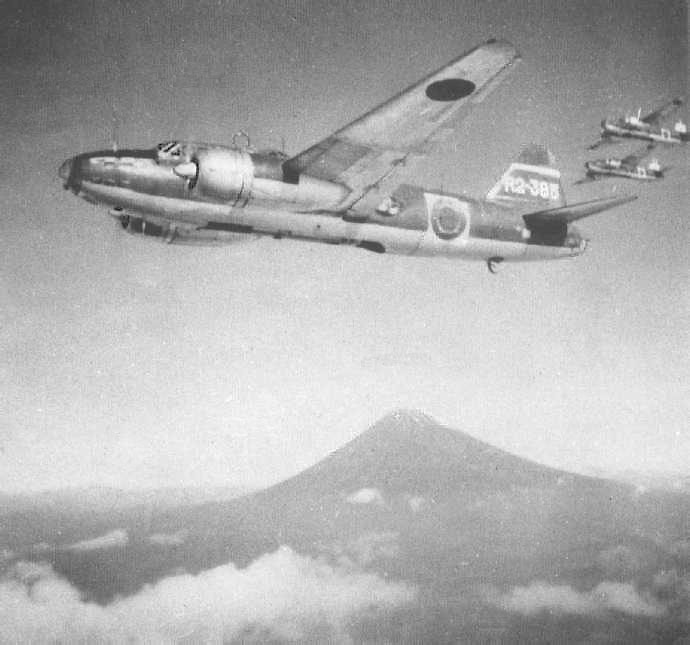
Mitsubishi G4M (1939)
It was later criticized for its lack of protection. Introduced on 2 April 1941, it was soon derided by allied pilots as the "The Flying Lighter", prone to ignition after just a hit. Only with the late G4M2 these issues were partly solved. With 2,435 delivered until 1945, it was also the most common Japanese twin engine torpedo bomber of WW2, with a range rivalling 4-engine bombers and took part in all important campaigns.
The Prime IJN Land-Based Bomber
The Mitsubishi G4M was designed in 1937-38 already as a replacement for the earlier G3M, already an important asset for Yamamoto in its Pacfc grand strategy, giving the fleet a reach equivalent to aircraft carriers, but from captured airbases dotted across islands. At the time, the IJNAS, the air service branch of the Imperial Japanese Navy was the only one across the globe to feature large numbers of land-based bombers. That category was indeed as much as forbidden by law in the US (reserved for the USAAC) and in Britain, the Fleet Air Arm was only authorized seaplane bombers instead. But the rivalry between the Army and Navy resulted in this unique case of entirely separated air service branches. The G3M developed in 1933-34 was already largely inspired by Junkers airplanes, which patents were acquired from 1928, and this culminated with the very aerodynamic Mitsubishi Ka-9. The core idea was to design a bomber so fast it did not needed an escort.
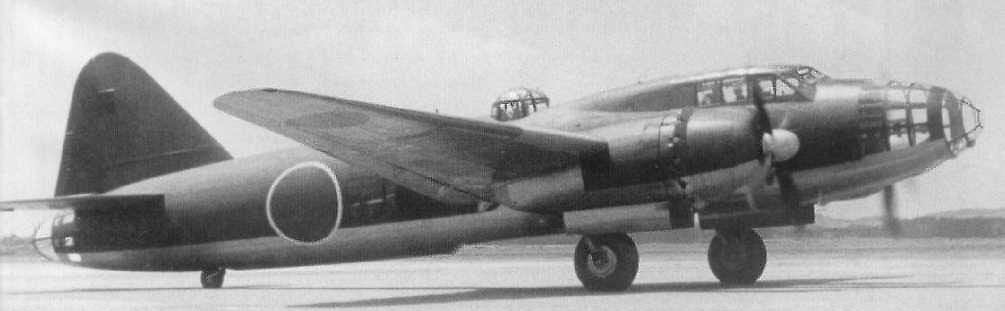
Production of the G3M started via the Ka-15 and pre-series, really starting in 1936, then going on with improvements until 1943, with transport versions developed on that base. However by 1942 standards it was already considered too slow and undepowered. Its replacement was planned long in advance by Yamamoto, which wanted a faster and more powerful model, which would be still a twin-engine, land-based medium bomber. The Mitsubishi Aircraft Company was not firmly chosen at first, but a string contender to deliver this successor for the Air Service (IJNAS) with a scheduled debut date FY1940. The base design of the G3M was improved across the board, and it was fitted with engines almost twice as powerful. The end product, that first flew in 1939, became the Mitsubishi Navy Type 1 attack bomber (Ichishiki rikujō kōgeki ki, Isshikirikukō). But in service the G4M1 was soon hated or derided by lany IJN pilots when compared to the more graceful G3M. It was nicknamed "Hamaki" ("cigar") between its barrel-like fuselage shape and tendency to ignite if hit. As soon as it was spotted, the Allied reported its name as "Betty". It soon became a familiar codename in operaton as the G4M was virtually everywhere during the war.
The G4M was indeed designed to succeed the Mitsubishi G3M and concentrate better performances overall, excellent range and better payload. It was soon considered the best land-based naval bomber, boasting an agility that would leave 1941 allied fighters like the Buffalo and Wildcat, in the dust. The reality was severe however. Compromises made in its flimsy structure (like for the Zero) led to an almost total lack of crew protection, no armor plating, not even self-sealing fuel tanks, which became the norm in 1937-38 already. The G4M took its sweet time in development until finally declared ready for service and accepted by the IJNAS on 2 April 1941. If lightweight made sense for a dogfighter like the Zero, this was a death sentence of a bomber, as fighters would always catch up. The result was heavy losses, so much so, Allied fighter nicknamed the Betty "The Flying Lighter". It took a more year for Mitsubushi to start better protecting it, with the G4M2 and G4M3 (self-sealing fuel tanks, armor protection, better defensive armament), compensating for the extra weight with better engines.
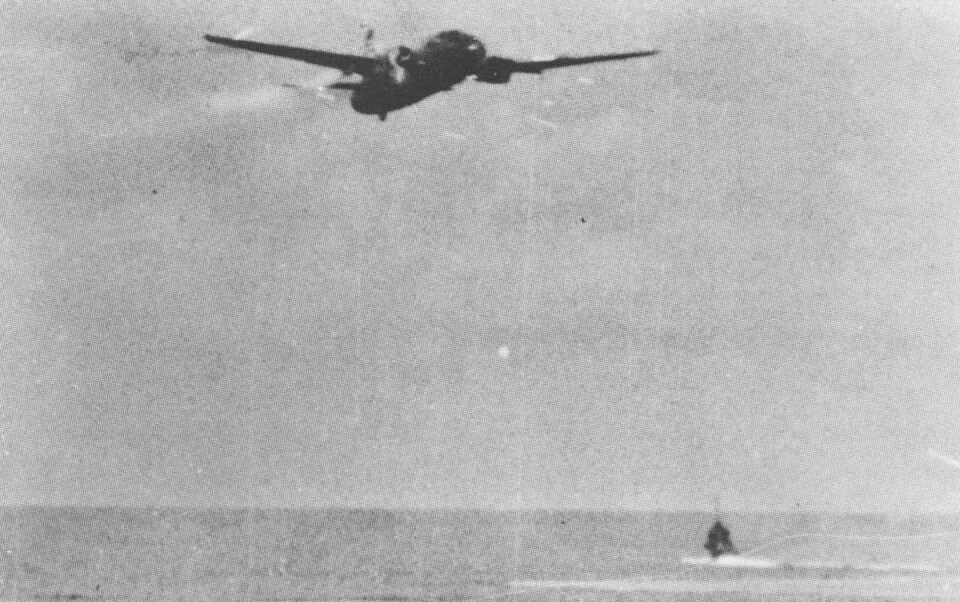
Despite its youth issues, the G4M soon became the IJNAS' primary land-based bomber, bringing an unrivalled bombing capacity at long distances and another asset in the IJN arsenal, complementary alongside the Kido Butai (IJN carrier group). This became most widely produced and most famous Japanese bomber in world War II, reflecting the same path a the A6M in its field. The G4M took part in virtually all battles of the Pacific War, taking part for example to the sinking of Force Z (HMS Prince of Wales and Repulse) a world's first in the open sea. G4Ms would operate alongside G3Ms there and later to sink USS Chicago at the Battle of Rennell Island. As the G4M replacement was already on its way, between the 4-engined G6M "Renzan" and nimbler Yokosuka P1Y "Ginga" more in tone with the previous G3M, the last G4M took part in desperate conversions like a mother plane for the Yokosuka MXY-7 Ohka suicide craft. There was a 1940 heavy fighter derivative, the Mitsubishi G6M1 usable as long-range escort fighter but later converted as a transport. No fully intact G4M survived the war but several airframes were saved from the elements and remained in unrestored state or partial restoration.
Development of the Mitsubishi G4M
The very origin was the emergence of a type of aircraft known as the "rikujo kogeki-ki" or "basic attack aircraft" (abbreviated "Rikko"), had its own drive in 1932 Shōshō (Rear Admiral) Isoroku Yamamoto's own will to develop that model, as future commander of the Combined Fleet. He was at the head of the Technical Department of the Naval Bureau of Aeronautics (Kaigun Koku Hombu) and initiated a three-year plan to achieve tech. parity with The West on naval aviation. In IJNAF terminology, the "naval attack aircraft" (kogeki-ki) emerged. Its primary function was to attack enemy ships with torpedoes while being also capable of carrying out bombing strikes, unlike the "pure" bomber or "bakugeki-ki". This model was the brainchild of Shigeru Marsuyama, head of the Kaigun Koku Hombu, naval attack aircraft type. He imagined a multi-seat, multi-engine aircraft having the range to strike any navala asset with torpedoes or bombs, far from home Islands and deployed from forward airfields but also capable of supporting the Battle Fleet from the air.
Marsuyama ordered Yamamoto and his subordinates in the technical department to conduct research and development in this direction, which led to the 1934 9-shi specification, issued to the Mitsubishi Aircraft Company. This was the first aircraft of this new class, the Type 96 or G3M "96 Rikko". It was accepted into service in 1936 G3M (later the "Nell"). This all-metal, modern and very aerodynamic twin-engine aircraft with smooth skin and retractable landing gear was for the time, grounbreaking. As there was no naval bomber to compare, this really was a peculiar asset for the IJN. The G3M1 Model 11 could carry an 800 kg (1,750 lb) payload over 2,800 km (1,540 nautical miles) when the German Heinkel He 111B carried twice that load, but on 1,100 km. From April 1936, shortly after the formation of the Kisarazu Kokutai, first naval bomber unit with the G3M, Taisa (Captain 2nd Rank) Takijiro Onishi, as the head of the instructor department at Kaigun Koku Hombu, inspected the newly formed unit. Commander Shosa (Lieutenant Commander) Yoshiharu Soga expressed satisfaction with the new aircraft but express its doubts about the standing of this bomber on the long-run and that the Navy could not afford to remain complacent, urging to start development of a successor.
Informal discussions regarding this successor started in mid-1937. In September Specification 12-shi fwas drafted. It was for a "basic naval attack aircraft" with a tender for development that was abandoned. Technical specification were awarded to Mitsubishi, trusted to also design that successor. Main requirements of Specification 12-shi expressed a top speed of 215 knots (391 km/h) at 3,000 m, a range of 2,600 nautical miles (4,815 km) max, down to 2,000 nautical miles (3,700 km) with the same 800 kg payload. It needed to be powered however by the same two Kinsei engines rated for 1,000 hp, then already produced at Mitsubishi for the G3M. This was an absurd, spec. as increased in speed and range with the same engines only advocated for radical improvement of the airframe and fuselage. There was still a vague understanding of its operational use and of how a "maritime attack aircraft" was supposed to operate in the future. Mitsubishi's management and staff accepted the challenge and the final result was a superb product, based on unreasonable requirements.
Kiro Honjo led the development team as chief designer already of the G3M and of the experimental reconnaissance aircraft from spec. 8-Shi. Honjo was the most experienced aircraft designer in Japan for multi-engine aircraft. After reviewing specifications, Honjo concluded the best was to use a four-engine configuration if the same engines were retained. At the first development conference between Mitsubishi and Navy representatives, Honjo requested a revision of the specifications. He wanted to create a four-engine configuration, and supported this by his sketches a four-engine attack aircraft on the blackboard with chalk. Rear Admiral Misao Wada (head of the technical department) opposed this with vehemence however:
"...The Navy is capable of handling operational planning issues on its own! Mitsubishi should simply keep quiet and build a twin-engine attack aircraft in accordance with the Navy's specifications. Erase the drawing immediately!"This ended Honjo's modern heavy bomber. His proposal nevertheless lingered in the minds of the IJNAF leadership. In 1937, unbeknownst to Mitsubishi, Kaigun Koku Hombu unofficially approached Nakajima to develop a next-generation "naval attack aircraft." in turn. From October 1937 there was a new chief at the head of Kaigun Koku Hombu's technical department, Rear Admiral Misao Wada. He instructed Nakajima's leadership to secretly acquire a Douglas DC-4E 44r-engine transport aircraft in secret and a license to manufacture it, officially for a new commercial company, Dai-Nippon Airline. Lengthy negotiations with Douglas, eventually succeeded and a DC-4E prototype was delivered. It became Nakajima's reference for the design, later evolving as the G5N1 "Shinzan" ("Liz"), but this remained unrealized with just six pre-production built, used as transports. Meanwhile, Mitsubishi continued working on the 12-shi spec. which included the installation of a 20mm defensive cannon in the tail, a last minute supplementary specification by December 3, 1937 after harsh lessons from the war in China that summer, as G3M bomber units were decimated.
The last minute tail cannon

The decision to install an aircraft cannon in the tail was confirmed in April 1938. The only remaining issue was finding the right ordnance, which seems to be the Type 94, produced in small quantities in Japan as a copy of the Swiss Oerlikon of 1930. It was however sunsuitable for the Navy as too bulky and with a low rate of fire, short range. By late 1937, a license for the new Oerlikon FF aircraft cannon was purchased for production at the Dai-Nihon Heiki KK in fixed and turret versions. But local producton never matched the awaited Swiss quality. Fine-tuning it took over a year and a half as the feeder constantly jammed, the barrel overheated. Instead, the MGFF with its rate of fire of 490 rounds per minute was accepted into service with the navy as the Type 99 Model 1 and gradually improved. There was also an attempt to convert the 12.7mm Ho-103 to a 20mm cartridge by late 1943, and the tail gun was replaced by a Ho-5. This gun turret was inside a glass cockpit behind the tailplane. The end result was a streamlined "cigar" hence the "hamaki" in Japanese. Kiro Honjo peferred "namekuji" (bullet).
A cigar or lighter ?
The next challenge was to find space for the 4,900 liters required to match the specified range. Kiro Honjo used integrated fuel tanks, with the wing having a two-spar structure enclosed within a box by skin load-bearing members for torsional rigidity. The interior was sealed and created a massive fuel tank. The wing skin was the only thing retaining all this fuel... Kiro Honjo rightly believed this would be extremely vulnerable to enemy fire unlike conventional fuel tanks using rubber lining and fire extinguishers but the Navy rejected it as it would reduce the capacity by approximately a third. The IJNAF showed again total stubbornness and shortsightedness, assuming all the risks. It was typical of the thinking of the time though for th top brass, achieving the objective at any cost, regardless of losses.Bad lessons from China
The naval command were perfectly willing to sacrifice survivability for a very modest payload as long as the range was maintained and the crew was expandable. In China, bombers with high operational altitudes and good discipline with highly skilled crews and meeting initial weak resistance from Chinese aaviation tended to prove this point. This was even compounded by a more effective fighter escort. Naval command believed all this was sufficient to ensure the bomber's survival. But soon, the air war in China led to fatal consequences in the Pacific Campaign. Honjo's only victory was a concession when he obtained replacing the 1,000-horsepower Kinsei for Kasei radial under development at Mitsubishi. These were two-row, 14-cylinder, tested from September 1938 and producing an estimated takeoff power of 1,530 horsepower, for a massive performance boost.Maiden Flight and fixes

On October 23, 1939, the "Hamaki" took off for a maiden test flight from Kagamigahara Airfield, north of Nagoya. At the commands were test pilots Katsuzo Shima and Harumi Aratani. Minor issues were noted about the handling, but overall, impressions were excellent. So much so that when completely light aerobatic were possible. With minor alteration, the new Mitsubishi bomber was accepted into service with the IJNAF on January 24, 1940 ad the G4M, succeeding the G3M. On February 27, a second prototype took off. It had a larger vertical tail surface and ailerons with trim tabs. Minor improvements were made to its steering and afterwards pilots expressed full satisfaction both woth the performances and handling. On March 15, this improved prototype was handed over to IJNAF for testing. The Navy Pilots achieved a top speed of over 240 knots (437 km/h) which exceeded specifications. Its unladen taxi range was 3,000 nautical miles (5,460 km), also exceeding requirements.
Towards the G6M1 "Escort Fighter"
The G3M1 was soon ready to enter production that spring of 1940. However events in China intervened and by May 17, 1940, the IJNAF launched "Operation 101", a four-month air offensive on Chongqing and other targets in Sichuan like Chengtu. Up to 130 G3M bombers were mobilized for these raids, but targets remained beyond their range, and the escorting A5M fighters were completely unable to provide support. This resulted over a sharp increase in losses and analysis revealed the bombers at the outer edges of the formations were the first downed, uncovered by crossing fire. The IJNAF command wanted then to develop some sort of "escort fighter" for based on the new G4M. Therefore, the decision was made to launch a limited-production of thse new G4M1 based twin-engine "escort fighters".Mitsubishi however vigorously opposed the idea, as a bomber for them, whatever its merits, would not substitute a proper fighter. But again the Navy top brass enforced its decision and placed an order for 30 "escort fighters", officially called the "12-Shi Rikujo Kogeki Ki Kai" (Basic Naval Attack Aircraft Modified 12-Shi) or G6M1. The bomb bay was replaced by a large nacelle housing two 20mm cannons and partially shielding fuel tanks. The first two were completed in August 1940. Mitsubishi warned about the final results. As expected, the hastily converted bomber performed poorly. The increased drag caused by the massive gun pod and change of the center of gravity caused not only lower agility and imbalance, but also a steep increase in fuel consumption. The G6M1 was just unable to escort the bombers long-distance missions. The USAAF arrived a the same conclusion with their "gunships" YB-40 and XB-41. Still, the IJN staff continually pushed this idea until 1945.
By August 1940, as this ludicrous bomber conversion took place, another Mitsubishi model impressed everyone by its long range and overall agility. This was their new carrier-based fighter, the Mitsubishi Type 0 A6M. That phenomenal range was just what was needed to escort the new G4M bomber formations over China. The Zero had its first combat debut as soon as September 13, 1940, near Chongqing and reported to the IJNAF ended the G6M1's short career. The gun pod was removed, and the former "fightesr" were reconverted for training future naval aircrews. Meanwhile production resumed for the new G4M1 bomber. The G6M1 became the "Type 1 Large Base Trainer Model 11" or G6M1-K but its career was short and they were all converted into transports for 20 passengers, in service by October 1941 as the "Type 1 Basic Transport Model 11" of G6M1-L and to carry paratroopers.
Variants
- G4M1 "Model 11": First production model, 1711 made
- G4M1 "Model 12": self-sealing fuel tanks
- G2M2 "Model 22" Initial variant (274 built)
- G4M2 Model 22A: 20mm cannon dorsal (5 built)
- G4M2 Model 22B: 20mm Type 99 Model (2)
- G4M2A Model 24: 1,850 hp MK4T "Kasei"-25 (14)
- G4M2A Model 24a, same as Model 22a (15)
- G4M2A Model 24b same as Model 22b (171)
- G4M2A Model 24c: Nose 13mm "Type 2" HMG (1)
- G4M2B Model 25: G4M2A 24 with MK4V Kasei-27 1,795 hp (1)
- G4M2C Model 26: G4M2A24b test MK4T-V Ru "Kasei"-2bRu w/t turbochargers (1)
- G4M2D Model 27: G4M2 with MK4T-B "Kasei"-25b engines (1)
- G4M2E Model 24d mothership for the Yokosuka MXY7 Ohka (20+)
- G4M3 Model 34": Shortened-range mod. with armored crew protection.

G4M1 Production and Modifications (1,170)
The first true production G4M1 bomber left the assembly line in December 1940. Its takeoff weight increased from prototype, from 6,48 to 7 tons. By then its top speed fell to 231 knots (420 km/h) and the range down to 2,315 nautical miles (4,210 km) when fully loaded. It still exceeded that of all contemporary foreign twin-engine bombers, even matching some four-engine heavy bombers. Trials at Yokosuka Kokutai went smoothly and it was accepted for service in April 2, 1941 as the "Basic Fleet Attack Aircraft Type 1 Model 11" better known as G4M1. From March 1942, the engines were upgraded to the Kasei Model 15 for high-altitude, from the 241st production aircraft onwards. From August 1942, from the 406th this became standard, alebti the external cowling remained the same. Soon reports of losses piled in however and the IJNAF tried to improve survivability.Tests were made with wing fuel tanks setup with a CO2 filling system, but it proved ineffective. Even minimal damage to the wing skin resulted in leaks each time and the CO2 did not prevented ignition. From the 663rd model from March 1943 at last a 30mm-thick rubber sheet was installed on the lower outer wing surface and it managed to reduce the cruising speed by five knots and radius by 170 nm while the upper surfaces remained unprotected. Also, the tail gunner ammuntions were protected by two small 5mm-thick armor plate, but it still could not stop 7.7mm bullets, and were removed immediately. Othr changes comprised the propeller spinners, and slightly longer engine exhaust manifolds. In the spring of 1943, the tail gunner had a new truncated glazing cone for a better arc of fire. From August it was completely redesigned with a wider cannon port like on US gun mounts and a month later in September individual jet exhaust stacks replaced common manifolds, from the 954th aircraft onwards. Production of the Model 11 (G4M1) ended in January 1944, with 1,170 G4M1 delivered (plus the 30 G6M1s and two prototypes).
G4M2 Production and Modifications (1,142)
 The G4M2 differed mostly by its more powerful Kasei Model 21 engines using a water-methanol injection system for 1,850 hp at takeoff. The engines also came with redesigned nacelles with individual exhaust pipes, and four-bladed propellers instead of 3-bladed. Called "Model 12" it was later changed to "Model 22". Armament was improved as well, and from November 1941 already it had been planned to replace the manual dorsal 7.7mm machine gun turret with a powered one with a 20mm cannon. But development was delayed and only arrived on production by early 1944. By then the takeoff weight rose to 12,500 kg from 9,500 kg, thus, the performances gain was modest.
The wings were also completely redesigned, and made thicker to accept a near-laminar airfoil profile and its internal fuel capacity increased to 6,490 liters but they only had limited rubber protection underside. The horizontal stabilizer was increased and reinforced. The tailwheel was simplified. No long retractable, it was fixed in the extended position. The glazed nose cone with a 7.7 mm machine gun had now a traverse of +/- 40° and elevation of +/- 45°. The nose had more extensive glazing, and aft of the wings, space was freed to install two additional 7.7mm machine guns whereas the side blisters of the G4M1 were replaced by flat and sliding glass panels. The tail gun mount had its protection ow made of small 10mm plates. The G4M2 prototype first flew on December 17, 1942 with three more prototypes made and testing showed a range of 3,031 nautical miles (5,500 km) and top speed of 236 knots (430 km/h).
The first pre-production and 5th prototype, was of Model 22, completed and tested from July 1943 and with the 6th retained for further testing due to issues found during the redesign. The most serious was a steady vibration from the new Kasei 21 engines, never fully resolved. From the 65th, the G4M2 was equipped with convex bomb bay doors, typically removed in the field. From the 105th a flat, transparent panel was installed under the nose cone to prevent distortion and enabled night raids. Here are some of the numerous variants of the G4M2:
Model 22 Ko:
Type 3 Kokutai Model 6 (H6) search radar, 7.7 mm MG on the sides swapped for 20 mm Type 99 Model 1. Side sliding panels over the gun ports redesigned, right one moved closer to aft.Model 22 Otsu:
Turret-mounted 20 mm drum-fed Type 99 Model 1 cannon replaced with the more advanced Type 99 Model 2 with a longer barrel and belt fed.G4M2A:
On May 22, 1944, the first prototype powered by Kasei Model 25 engines with a reduced gear ratio to address vibration issues took off. It was now faster at 243 knots (442 km/h) and started production as the Type 1 Model 24 (G4M2A). It also had new engine cowlings with separate carburetor intakes on top, modified bomb bay doors.G4M2A Model 24 Ko:
This one was equipped with radar and 20 mm cannons in side mounts like the Model 22 Ko.Model 24 Otsu:
It replaced its Type 99 Model 1 cannon in the dorsal turret with a long-barreled Type 99 Model 2.Model 24 Hei:
7.7 mm machine gun in the nose replaced with a large-caliber 13.2 mm Type 2, in place of the radar antenna, moved up.Model 24 Tei:
The G4M2E was modified to carry the MXY 7 Ohka kamikaze self-propelled jet bomb. The bomb bay doors were removed to accommodate this model and Mitsubishi records, showed it also had armored cockpits and fuselage fuel tanks. Fire protection for the wing tanks wa simproved with cavities filled with carbon tetrachloride, actively replacing oxygen with chlorine of hit and flaming out. This reaction also released toxic chlorine, and could potentially kill the crew of an internal tank was hit.Model 25:
The G4M2B had the new Kasei Model 27 engines. Small numbers produced.Model 26:
The G4M2C was a Kasei Model 25 Otsu with direct fuel injectionModel 27:
The G4M2D was powered by turbocharged Kasei Model 25 Ru engines from the Naval Arsenal. In all, a total of 429 G4M2s and 713 G4M2As, plus prototypes and variants were produced until June 1945.Model 34 (G4M3)
The G4M3 was the last production model entering service with a reinforced armor and fuel tank protection, so it also had the shortest range. The wing structure was redesigned so to have now a single spar and small fillets in the wing roots. The first prototype was powered by Kasei Model 25 engines, and it flew on 01 January 1944. For this trials the outer rubber protection in the lower outer wings, causing drag, were removed, so it could reach still 259.7 knots (473 km/h). All 7.7 mm machine guns were now replaced with 20 mm cannons and the tail gun was now identiocal to the one from a captured Boeing B-17E. The fuselsage was shorter, as its center of gravity so the stabilizer angle was significantly increased.
Model 34 Ko
The Type 1 Model 34 Ko or G4M3A entered production in October 1944 but production was hampered by a strong earthquake combined with air raids over Nagoya so only 90, were deliveryed by 15 August 1945, from the plant in Misushima (Okayama Pref.). Subvariants included the "Model 34 Otsu" (siimilar upgrade as the Model 22 Otsu and Model 24 Otsu) and Model 34 Hei modified like the Model 24 Hei. The newt iteration was the Model 37 fitted with a turbocharger. Overall, total production all combined reached 2,435.Design of the Mitsubishi G4M

Fuselage and general layout
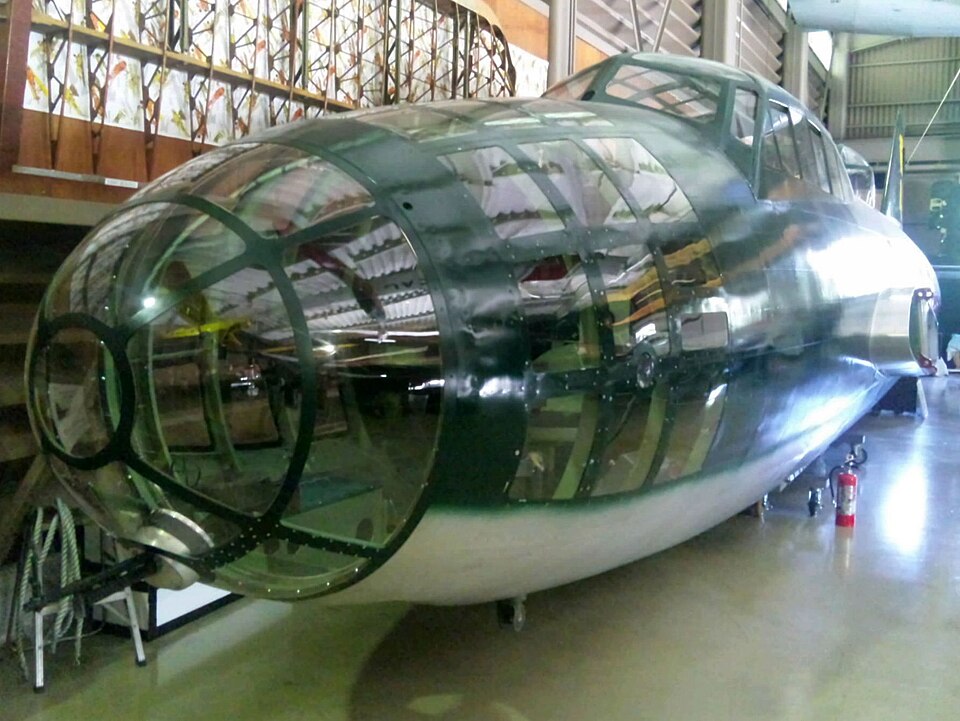
This classic twin-engine with cantilever and all-metal monoplane was designed for a crew of 7-8. It had a near constant oval cross-section on the fuselage of 2.5 m x 2 m at the midsection and riveted as a monocoque structure. This superfifcially looked like a cigar, hence the nickname. The fuselage was made of 38 main frames with stringers and stressed skin in duralmunin wrapped aound. For ease of production as well as assembly, and repair, the entire fuselage was split at frame #24 and the Frames #12 and #14 were reinforced to accommodate wing spars. The bomber/navigator's glassed nose forward started at frame #1 to frame #5 and the pilot's cabin (to seats) located behind, at frames #6 and #11 below a glasshouse.There was an extra seat further aft to the right for an observer, and an enclosed section for the radio (right) and navigator's map table (left). The weapons bay was at frames #9 to #22. The radio operator also acted a dorsal gunner and could swap rapidly from its position to the dorsal dome.
Behind the wing was located the flight engineer's station and second, side gunner position. The rear gunner's station was the most isolated, at the tail end glass cockpit, and he had to crawl above the bomb bay to go forward. The fuselage was appreciated however unlike the G3M as it had extra space amidship and aft. The crew enters through round door between frames #25 and #27, port side, often used as a marker to place the hinomaru. Since long range means also hours aloft, there was a lavatory located between frames #27 and #28, port side. Equipment was spartan to spare weight, but there was at least a Sperry autopilot and radio compass. The navigator could use a Type 90 optical bombsight located in the nose.
Wings
The wing is trapezoidal in overall like the Type 96 but less pronounced, and with rounded tips, smooth leading and trailing edges. The mid-wing position eliminates interference with the fuselage, without extensive fairings. This all-metal, two-spar structure featured a working skin with countersunk riveting. The wing profile was Mitsubishi MAC 118 along its span,that is 12.5% thick at the root, 10% at the tip. it was simplified to comprise five parts that could be all taken apart: A center section inside the fuselage with two inner consoles, and two outer consoles. The center section spars extended through the fuselage, attached to reinforced frames #12 and #14. The leading edges for the inner consoles are formed by the detachable oil tanks, and the trailing edge is equipped with slotted flaps. There was a metal frame and covering with each spanning 5.250 m, over an area of 4.108 m². They had electric drives.Deflection angles are 36° on takeoff and 45° on landing. Attached to the trailing edge of the outer consoles are Fraize-type ailerons with a 15% aerodynamic compensation, with a metal frame and fabric covering for a span of 6.25 m, 2.05 m², and controllable trim tabs. Deflection angles were 18° upward, 27° downward. The engine nacelles were attached to the inner consoles and then to front and rear spars to be removed entirely.
Empennage
The empennage is cantilever as well, with a single vertical stabilizer whixh wingspan was ten meter, consisting of three parts, with a center section, and detachable outer wing panels. It had adjustable trim tabs on the control surfaces, metal structure and single-spar attached to frame #35 but fabric-covering for the control surfaces, with a spaon of 3.02 m², and deflection angles of 20° up, 25° down. The vertical stabilizer was made of two parts, a lower one attached to the fuselage, and upper one that was detachable with a reinforced rib showing the separation, metal structure all aroind but there was also a fabric-covered rudder. The trim tab was controlled on the rudder which spann was 1.82 m2, and had a deflection angle of +/- 30°. Commands by cables.Engine and performances

The two original engines of the first version were Kasei-11 radial, two-row, 14-cylinder, and air-cooled engines. Their takeoff power was 1,530 hp/2,450 rpm and the supercharger was located in the second gear. Max power was 1,410 hp/2,350 rpm at 2,000 m or 1,340 hp/2,350 rpm at 4,000 m. There was a two-speed, single-stage supercharger for altitude flights. Each weighted 632 kg with a gear ratio of 0.684. They were provided with DC generators, to power the landing gear as well as the flaps, and other systems. These came with Sumitomo Hamilton CS-3B constant-speed propellers, which were all metal and three-bladed, 3.4 meters in diameter and with a pitch range from 20 to 40°. Each prop weighted 175 kg.
The engine cowlings were of the NACA-type with adjustable exhaust flaps. The exhaust manifolds were separate for each cylinder bank and their exhaust pipes routed to the upper surface of the engine nacelle. They had tunnel-type oil coolers, mounted inside the cowlings. The removable oil tanks were located on either sides of the engine nacelles, 150 liters each, anf forming the leading edge of the inner consoles.
The fuel system comprised a total of eight unsealed tanks for 4,780 liters between the wing spars, completed with their fuel lines and electric fuel pumps. Ther first two tanks had a capacity of 690 liters each, in the center section at least somewhat protected inside the fuselage and the inner ones were 630-liter, mounted on the wing consoles between the fuselage and the engine nacelle. There were two more tanks, with a capacity of 640 and 430 liters located between the engine nacelle and junction with the outer console, more exposed. Fuel fillers were located on the upper wing surface with also hatches on the underside for tank inspection.
The landing gear was fully retractable, electrically powered up and down as well as the tailwheel. There was a manual backup however. The main landing gear was a classic foorl type with hydraulic spring arms and attached to the front wing spar. They fully retracted forward, inside the the engine nacelles. In vase this failed, there was a simple gravity emergency release, using the oncoming airflow pressure. The main landing gear suspension was oleo-pneumatic. The wheels tires measured 1200 x 400 mmand were equipped with brakes. The tail wheel was a 500 x 180 mm tire, freely castering with a lock, retracting into the fuselage. In practice, it was rarely retracted abnd in fact the pilots removed the actuator and it was locked permanenlty in the extended position. On the G4M2, the retraction system was eliminated the the tail wheel became fixed to spare weight and complexity.
Armament
Bomb and torpedoes amounted to a symbolic 1,000 kg. They were housed in the weapons bay between frames #9 and #22 with doors closed only when the aircraft was not carrying any payload so in ferry operations or reconnaissance for better aerodynamics. When carrying torpedoes or large (800/500 kg bombs) these doors were open or partially removed. The chassis was large enough to support one 800 kgs or one 500-kg bombs, using identical attachement points. The torpedo section was as long as the bomb bay. To reduce airflow turbulence and improve bomb separation, there was a deflector installed at the rear of the bomb bay.

The reference torpedo was a unique Type 91 Kai 7 torpedo, weighing 1,055 kg. It carried a warhead of 323.6 kg (713 lb) HE or 235 kg (518 lb) for the mod 3. It was powered by a wet-heater type 8-cylinder radial engine rated for 150 kW (200 hp) for a top speed of 42 knots or 78 kph. It needed to be release no more than 2,000 m (2,200 yd) from the target. The crew prepared it by connecting it for constant electrical power and maintain compressed air as well as spinning the guidance mechanism gyroscopes, actuators, and engine during the flight. A simple release separated the umbilical. Bombs were suspended horizontally and apart one large bomb (see before) that could carry either four 250 kg, or twelve 60 kg bombs. In that case they were mounted on two bridge beams, in two rows of three each, attached rescectively to frames #10 and #14, and frames #15 and #19.
The defensive armament comprised four 7.69 mm machine guns plus two spare and the 20 mm cannon in the tail. One was were located in the navigator's cabin, one in the upper dorsal blister, two in the side blisters. The Naval Type 92 machine gun was essentially a copy of the Vickers in the same caliber abd worked with 97-round drum magazines or 47-round magazines in case the former were unavailable. The navigator's machine gun had a ball mount, asymmetrically in its rotating cone for better firing angles forward, rotated by an electric motor and handle. The deflection angles were 75° in elevation and 60° traverse. The other mounts were manually handed, and seven magazines of ammunition were carried. There was also a spare machine gun that could be mounted in a roof hatch from the navigator's cabin.
The dorsal blister (replaced by a turret in the G4M2) had a forward fairing and rear movable section to allow the entire mount to be deployed or relocated inside. The machine gun was attached to a transverse rai for a 70° elevation and 35° traverse either side. Seven drum magazines were also stored for them. The side blisters were similar in design with a 90° elevation and 60° traverse, also retratable inside and six drum magazines provided for each, located nearby. There was an additional spare machine gun that coild be moounted in a top hatch between blisters.
But the most potent defensive asset of the G4M1 was the tail gunner's Megumi Special Naval Type 99 Model 1 cannon. It had an oscillating mount allowing the gunner to maintain a constant position relative to the cannon when aiming vertically. It could simultaneously be manually rotated around its longitudinal axis. It had large 45-rounds stored behind the gunner and rolled to him with a conveyor belt. Elevation was limited to 35°, and traverse also 35° both sides.
Specs G4M1 Model 11 | |
| Crew: | 7: pilot, co-pilot, navigator/bombardier/nose gunner, captain/top turret gunner, radio operator/waist gunner, engine mechanic/waist gunner, tail gunner) |
| Length: | 19.97 m (65 ft 6 in) |
| Wingspan: | 24.89 m (81 ft 8 in) |
| Height: | 4.9 m (16 ft 1 in) in rigging position |
| Wing area: | 78.125 m2 (840.93 sq ft) |
| Airfoil: | MAC118 mod (12.5%); tip:MAC118 mod (10%) |
| Empty weight: | 6,741 kg (14,861 lb) |
| Gross weight: | 9,500 kg (20,944 lb) |
| Max takeoff weight: | 12,860 kg (28,351 lb) |
| Powerplant: | 2× Mitsu. MK4A Kasei 11 14-cyl. A.C.R. 1,140 kW (1,530 hp) each TO |
| Propellers: | 3-bladed Hamilton/Sumitomo constant speed variable-pitch |
| Maximum speed: | 428 km/h (266 mph, 231 kn) at 4,200 m (13,800 ft) |
| Cruise speed: | 315 km/h (196 mph, 170 kn) at 3,000 m (9,800 ft) |
| Stall speed: | 120 km/h (75 mph, 65 kn) |
| Range: | 2,852 km (1,772 mi, 1,540 nmi) |
| Ferry range: | 5,040 km (3,130 mi, 2,720 nmi) |
| Rate of climb: | 9.17 m/s (1,805 ft/min) |
| Guns: | 1× 20 mm Type 99 tail, 4× 7.7 mm Type 92 LMG fus. |
| Payload: | 858 kg/800 kg bomb or 4× 250 kg bombs or Yokosuka MXY-7 Ohka. |
Operational career of the Mitsubishi G4M

The G4M was similar in performance and missions to other contemporary twin-engine bombers such as the German Heinkel He 111 and the American North American B-25 Mitchell. These were all commonly used in anti-ship roles. The G4M Model 11 was prominent in attacks on Allied shipping from 1941 to early 1944, but after that it became increasingly easy prey for Allied fighters.
By early 1941, the IJNAF had six Kokutai dedicated for the G4M, each was named after its permanent peacetime base. The "Kisarazu" and "Kanoya" Kokutai were the oldest, formed in August 1937, with G3M bombers, and proud of their history. From 1938, the "Kisarazu" Kokutai retrained and by January 1940, moved to the east coast of Tokyo Bay. With its long runways, it proved was ideal for operating large aircraft, and hosted most bomber by the late 1930s and early 1940s. All were trained here. The "Kanoya" Kokutai was a combat unit located on the southern coast of Kyushu. The southernmost base was "Takao" Kokutai based in Takao, Formosa (Taiwan), part of the Empire of Japan since 1895. The "Chitose" Kokutai was facing Alaska and the Kuriles from Hokkaido. Two new naval bomber units were formed in late 1940, "Mihoro" Kokutai in northern Hokkaido and "Genzan" Kokutai in Genzan (Wonsan) in Kore, Chosun Province.
To consolidate the strategic command, the 11th Air Fleet (Koku Kantai) was established on January 15, 1941, having all bombers units under its control. On April 10, two additional Kokutai were formed, the 1st and 3rd tokusetsu ("special units") on specific operations and on temporary as forward bases. The first was formed at Kanoya, the other at Takao. Each Kokutai (abbrev. Ku) comprised four hikokitai or "hikotai" with their own aircraft, crews, support making them fully autonomous and mobile. Kokutai were essentially "air corps" but they were closer to regiments or small divisions. but surely were duvided into Sqn.s or "buntai", or chutai (used interchangeably albeit they covered various aspects). The hikotai was really the closest to a full "Sqn." with all its components. Its commander was the buntaicho, seconded by a chutaicho managing the unit ground assets. Eacg comprised usually nine bombers and three in reserve; to match the smallest formation of three in rotation.
The later was shotai (flight), but the number of shotai in a hikotai varied over time between three and six, each led by a hikotaicho, led by a single hikocho, captain 3rd rank in the IJN acting as second-in-command for the kokutai. The CO or kokutaicho was a IJN captain 2nd rank. In May 1941, Takao kokutai was considered the best prepared and was the first to receive the G4M. By July and August 1940, G4M1s were also delivered to the Kisarazu kokutai for training and start producing new crews for more deliveries to come.
Combat Debut in China
"Operation 101" in 1940 already showed the limits of the use of bombers on distant targets in China. By July 1941, the IJNAF launched another such air offensive, "Operation 102" committing the entire 11th Air Fleet (180 bombers based at Hankou) for a raid on the Sichuan Province, Chongqing and Chengdu. But as relations with the United States were rapidly deteriorating it was decided to complete the conquest was one last massive strike to free these bombers for upcoming operations linked to the "southern strategy", now agreed by the majority in the interarm staff and sanctioned by Generalissmo H. Tojo. The Takao kokutai flew into Hankou on July 25, bringing there 30 G4M1s, and two days later, they took off for Operation 102, raiding Chengdu. But before getting there, they were intercepted by a massive Chinese resistance. In 1939-40 indeed, the Chinese Nationalist AF hd been reinforced by the latest US aiacraft, not counting volunteer pilots and mercenaries, and they took a heavy tall on the incming G4M1s as they already did on the G3Ms.Fortunately by that stage, the IJN could now escort these formations with a few A6M fighters, just arroved that summer of 1940. WWhen present, they demonstrated complete air superiority over any Chinese aircraft, so much so the latter deliberately choose to avoid combat. The Japanese wanted to lure out these fighers to finish them off and tried various "bait formations" but the Chinese planners knew the game and carefully choose when to launch their forces. Long story short, the new G4Ms could maintain a cruising speed of 170 knots, about the same as the A6M, and those from the Takao kokutai provided navigation for the Zeros in escort, but the bulk of the G3Ms from other units would arrive at the target later. Operation O-go ("102") took several days, until August 11th and committed twenty A6Ms from the 12th Kokutai from Yichang, closest to the Chinese positions.
Nine G4Ms from Takao Kokutai under the command of Lieutenant Yogoro Seto left Hankow at 01:35 on August 11 and they reached Yichang by flying low not to be signalled, made them known, so that the Zeros took off in complete darkness, lined up next to the G4Ms. One formation of two bombers and four fighters separated for a diversionary attack on Hanzhong and Guangzhong. The remainder headed for Chengdu, and arrived before dawn at 05:05. The Chinese had been warned and sent their Tupolev SB bombers from Wen Chang away just before the Japanese arrived, but they sent in interception all I-153 fighters from 4th sqn. Shuang Lui.
Six I-153s arrived first, four shot dow by Zeors. Over Wen Chang airfield, the Japanese bombed and destroyers two Tupolev remaining there broken down. In this first pass, five I-153s were claimed destroyed in the air. Complete success, with no losses. Some G4M1s in this mission acted as leaders for the Zeros without any bombs and so could not do much against the Chinese airfield. This was still a Japanese feat of night, long distance flying and coordinated discipline. Western analysts doubted the distance ran by the G4M1s from Hankou, as the distance was almost 100 km further than London to Berlin. No bomber of that range existed in Asia it was believed.
Combat Debut in the Pacific
By July 1941, Japanese forces attacked southern French Indochina and the US froze all Japanese assets, soon joined by Dutch and British Commonwealth, and they also cut off all oil supplies. The Japanese started preparing the seizure of the Dutch East Indies by force to get these resouces and Operation 102 was terminated on August 31, freeing bomber units in Hankou to return to their bases in Japan by September 1-2. The IJNAF, except a few recce aircraft, withdrew entirely from China until the fall of 1941. The Army and IJAAF were now in charge. Naval pilots started intensive training for these new operations.Back to Kanoya Air Base, corresponding Kokutai was converted in turn to the G4M. The 3rd Kokutai became a fighter unit with the new A6M and the last G3Ms were retired. The 3rd Kokutai had previously four G3M buntai between Takao and Kanoya and get six G4Ms Sqn.s. In October the 1st Air Fleet (Koku Kantai) was prepared for the attack on Pearl Harbor. On land, operations were left to the 11th Air Fleet. Bases in Taiwan were prepared and the 21st and 23rd koku sentai (air flotillas) were tasked of attacking the Philippines and in general be called in support for all the southern campaign areas. From bases in southern French Indochina, the 22nd koku sentai was tasked of supporting the Malayan conquest and the advance toward Singapore. In the Philippine it was at first planned to only use carrier fighters but given the experience in China, crossing the 500 nautical miles from bases in southern Taiwan, to Manila and back was retired to the carriers. The 3rd and Tainan Kokutai were prepared to use Zeros for very long-range raids over the ocean. An aspect that was worked hard on, was the timing of the attack on Pearl Harbor by taking in account time zone differences with the US to avoid giving the impression of a surprise attack without official notification. But as we known there was an error and that what's happened. G4M and A6Ms crews underwent intensive coordination training in the fall of 1941 for these ultra-long-range raids, unprecedented in the history of combat aviation.
On October 31, 1941, the 24th Koku Sentai, inc. the Chitose Kokutai, was detached from the 11th Air Fleet, assigned to the 4th Fleet and tasked with capturing Guam and Wake, central Pacific. The G3Ms of the Chitose Kokutai already completed redeployment to the Marshall Islands by late October. By mid-November, the still unique G4M unit was reassigned to the Chitose Kokutai, based from Rua, Kwajalein, under LCt. Nobuo Ando.
Raids on the Philippines
On October 25, the British famously sent Force Z, HMS Prince of Wales and Repulse from the Home Fleet to Singapore, and on November 4, the US air command transferred six B-17Cs and 29 B-17Ds to Clark Field, Luzon, Philippines wiht more expected in December. On November 18, the 1st Kokutai was stationed in Tainan and soon joined by the Kanoya Kokutai at Taichu with the HQ 22nd Koku Sentai based in Saigon, Indochina to direct the Genzan and Mihoro Kokutai. On November 30, the Kanoya Kokutai transferred half its complement to Saigon when it was learned Force Z had passed Colombo, and were now closing on Singapore. The transport Keiyo Maru was loaded at Takao with aviation fuel and type 91 mod.2 torpedoes for the Kanoya Kokutai, departing for Indochina. On December 2, Prince of Wales and Repulse arrived in Singapore. The Kanoya Kokutai started its transfer with a selection of the bewt Crews, selected individually, as the most experienced in torpedo attacks by Captain Second Rank Naoshiro Fujiyoshi. He was at the head of 36 G4M1 bombers (27 + 9 reserve) from the 1st, 2nd, and 3rd Chutai.Stormy weather over the South China Sea caused flight issues but by December 5, the transfer was completed and on the 7th, it flew to Thu Dau Moi, 20 km NE of Saigon. The 11th Air Fleet had at that stage 216 twon-engine bombers, excluding reserve aircraft, now half were G4Ms and the other half G3Ms. G4Ms of the Takao and Kanoya kokutai, 54 each. 1st Genzan and Mihoro kokutai each had 36 G3Ms. The Chitose Kokutai had 27 G3Ms, one G4M1 at Rua, Marshalls only used for long-range reconnaissance. On Sunday, December 7, the attack on Pearl Harbor was launched, but the main attack on the Asian side wuuld take place on Monday, December 8.

G4M1 of Takao Kokutai 753rd unit, Rabaul October 1942. The improvized camouflage is mostly field-made over the base primer sliver grey, sprayed vermicels in black, dark grey and red brown (pinterest).
The 11th Air Fleet scrambled all its Sqn.s to take off from bases in Taiwan at 1:30 AM. After a long night flight they reached their target shortly after dawn, c6:30 AM. Twenty-seven G4M1s from Takao and 27 from Kanoya escorted by 54 A6Ms from the 3rd and Tainan Kokutai attacked Nichols Field, on the outskirts of Manila. Another 27 G4Ms from Takao kokutai, 27 G3Ms from the 1st kokutai, escorted by 36 A6Ms from Tainan kokutai bombed Clark Field, 100 km closer. At 10:30 PM on December 7 in a dense fog on the coast of Formosa, started to spread to the Takao area and at 1:00 AM on December 8, Vice Admiral Nishiso Tsukahara, 11th Air Fleet commander scrambled a top staff reunion as intercepted US radio messages indicated US forces were redeployed north of the Manila along a defensive line to Iba and Clark. Coupled with fog, this delayed the takeoff ofthe second wave and forced Tsukahara to abandon the attack on Manila.
Plans to Clark Field remained unchanged but not Nichols Field. 54 G4M bombers were redirected on Iba airfield. Later the fog over Tainan started to clear. At 7:50 a.m., order to take off was received with the G3M being the first to take off at 8:15 a.m. Zeros took off an hour later. Over Takao, the fog cleared at 9:30 a.m so the 54 G4Ms from Takao and Kanoya Kokutai took off, followed by Zeros and passed Mount Niitaka, highest peak in Taiwan and excellent landmark for orientation, seen in the morning light. Meanwhile the attack on Pearl Harbor was already in full swing and strikes on Davao underway while IJN Ryujo struck Mindanao. Northern Luzon already had been attacked and the bombers were on their way back. Surprise had been lost for the initially first wave, becoming a 2nd wave due to the fog. US fighter pilots from scattered P-40s & P-36s in the Philippines were all in high alert.
Half of the Takao units led by Commander Yoshiso Suda, observer in the lead Betty piloted by Jiro Adachi, and 26 bombers led by their hikocho Irisa, headed for Iba and the other half led by hikotaicho, Taro Nonaka plus G3Ms from the 1st Kokutai, headed for Clark Field at an altitude of 7,000 meters. US fighters had been in the air since early morning, unaware of the weather problems in Taiwan, saw after no sign of the Japanese around midday, they started to land for fuel, just when Japanese bombers appeared. At 12:36, they attacked, dropping some six hundred and thirty six 60 kgs bombs (42 tons) on Clark Field in a textbook precision. This destroyed twelve B-17s, damaged five more (later written off) as well as twenty P-40Bs. Iba Airfield was hit by four and eighty-six 60-kg and twenty six 250-kg bombst minutes after Clark, claiming Seven P-40Es on the ground, and the radar. Meanwhile Zeros shot down six fighters. 50% of the US bomber force in the Philippines and 35% of the fighter force. The US pilots still managed to shot down seven Zeros, one Betty from Kanoya Kokutai, which survived only to crash-land near its base after the long return flight.
Destruction of Force Z
Meanwhile G3Ms of the 22nd Koku Sentai took off in a thunderstorm for their first raid on Singapore while the G4Ms from Kanoya kokutai assigned to search for Force E remaining on the airfield on high alert, awaiting orders to attack. A Type 98 C5M2 "Babs" confirmed Force Z was in Singapore at 9:50 A% and conformed by another reconnaissance aircraft. Decision was made to destroy them in port that night. However at 3:40 p.m., I-65 claimed they had already departed and were now in the South China Sea at 1:45 PM. It turned out that the "Babs" crew mistaken two large tankers for them. The IJN was soon aware the two ships were now underway to intercept the Japanese invasion force. Vice Admiral Sir Tom Phillips indeed had sailed at 5:35 PM on December 8 with four destroyer escorts and were underway to Singora, southern Thailand.Vice Admiral Jisaburo Ozawa ordered the naval bomber force to take off and search for them in the Saigon area. Thios was foiled by a sharp deterioration in the weather and darkness. Rear Admiral Matsunaga decided to postpone the all-out search and wait for the following day. At 6:44, G4M1s from three hikotai of Kanoya took off from Dau Moi airfield loaded with the recent Type 91 Kai 2 torpedoes capable of shallow diving, with more powerful warheads. The weather improved significantly and meanwhile Admiral Phillips was forced to abort the Singora mission when spotted by a floatplane from a Japanese cruiser and turned back to Singapore. At 10:00, Genzan Kokutai bombers spotted them and signalled their position and heading. At Saigon, the 22nd Koku Sentai HQ immediately scrambled the coordinates to all units already in the air.
The faster G4Ms from Kanoya Kokutao missed the message and at 10:28, they were 600 nm from base, Singapore 80 nm to their right, Sumatra ahead, turning around and heading back to base. Rear Admiral Matsunaga eventually sent British coordinates in plain text at 11:30 PM and units northwest of Anambas Island turned toward the assembly point. LtCdr. Shichiso Miyauchi in the lead aircraft, piloted by Senior Lieutenant Miyoshi Nabeta led the nine aircraft of the 1st Chutai (Moritaka Higashi) and 3rd (Lieutenant Haruki Iki), reaching the assembly point, but could not see a thing due to dense clouds. In a break Miyauchi spotted a glimpse of a floatplane flying below, which was a Supermarine Walrus from HMS Repulse. The formation then went down through the clouds and at 12:15, broke through down to 800 meters,and after 2 minutes sighted Force Z. Repulse was 2,500 meters behind Prince of Wales, an the destroyers were deployed on POW's starboard. From 11:15 to 11:57, a total of 32 "Nell" (G3Ms) bombers and torpedo bombers attacked in successive waves. Repulse suffered a single 250-kg bomb hit but sailed on and thanks to brilliant handling Captain Tennant dodged no less than 15 torpedoes in a comb.
Those of Genzan KKt. attacked the Prince of Wales, managed two torpedo hits on her port side, one hit, disabled the rudder, jammed the port propeller shafts and damaged its power system so she could no longer use its 133mm DP guns albet she managed to shoot down one attacker. Down to 10 knots and unable to maneuver, she was now a practice target for the G4Ms. Nine from the first chutai (Miyauchi) approached down to 300 meters and at 8 km, emerged from the clouds, spotted by the British in a patch of bright blue sky, trigerrng a barrage of AA fire, but at 12:18, Miyauchi flapped his wings twice to signal the attack. Miyauchi launched first against the Prince of Wales on her exposed starboard. Repulse at 28 knots was caught in a starboard turn toward the attackers, unaware that Prince of Wales lost control. It was assumed the flagship would also turn and they themselve started a left turn in anticipation only to realize she was still straight ahead, loosing momentum and having to return for a seocnd pass. The second and third flights abandoned the attack and reformed.
Miyauchi's first shotai continued on its original course and dropped their torpedoes when reaching 1,000 meters from the target, even 500 meters, so at 12:20, two torpedoes struck Prince of Wales at the bow and forward of the bridge. One was dropped too late and missed. The 2nd and 3rd Shotai made another run on Repulse, always turning teir bow to them, heeling heavily but the aircraft won the race, caught her in a pincer, launching two starboard, three port. Repulse was hit once to port close to aft superstructure, but still was making 25 knots. One G4M, unable to get into a good position to attack Repulse, switched to Prince of Wales and hit her starboard. The 2nd chutai (Higashi) approached Repulse with 6 bombers from the 1st and 2bd shotai from the port side, with two re-routed on Prince of Wales, from the starboard, making one more hit aft. Prince of Wales finally lost power, started listing starboard.
Repulse, managed to evade six torpedoes, only to succumb to the third chutai (Haruki Iki) from her rear, first assessing the situation and assisting his chutai to focus all attention on the battlecruiser. After a full circle, they attacked from the port side, six other from the starboard side and torpedoes were dropped from 800 meters at 30 meters. However two were shot down. Repulse suffered a hot on her port side near the engine room, one aft of the aft main battery turret, one at the aft end and a hit to starboard near boiler room "E". Two minutes later, Captain Tennant ordered to abandon her. HMS Repulse capsized and sank, stern first at 12:33 PM. Prince of Wales lingered for 30 min. longer, before two G3Ms dropped 500-kg bombs, one hitting amidships at 12:43, and then minutes later, she capsized and sank with Vice Admiral Phillips and Captain Leach.
The IJN pilots knew they just made history. Until then capital ships had been sank at anchor, Taranto and Pearl Harbor. There, they proved that they could sink them underway, at full speed, alive and kicking. This also doomed all chance sof stopping an invasion forces. Singapore was left to its defenders. Losses were comparatively very lmight, two "Betty" and one "Nell" from Genzan KKt and one heavily damaged and, belly-landing southwest of Soc Trang after running out of fuel, three other "Betty", one "Nell" from Mihoro damaged but later repaired.
Supporting the Offensive
The desire to seize the rich natural resources of the Dutch East Indies, with the capture of Java as the ultimate goal, led to the development of Japanese offensive plans along two main axes. In the east, the Japanese hoped to break through the Philippine archipelago, reaching the oil fields of the coast of Borneo, Sulawesi, and other islands, and heading toward eastern Java. In the west, their route lay south through Malaya to Singapore, with the goal of establishing a strong foothold on the west coast of Borneo and southern Sumatra, and then approaching the western tip of Java.Philippines Campaign:
On December 10, bad weather forced three of the "Kanoya" Kokutai hikotai to remain grounded in Taichu, but the "Takao" Kokutai appeared over Luzon in full force. Half of the 27 G4Ms kokutai were tasked with completing the failed raid on Nichols Field, south of Manila, on December 8, while the other half, an equal number of Bettys, were to attack Del Carmen Field, south of Clark Field. Clouds over the target prevented the second group from attacking, forcing them to turn their attention to shipping in Manila Bay. The Zeros escorting the bombers engaged P-40Es over Manila, destroying the remnants of the US 24th Fighter Group.By December 12, the weather around Formosa and the surrounding waters had improved, but parts of Luzon Island were still under cloud cover. When 27 Bettys from the Kanoya Kokutai were sent to bomb Clark Field, they found the entire airfield obscured by clouds and were forced to unload over Iba Airfield. A Takao Kokutai with 52 Bettys was diverted to attack Batangas Airfield due to fog over Nichols Field. The next day, a total of 104 Bettys bombed various targets on Luzon Island, 26 Kanoya Kokutai aircraft and another 26 from the 1st Kokutai bombed Nichols Field, permanently disabling it, and 52 bombers from Takao Kokutai attacked Olongapo, Iba, and Del Carmen airfields. In less than a week of fighting, the Japanese had gained overwhelming air superiority over the Philippines, and they were already scrambling for viable targets.
Moreover, the "Betty" units, reliably covered by the ubiquitous "Zeros," suffered virtually no losses. G4M bombers—the "long arms of the Imperial Navy"—operated successfully in the south, both in the Philippines and beyond. Thus, on December 18, a "Kanoya" Kokutai unit, with 25 "G4Ms," flew from Taiwan to Peleliu Island, in the Palau archipelago, to support the landing in Davao scheduled for December 20, 1941. On December 21, 21 "Kanoya" Kokutai "G4Ms," taking off from their new base on Peleliu, attacked Del Monte Airfield on Mindanao Island.
On December 22, 1941, the main Japanese invasion force in the Philippines landed at Lingayen Gulf, on the island of Luzon. In the following days, the Japanese Army achieved significant successes in providing tactical air support to its own Army Air Corps. This allowed the Philippines campaign to be left solely in the hands of Army Aviation, while Naval Aviation shifted its focus to other missions. For example, bomber units from Formosa hunted shipping near Manila from December 25 to 28. G4M crews then turned their attention to the Bataan Peninsula and the island fortress of Corregidor. However, it should be noted that the Japanese Army abandoned Allied air power in the Philippines early on. For example, on December 25, the 90th Sentai of light bombers, consisting of 27 Ki-30s, taking off unescorted on a ground attack, was suddenly attacked by 11 P-40s from the remnants of the US 24th Fighter Group, which shot up 18 aircraft in mid-air and damaged six more.
Corregidor was a serious threat; it was the strongest and most well-defended target the Japanese had encountered in the early stages of the Pacific War. The island fortress's extremely powerful air defenses forced experienced G4M crews to retrofit their aircraft with Kasei 15 engines. These engines significantly increased the Betty's operational ceiling, operating over enemy territory riddled with anti-aircraft guns. During one raid on January 3, 1942, one Betty, a Takao Kokutai, made an emergency landing on Vigan Island after an anti-aircraft shell struck its fuel tank. The following day, another Betty was shot down by one of the few remaining P-40s over Bataan. On December 28, 1941, an advance group of 10 Kanoya Kokutai "Betty" fighters flew to the newly captured airfield in Davao, on the southern coast of Mindanao. The rest of the aircraft arrived there by January 5. The island of Jolo, halfway between Mindanao and North Borneo, was captured on Christmas Day, and between January 2 and 8, Takao Kokutai and its 23 "Betty" fighters flew to the local airfield on the island. Although American and Filipino forces continued to hold Bataan and Corregidor, the Japanese were rapidly advancing toward their intended objective—the Dutch East Indies.
Malaya:
With the destruction of "Force Z", army units, supported by the IJAAF, rapidly advanced down the Malayan Peninsula. IJN bombers took no part in this, and instead, were tasked to patrol the South China Sea and support Japanese troop landings along the west coast of Borneo. On December 16, 1941, they covered the landings in Miri, northwest coast of Borneo. From the 18th, Bombers from the 22nd Koku Sentai bombed Allied counterattacks. On December 20, the "Kanoya" Kokutai and its 26 serviceable "Betty" were sent to locate and bomb an Allied airfield from the Dutch Air Force, which assets launched raids on the Mira beachhead. They spotted and attacked the Singkawang II airfield, near Ledo. They reported the destruction of 11 large and 5 small aircraft. On the 22nd a new flight of 24 G3Ms (Mihoro Kokutai) bombed the runway and neutralized Dutch aircraft for a time.On December 24, with the landing in Kuching, further down the coast, troops captured the airstrip the following day. Pre-war Japanese plans to develop and expand airfields in Miri and Kuching, turning them into large airbases for operations against Singapore and West Java however, failed. These small airfields indeed were surrounded by impenetrable jungle on all sides. They were not easy to scale up for large aircraft. At most, they were just large enough for a Sqn.. Naval aviation was forced to continue from southern French Indochina airfields. Even at this early stage, the lack of adequate Japanese engineering units began to impact the effectiveness of Japanese air power.
The Battle of Singapore:
Soon, Japanese command shited attention back to Singapore. Army led reconnaissance on December 28 and spotted some 100 British aircraft on the few airfields, so there was soon a joint air operation Army-Navy organized. 27 Betties were sent over Singapore on the night of January 3, from the Kanoya Kokutai. They ravaged Tengah airfield and the naval arsenal nearby. 4 days later, intel reported increase air operations so more pressure in answer. By January 14, 1942, Ki-27 fighters (11th Hiko Sentai) reported spotting an "aircraft carrier" in Kappel Harbor. The next day, 27 betties from Kanoya Kokutai attacked the port but saw no aircraft carrier so they dropped their remaining payload over Tengah and Kluang airfield. On January 18 Kanoya Kokutai destroyed the naval oil depot, burning for several days.On January 26 they supported the landing at Cape Endau, southern Malaya. The 27 betties from Kanoya Kokutai before that bombed again Tengah airfield to ensure it never would be operational, and 25 "Nell" from the Mihoro Kokutai bombed ships in Kappel Harbor. A day later, all 27 Betties from Kanoya bombed Sembawang airfield, and 25 ohthers from Genzan Kokutai bombed Kallang. The older G3M "Nells" suffered losses to Hurricanes, but Bettie were too fast for them and escaped all unharmed. The crews estimated their luck, and Lieutenant Hajime Sudo from Kanoya Kokutai recalled:
"I always felt sorry for the guys from "Genzan" and "Mihoro" whenever we flew joint missions with them. During the raids on Singapore, the idea was to meet over the target so our bombs would fall at roughly the same time. But, taking off from the same base, our "G4Ms" would arrive there three and a half hours later, while the "Mihoro" planes would arrive only an hour after us...The Kanoya Kokutai started operation over Singapore on January 27. 24 Betties bombed Kallang Airfield. Two days later, Genzan Kokutai made its final bomb run over Singapore. Theisland fell entirely to the the Army Air Corps responsibilty. On February 15, 1942, Singapore fell. Next were Java and Sumatra.
...Then the "Mihoros" began to take off significantly ahead of us. As we approached the target, we caught up with them...
...They could barely maintain 7,500 meters above sea level, while we easily flew at 8,500. To keep up with the same speed, we were forced to fly in zigzags...
...The enemy fighters were afraid of our 20mm tail cannons and Rarely attacked us. If they did, they'd make only one pass before switching to the Type 96 Rikkos, flying 1,000 meters lower and significantly slower… and harassing them for half an hour...
...The anti-aircraft guns also concentrated their fire on the lower Type 96 Rikkos... Often, we'd already been eating ice cream at the base and resting long after the guys from Mihoro returned home..."
The Java Campaign:
The eastern corridor of the offensive was divided into two axes:-One was under the responsability of the Kanoya Kokutai and the 1st Kokutai (Nells and Mavis flying boats from Toko Kokutai). They were supported by Zero fighters from the 3rd Kokutai based at Menado, northeastern Sulawesi/Kendari (southeastern coast) but also Makassar (southwestern tip of Bali) east coast. It was aplanned to use Ambon and Timor further east as starting points with new airfields.
-The other axle was under the AoR (Aera of Responsibility) of the Takao Kokutai and the fighters from Tainan Kokutai all along the east coast of Borneo, from Tarakan to Balikpapan, to Banjarmasin, southern coast.
From Davao, 14 Nells from Kanoya Kokutai and three Type 97 flying boats from Toko Kokutai raided Ambon in pre-drawn hours on January 7, before the landing at Menado for the 11th. For the first time, paratroopers were used. The Takao Kokutai from its new airfield of Jolo Island, raided Tarakan Harbor on January 8-9, supporting the landing on January 11, buone was lost in a low pass to AA fire. Next on the 24th, simultaneous landings were perfomed at Balikpapan in Borneo, and Kendari in Sulawesi. The 35 Betties of Takao KKts raided against enemy positions on Balikpapan, the day of the landing, helping to secure the beachhead. In the east, after reports of aircraft at Ambon, the 26 Betties of Kanoya KKt bombed it on the 15th and the 16th with sixteen Betties. G4M crews also flew daily patrols in the area, searching for any ship, but spotted none. Balikpapan fell soon and with its, the richest oil fields on Borneo, and the large airfield at Kendari, ideal for hosting both bomber and fighter Sqn.s.
The airfield "Samarinda II" which was never spotted before and all this time was the source of constant allied raide was at last discovered by reconnaissance aircraft and on January 25, some forty-three "Bettys" from the Takao Kokutai visited the airfield. The next day, 35 took off again in bad weather, 17 forced to return, the rest bombing through clouds. The airfield survived. But it's the encirclement in Balikpapan, that forced the Dutch to withdraw their last Martin B-10 bombers. The airfield at Kendari was a large, modern one with good facilities, unlike the previous airfields of Davao, Jolo, Menado, Tarakan, and Balikpapan. The Kanoya Kokutai arrived there on January 27. G3Ms from the 1st Kokutai follwoed them on 30st, plus another thirty-four G4M of the Takao Kts. on February 1. The entire bomber force in the region was now there.
But pilots and mechanics had little time to rest, as they were asked an offensive toward East Java, starting on February 3, with almost all the bombers in flying condition, some 72 leaving Kendari in the early pre-dawn hourse before morning. Lt. Codr. Shosa Nonaka led 21 Betties from Takao Kkt to attack Perak Airfield, Surabaya. The 27 Nells from Kanoya Kokutai (LtCdr. Shosa Irisa) were tasked to bomb Maospati Airfield, Madiun. 19 more "Nell" also attacked Singosari Airfield, Malang. All three airfields were badl damaged and at the end of the say, the all-important Surabaya naval base, HQ of the Dutch KNIL Navy, also attacked. Zeros escorting bombers destroyed 38 Allied aircraft to boot, some in the skies and other on the ground. Four zero were lost, and a single Type 98 C5M reconnaissance aircraft. Crews of the Takao, Kanoya, and the 1st Kokutai managed to return to Kendari without any losses however.
After this, the Takao Kokutai was plsit in two, with one chutai (9 Betties) remaining in Kendari, 18 transferred to the Balikpapan airfield for limited operations. On February 4, Bombers of Takao Kokutai while patrolling, spotted the Allied naval strike force (ABDA) in the Flores Sea. That same day, 27 Betties of Kanoya KKt. as well as 9 from the Takao Kkt, 24 Nell from the 1st Kokutai arrived at medium altitude and started rows of attacks. They claimed the Omaha class cruiser USS Marblehead (claimed sunk but badly damaged), after two 250-kg bombs direct hits, many near-misses. She had to sail for Brooklyn via Pearl Harbor for long repairs. USS Houston had the roof of the aft main battery turret blow up by a direct hit. Another bomb hit destroyed the AA fire control system on the flagship cruiser De Ruyter. Houston shot down a G4M though. Albeit all ships survived, this forced the ABDA command to abort their interception of the Japanese landing force and turn back. The the landings at Makassar on February 9 were unopposed. Houston and De Ruyter were later finished off by naval artillery from heavy cruisers a few days later. The western sector lacked airfields comparable to Kendari so G3Ms from the Mihoro and Genzan Kokutai used small forward airfields and a part of the Kanoya Kokutai remained at Dau Moi, Indochina. By February, operations were assigned to the Mihoro and Genzan Kokutai.
On February 14, the Army landing force had a landing on Falambang, southern Sumatra, capturing an airfield and oil refinery. A day later they linked up with regular forces and an Allied fleet of five cruisers, ten destroyers was spotted near Bangka Island on February 15. IJN bombers attacked, but scored no hits. They retreated to Java. Palembang was the largest oil field in the West Indies and main airfield on the way to West Java. It became the primary base for the IJAAC, leaving nothing for the IJNAF bombers so the Navy decided to use a new captured Dutch airfield, Gelumbang, some 37 kilometers southwest of Palembang ("Palembang II") for 33 "Nell" of Genzan Kkt, 6 "Betty" from Kanoya KKt, transferred on February 24.
Nicknamed "Gelumbang" thus new airfield, was spacious enough for Navy operations, but Japanese logistics were hard press to maintain this jungle airfield with sufficient fuel supplies. It was decided a single Kokutai would remain there. On February 26, the Genzan Kokutai (Nell) were forced to return to Kuching and the Kanoya Kokutai continued from Dau Moi.In the eastern sector, weather deterioration meand that on February 10, no aircraft took off, until the 18th. As soon as it cleared, 21 G4Ms of Takao Kokutai attacked Surabaya harbor. However being the main baval base of the Dutch East Indies, there were several defensove airfields, and for the first time G4Ms lost four.
One took a direct hit from a 75mm AA shell, two others by US P-40Es from the 17th Sqn.. With radar, they were warned in advance and took off to prepare an attack. One Betty piloted by Seiji Miyamoto was riddled with fire and crashed into the sea while back. Nine other were damaged, inc. the command bomber (Petty Officer Katsumi Kitajima), having some 150 bullet holes and two dead crew members, two more badly wounded, including pilot, Petty Officer Masatomi Ota. But this proved also that the P40Es two fuselage 0.5 in Browning and four 0.3 in in the wings were not enough to down the G4Ms, especially as they avoided closing in the tail gunner... On February 19, the Japanese landed on Bali, near East Java.
IJN Bombers menacing Australia
Carrier-based aircraft famously raided also Darwin, northwest Australia, the only time the continent was directly impacted by the war on its soil. 27 Type Nells from Kanoya Kokutai and 27 from the 1st Kokutai supported the attack, notably RAAF airfields to the northeast, in preparaitons for landings at Kupang and Dili in Timor a day later. This completed the encirclement of Java. On February 27, the US seaplane carrier USS Langley was spotted, along with two escorting destroyers, making its breakout to Tjilatjap, southern coast of Java, with on board, thithy-two P-40 fighters, 33 pilots. A raid by nine "Betty" from 1st chutai, Takao Kokutai led by Senior Lieutenant Jiro Adachi found and sunk USS Langley, taking near misses and several direct hits from 250-kg and 60-kg bombs. She was unabled to be towed and had to be finished off by torpedoes and gunfire from USS Whipple.Java was done for by then. The Allied fleet was eventually destroyed in the Battle of the Java Sea from February 27 and March 1. The Japanese landed on the island from the east and west by March. The Dutch surrendered on March 9. IJNAF bombers already started to be redeployed to other sectors. On March 5, Kanoya Kokutai left Gelumbang and the others, Kendari. On March 10, Kanoya Kokutaireunited and returned to Japan for crew's R&R and complete overhaul of the bombers, then re-training. Takao Kokutai continued fighting however: On March 14, 18 "Betty" flew to an airfield at Kupang, Timor, to start operatons against northwestern Australia. The other two chutai and the kokutai HQ were sent to Clark Field in Luzon, Philippines to finish off defenders of Bataan and Corregidor. From March 24, the Takao kokutaimade daily raids alongside Army Type 97 Ki-21 "Sally" bombers.
Overall, the conquest of Southeast Asia took 90 days. cost the Japanese Navy ninteen G4M aircraft, some lost on the ground after rare allied raids. Losses of "Nells" were also still comparatively light.
The New Guinea and Guadalcanal Campaign
Kiaveng and Rabaul
On January 23, new airfields were established in the Bismarck Archipelago, starting with Kavieng, New Ireland and Rabaul, New Britain. Rabaul became a key base, having all the facilities, soon expanded, to become THE major baval and air base of the IJN in the whole area, and the fulcrum for Japanese operations in the southwest and New Guinea, or southeast in the Solomon Islands. There was a IJNAF mixed fighter-bomber unit formed for new offensives there. Meanwhile, one bomber Kokutai that never left the field and was not allowed to rest, was the IJN 4th Kokutai, former "Chitose" Kokutai. It struggled to subdue Wake Island or the capture of Rabaul (New Britain). Later it had the difficult job of defended bases in the Marshall Islands against US carrier raids. These forces only comprised older Type 96 Rikko or "Nell" bombers except the only "Betty" from December 15, used for long-range reconnaissance.The bomber component of Rabaul, the 4th Kokutai, comprised three chutai. The "Chitose" Kokutai started to trade G3Ms for G4Ms bombers and made one its chutai under 1rst Lieutenant Shigeo Yamagata and the other two were formed from veterans. Also soon deploye there, were the Takao Kokutai, from the Philippines and Dutch East Indies, composed of the 4th and 6th Chutai undel Lt. Masayuki Miyake and Masayoshi Nakagawa. On January 31, 1942, they had 21 bombers in common. On the night of February 5-6, both took off from Jolo Island, landed on Peleliu to reful and arrive at Truk (two were lost after colliding in mid-air), inc. Sqn. commander, Masayuki Miyake, freshly appointed. Yogoro Seto was appnted at the head of the 4th Kokutai from February 10. Conversion of pilots from one of Chitose Kkt Chitaoi complet conversion training to the G4Ms at Vunakanau Airfield, Rabaul. Two other chutai arrived on 14-17. 3 days later on February 20, a Type 97 patrol flying boat from Yokohama Kokutai spotted and reported ships 460 nautical miles from Rabaul (then shot down).
Attack on USS Lexington (Action of Bougainville)
This happened to be Vice Admiral Wilson Brown's group with the USS Lexington as centerpiece, en route to strike Rabaul. Rear Admiral Eiji Got (24th Koku Sentai) ordered an attack. Only issue, Rabaul still lacked aerial torpedoes, en route to be delivered, neither drop tanks for the escorting Zero fighters, also just arrived at Rabaul. There were also a few Type 96 A5M "Claude" there for local air defense. Thus, the 4th Ku-wing flew with only bombs and without escort. They were all veteran crews from the former Takao kokutai, and still fully confident of success. On February 20, 1942, at 2:20 p.m. these 17 "Betty" took off from Vunakanau, each carrying only 250 kg (550 lb) bombs to compensate for the long range led by 4th Kokutai Lt.Cdr. Takuzo Ito, senior navigator Taii Seto and pilot Petty Officer Chuzo Watanabe.
He led 8 Bettys of the 1st Sqn., Lt. Taii Nakagawa of the 2nd Chutai, the remaining nine. He was also the first to spot the US formation. At 4:35 p.m., her radioed his attack but nothing after. Indeed, by that stage, USS Lexington had radar a and a CAP already in the air. F4F Wildcat from VF-3 took off in addition and soon all converged on the nine bombers of the 2nd Chutai. Only 4 dropped their bombs and missed before the "circus" commenced. Three bombers bombers were caught when withdrawing, for two F4Fs by tail gunners as claimed. The last remaining Betty evaded them but was intercepted by a Douglas SBD-2 Dauntless from VB-2, also scrambled and showing the dive bomber was also an adept fighter.
At 17:00, the 1st Chutai approached in turn the formation, and five minutes they were intercepted in turn by a first pair of Wildcats (led by famous Lt.Edward H. 'Butch' O'Hare, futre top ace) and wingman, Junior Lieutenant Marion W. Dufilho. The latter had his HMGs jamming but 'Butch' O'Hare downed the three Bettys in an expert way, avoiding the tail gunner's best angle each time. He wontinued hs rampage and damaged two more. Onlly one bomber piloted by Petty Officer Koji Maeda, reached the bomb release point, was crippled but stayed on target, and soon the remaining three Bettys, all dropped their bombs and missed, the best 30 meters from the ship. USS Lexington survived this day. Its likely a combined bomb/torpedo approach would have met more success.
Group leader Lt.Cdr. Takuzo Ito was shot down just after release by 'Butch' O'Hare, eaning his 3rd victory. Seto however as her plungd in fire, managed to maintain his course on Lexington. His "kamikaze" run was stopped by concentrated AA fire from the entire group. The cockpit was obliterated and the wings disintegrated, it crashed 1,400 meters forward of the carrier at 17:12. Of the last remaining five, another was shot fown by a F4F and the rest turned back, three in formation, another behind, badly damaged and piloted by the only man alive, Petty Officer Satoshi Mori. One of the group eventually crashed at 7:25 p.m, when trying to land on Nugava Island 50 miles from Rabaul. The remaining two landed at Vunakanau and at 8:10 PM, Satoshi Mori managed to land at Simpson Harbor, Rabaul. This mission was the end of the 4th Kokutai, with 88 crew members killed and two Sqn. commanders 15 out of 17 shot down or damaged beyond repair. This loss was accepted and expected due to the lack of fighter escort. This was the first of many cases that highlighted the bomber's lack of survivability and protection.
The New Guinea Campaign
After this battle, the 1st Kokutai and its Type 96 'Nell' was transferred to Rabaul in replacement, and the sole surviving chutai led by LtCdr Yamagata, commander, was delivered to Rabaul with ten G4Ms, on 21 February 1942. Soon arroved a new Sqn. commander, Lt.Cdr Hatsuhiko Waranabe and his deputy Senior Lt. Kuniharu Kobayashi. By then, the 4th Kokutai only had a single Sqn.. On February 24, it took off with 8 Zeros, led by Lt. Yamagata for a first raid on Port Moresby, southeast coast, New Guinea. On February 10, was also created the Misawa Kokutai, after the base and airfield on the northern tip of Honshu, made of three chutai all with G4M1 bombers. With the reorganization of April 1, 1942, the 4th Kokutai now had a four-Sqn. structure, fighter component absorbed into the "Tainan" Kokuta. The "Kisarazu" Kokutai was created with three chutai and G4Ms bombers, previously in training. It was replaced in that task by the "Shinchiku" Kokutai in Taiwan.The 25th and 26th Koku Sentai were reorganized and sent ti the northeast. The 4th Kokutai fell under control of the 25th Koku Sentai, Misawa and Kisarazu under the 26th Koku Sentai. On April 18, 1942, Colonel Doolittle raided Japan from USS Hornet, which convinced the command to not send too much units abroad. The first major operation for G4M bombers was the invasion of Port Moresby and landing on Tulagi, Solomon Islands to northern Coral Sea and prepared for an invasion of New Caledonia, Fiji, and Samoa, completely isolating Australia. G4Ms bombers of the 4th Kokutai and the 1st Kokutai made several raids over New Guinea, notably to support the landings at Lae and Salamaua on March 8. Allied air resistance was light but intensified by late March. On the March 14 raid on Horn Island, Cape York in Australia, eight Bettys and 12 Zeros were intercepted by Curtiss P-40s of the 7th Sqn., 49th Group. They claimed two Zeros, all Bettys returned safely.
This changed however on March 21, with a G4M used for long range recce (Petty Officer Chief Heihachi Kawai) over Port Moresby. He was shot down by P40s from No. 75 Sqn. RAAF. After April 1942, the 1st Kokutai was transferred to the Central Pacific. On the 4th, the 4th Kokutai was alone, until joined by the Tainan Kokutai, all veterans. However losses of the 4th Kokutai continued to mount. Like on April 6, seven Bettys were engaged by two P-39D Cobras of No. 36 Sqn., 8th Group USAAF, five were damaged. On the 10th, one Betty was lost to the Australian 75th Sqn.. Reinforcements were awaited for a major operation of the Combined Fleet from April 10, and on 16 April the Tainan Kokutai arrived in Rabaul and trained until the 20th. The Genzan Kokutai (Nells) was temporarily assigned there as well, and at last, yhe 4th Kokutai received long-awaited reinforcements, five G4Ms on 19 April, eight more on 1 May.
The 4th Kokutai resumed operations against Port Moresby on April 17 (five G4Ms, 13 Zeros) and on April 21 (eight Betties, 10 Zeros) from Tainan on the Kila Kila airfield, Port Moresby, also no losses. It was followed by near daily raids on Port Moresby. The Tainan KKt zero fighters, well all manned by veteran aces and they reduced the RAAF 75th Sqn., cose to disappearing. More P-39 Airacobra arrived (35-36 USAAF Sqns). On April 30, the Allies launched a counterattack with 11 P-39s over Lae airfield, destroying one and baldy damaging eight Zeros and 10 Bettys.
Battle of the Coral Sea
In May was launched Operation MO and on the 4th there was a US carrier-based raid on Tulagi, captured the previous day. But the carriers remained ellusive, until May 6 when spotted by a Type 97 "Mavis" flying boat from Yokohama Kokutai. This led to the epic Battle of the Coral Sea in which naval bomber played a little part.On the morning of May 7, two floatplanes from cruisers located the American carriers and the 4th Kokutai launched 12 Bettys from Vunakanau, this time with their intended Type 91 Kai2 torpedoes. They were assisted by 19 "Nell" bombers with two 250-kg bombs each. They were however unable to locate the carriers, but spotted Rear Admiral Grace's cruisers south of Jomard Strait, Louisiana Islands and attacked at 2:30 p.m. The G3Ms were the first to approach tham at 1,000 meters, only to witness the formidable AA barrage, not against them but on the torpedo-armed Bettys that simultaneously arrived above the waves for their run, launching them though FLAK. The G3Ms dropped their bombs unhindered, returned to base without losses, but all missed the expertly manoeuvering cruisers. The torpedo attack cost 50% of the bombers, obliged to keep a steady course until releasing their payload at short range:
Group leader Senior Lieutenant Kuniharu Kobayashi crashed in water with a torn-off wing, three other followed him. Another "Betty" managed to land at Lae, destroyed in the crash landing. The rearmost one (Misao Sugii) made an emergency landing on Deboyne Reef and the remaining six landed all damaged at Vunakanau. All for nothing. USS Lexington would be sunk, but by dive bombers.
Operation MI
The New Guinea campaign went on, and the last raid on Port Moresby was on May 18 (4th kokutai Cp.Lt. Hatsuhiko Waranabe) with sixteen G4Ms on the airfield at Seven Mile and the Genzan Kokutai ahd eighteen G3Ms on Twelve Mile. P-39s (Nos.35/36 Sqns) attacked befote fighters from Tainan Kokutai could cover them, with one Betty shot down, eight damaged, one later crashed landed at Lae, the rest reached Rabaul. Twelve Mile was struck and the Kokutai returned without losses. Capture of Midway was scheduled for June 6. Nine G4Ms from Misawa Kkt. were scheduled to land on Midway before capture, and others under the 26th Koku Sentai following in July. It was optimistic, but the plan was to bring them close enough to Pearl Harbour to "finish the job" started seven months before. The Carrier Battle of June 4-6 was the crippling defeat for the IJN we all know, and so by July 10, Misawa Kokutai was transferred instead to Saipan, Mariana Islands, patrolling the waters and training.More action Close to Australia
The Japanese command abandoned its plans to invade New Caledonia, Fiji, and Samoa on July 11, but still maintain the conquest of New Guinea from land, and that implied capturing Port Moresby to bunkerise the Solomon Islands, starting by creating a new airfield on Guadalcanal. 4th and Genzan Kokutaidevoted their time to maintenance, training, and replenishment between patorls, apart a daylight raid on Port Moresby and small night raids in June, marred by poor weather. On June 16, the 25th Koku Sentai made a raid on Port Moresby. A day later nine G4Ms of the 4th Kokutai aborted due to a rain squall off Cape Gloucester. Genzan Kokutai however broke through the rain and damaged the transport Macdhui in the Harbor.A day later eighteen G4Ms under Lt.Cdr. Watanabe finished off the same ship. They took FLAK however but all returned safely. This was their last mission for them, albeit Genzan Kokuta raised Port Moresby on June 26. It would leave for Japan. On the night of July 3–4, the 4th Kokutai attacked with a new park of 26 bombers as well as p, July 5, 1942 with twenty escorted by 14 Zeros in a follow-up daytime raid. None was lost. The next day they were intercepted by P-39 and P-40s from the 35th Group, but they escaped all.
On July 10, twenty-one "Bettys" took part in another daily raid on Port Moresby but met heavy AA fire and interceptors. Lt.Cdr Tadanobu Tsuzaki, leading the 4th kokutai was shot down by AA fire and crashed shortly before releasing its bombs, to the remaining group were confused and drop their bombs randomly. But they returned without losses. After the landing at Buna Bay, northern Papua New Guinea on July 21, other missions were planned, marred by the tropical weather, cancelling two flights on July 18 and 19. On the day after, 25 Betties attacked the beachhead, without losses. On July 24, twenty launched the last daylight raid on Port Moresby, followed by several night raids until the end of the month.
Raids on Australia
On March 16, two aircraft from the Takao Kokutai were deployed to Kupang, Timor and launched raids on northwest Australia, at first unopposed, but after Broome on March 20, they flew unescorted until March 28, when seven G4Ms raided Darwin. They were intercepted by P-40Fs from the 9th Sqn, 49th Fighter Group, lost one. On March 30-31, another raid on Darwin, escorted by Zeros from the 3rd Kokutai, no losses. On April 4, they were intercepted north of Darwin, the six Zeros repelled the attack on seven Bettys, but the P-40s still managed to shoot down three, damaged two more. Next day, seven more arrived, accompanied by a full chutai (nine zeros) no loss. On April 10 marked however the start of a more defensive posture in the region albeit strikes on Australia continued, just to locate and prevent Allied activity and offensives.The other half of the Takao Kokutai arrived in Kupang from 15 April, to wintness a rising number of Allied raids on the base. It was decided to evacuate to Kendari, Sulawesi, Kupang kept as staging base. Rear Admiral Ryuzo Takenaka, 23rd Koku Sentai Cdr, made a large, massive raid on Darwin on April 25, with three full chutai from Takao Kokutai led by Lt.Cdr. Goro Katsum on the RAAF airfield in Darwin, and 15 zeros. Three Betties returned due to engine failure, the remaining 24 was greeted by a swarm of P-40Es, 49th Fighter Group (50 Warhawks) for 35 minutes. Four G4Ms were shot down, three lost one engine. One ditched 80 miles east of Kupang, two returned to base, one was riddled with 180 bullet holes, with one engine lost, four crew killed and the pilot badly wounded in both legs. He made a belly landing at Kupang. Another later landed at the beach in Dili Harbor, caught fire, being destroyed. Takao Kokutai returned, resupplied and took off for Darwin 48 hours later, with the remaining sixteen bombers and twenty-one Zeros. One was shot down.
In May and June 1942, the Takao Kokutai receibed new bombers and stuck to routine patrols. On June 13, a new raid on Darwin was planned and started on June 14, 15, and 16, with twenty seven bombers. They levelled the city, escorted by many fighters and from altitudes of 7,000 meters and above. Many were still shot down. Again in July, after the landings on the Kai, Aru, and Tanimbar Islands, east of Timor on the 30th of June. Takao Kokutai sent one Shotai for night harassment raids on Darwin on July 25 to 30th. LtCdr Katsumi, led 26 G4Ms plus 26 Zeros in a daylight raid on airfield again, with one zero traded by a P40. Port Hedland in Western Australia was also raided without losses.
In August, there was one daylight raid on Darwin. On August 23, twenty-seven G4Ms led by Lt. Tanemasa Hirata raided Hughes Airfield and other auxiliary airstrips south of Darwin, also burned fuel and ammunition depots. Their radar warned the base, so they were greeted by twenty-four P-40s, downed one G4M damaged anoyher, which landed at Dili, two more later were seriously damaged and landed at Kupang. Four Zeros were lost, and this was the last daylight raid on Darwin. Nighttime operation became the norm, but the real deal was now rather in the Solomon Islands.
The Solomons Campaign
By August 1942 the 25th Koku Sentai supported the ground offensive on Port Moresby and on August 7, twenty-seven G4Ms departed Rabaul to raid the airfield at Milne Bay, eastern tip of New Guinea. They learned shortly in flight that massive US landings proceeded at Guadalcanal and Tulagi in the Solomon Islands. Marines overwhelmed the small Japanese garrison on Tulagi and on Guadalcanal, captured a small airstrip recently completed by the Japanese engineering troops. The raid on Milne Bay was called off, and Betties were sent to look for the US naval strike group estimated c500 nautical miles from Rabaul. They took off at 10:06 with 250-kg and 60-kg bombs escorted by 17 Zeros from Tainan Kkt. led by Senior Lieutenant Rempei Egawa. They arrived above Guadalcanal shortly after 13:00. He decided to attack cruisers and other ships near Guadalcanal, only to be intercepted by carrier-based Wildcats and AA fire. Four Betties were short down, for US ships largely unscathed and the main force not spotted.The next morning, the 4th Kokutai was rearmed with torpedoes and took off, led by Lt.Cdr. Shigeru Kotani with seventeen G4Ms from Vunakanau and nine from the second chutai, Misawa Kokutai under Lt.Cdr. Hiromi Ikeda. They had been transferred to Rabaul from Saipan. These were escorted by 15 Zeros. They arrived before noon and dropped to sea level only to be met by fierce AA from Rear Admiral Kelly Turner's cruiser-detroyer escort. Eight were short down a few managed to drop their torpedoes and the remaining ones were greeted by Wildcats, shooting down four more. More even were lost on the return flight so that five, all badly damaged G4Ms returned to Rabaul, with one crash-landing. 17 Betties and 125 crew members plus officers lost for a single torpedo hit on the DD USS Jarvis. Another, hit, was steered and crashed on the transport George F. Elliot.
On the afternoon of August 8, the remaining 17, all from Misawa Kokutai, arrived at Vunakanau. 16 armed with torpedoes took off to look after the US carrier group and finished off Jarvis, sailing alone, with two torpedoes. However its AA fire shot down two Betties, damaged another, which crash-landed on Buka. However the same day a transport convoy left the landing zone without completing unloading after the defeat off Savo Island the previous night. On August 10, Tulagi or Guadalcanal were free from US opposition, so the command changed its stance and sent reinforcement to retake Guadalcanal, leading the the "Pacific Verdun". The bomber groups were ordered to resume their offensive on Port Moresby. A 4,000-strong Japanese contingent landed near Buna and on August 17, sixteen G4Ms from Misawa Kokutai; nine from the 4th Kokutai under LtCdr Tomo-o Nakamura were sent to raid the airfield "Seven Mile".
This was successful, as there were no fighters, and from 7,000 meters, still accurate to destroy 11 aircraft on the ground, buildings, and the fuel depot. New 250-kg delayed-action bombs also blasted the runways. The japanese landings proceeded unhindered. On August 20-21 took place on land the Battle of the Tenaru River and a day later, the Kisarazu Kokutai (19 G4Ms) was deployed at Kavieng. In between F4F and SBDs from the USMC landed at Henderson Field. They would have to defeat the three Kokutai of Rabaul. On August 25, twenty-three G4Ms from Kisarazu, eight from Misawa, six from the 4th KKt, attacked Henderson Field for no losses. Sape the next day (23 G4Ms Misawa, eight Kisarazu) and they managed to burn out 7,500 liters of aviation fuel and a supply of 1,000-pound bombs, damaged aircraft and a mobile radio station. F4Fs from VMF-223 claimed two of Kisarazu, a third crashe landed and Group leader Nakamura mde a belly landing on Buka Island.
During the raid on August 29, 1942, the Kisarazu Kokutai lost one aircraft, shot down, another making an emergency landing on Buka after a raid on Henderson Field. The other nine from Misawa came back unscathed. On August 30, Lieutenant Nabeta led 18 G4Ms, nine from Kisarazu, nine from Misawa for a free raid on Guadalcanal. They spotted and sank the 4-piper USS Colhoun, acting as transport (APD) and returned to Rabaul. By September, on the 2nd, was another raid by Nabeta (18 bombers) to Henderson Field, no losses. That same day, First Lieutenant Nobuo Ando arrived at Vunakanau with ten Bettyies from Chitose Kokutai. However the growing Allied air force in Australia put a good defence of New Guinea and started to threaten the Solomons. The Japanese suffered from the lack of airfields, having only Rabaul and Kavieng as main bases for a daily raid on Guadalcanal for a full mission over 6.5 hours. Plus they often separated due to the perculiar tropical weather. Moreover their vulnerability became clear to the allies and the Japanese crews nicknamed it the "Lighter". They usually climb as high as possible.
Tactics changed as well. For attacks on Port Moresby, G4Ms used shallow dives at 5-degree from 7,500 meters (24,500 ft), releasing bombs from 7,000 meters (23,500 ft) buy over Guadalcanal, tthis was from over 8,000 meters (26,500 ft) and moisture in pilot's oxygen masks froze, wheras accuracy fell. Anorther aspect was the Bushido code as it was preceived, and crews of downed aircraft found behind enemy lines preferred to commit seppuku than trying to look for rescue. Many also choose the remained in their aircraft rather than bail out. This reduced the numbers of veteran crews. Daylight raids on Guadalcanal resumed on September 9 with an attack of Sealark Channel with 25 G4Ms, inc. from Chitose and Misawa, 2 never returned. Another crash-landed on Buka Island. On September 10 Misawa lost another, plus two missing, one crashing on Buka Island. One from Kisarazu crashed in Rekata Bay, Santa Isabel Island but the crews survived as there was a floatplane base. On the 12th, Kisarazu lost 2, Misawa 2, Kisarazu 1 (crashed on Buka), Chitose 1, crashed on Rekata. Teinforcements of nine G4Ms from Kanoya arrived at Rabaul though.
On the 13th, 8 "Bettys" from Kisarazu, 7 from Misawa, 2 from Chitose took off to bomb "artillery positions" on Taivu Point. 1 from Kisarazu was lost, another crashed on Rekata Bay. On the grounds, attacks on Henderson Field continued without success. On the 16th the two remaining Chutai of Kanoya arrived in Kavieng, joined by a 3rd from Rabaul. On the 23th two Chutai of Takao KKt departed Rabaul from the East Indies (20 G4Ms) whereas the depleted Chitose Kokutai returned to the Marshalls for rest. The remainder of the 4th Kokutai were reformed and was what left of the 4th Kokutai (6 G4Ms) were sent back to Rabaul, fused with the Kisarazu Kokutai. Guadalcanal Ops. cost the Japanese 50 bombers.
Meanwhile in New Guinea, the troops nearly reached the last line of defense at Port Moresby. However given the needs of the Guadalcanal campaign they were ordered to retreat. On September 25, a general retreat started, that resulted in the loss of New Guinea. Bad weather also stopped raids on Guadalcanal for two weeks by September. Support was provided for retreating troops of New Guinea with nght raids on Port Moresby on the 17-19th, daylight raid on the 21st. The Kokoda Airfield was raided on on September 23. On the 27th the home air force relaunched operations over Guadalcanal under 1st Lieutenant Miyoshi Nabeta with 17 Bettys, 8 from Kisarazu, 9 from Takao over Henderson Airfield. 4 were lost but also 5 SBDs, 5 Avengers, and 6 Wildcats were destroyed on the ground. A new airfield had been created by the seabees, "Fighter One" east of Henderson Field. It led to disaster on the 28th. The 25 G4Ms sent to bomb Henderson Field and Lunga Point were intercepted by 35 F4Fs from VMF-223, VMF-224, and VF-5: 4 lost from Takao KKt, 1 from Misawa Kkt, (the group leader) Rinji Morita, Kanoya lost 5 bombers and later another one never returned to Rabaul, total 11 lost. There was a change in tactics so a day later, 9 from the Kisarazu acted as bait, onto 27 Zero fighters from the Russell Islands. The Americans did not fall for the trap however.
There was acomplete reorganization on November 1 wth number replacing names. Kanoya became the 751st, "Takao" the 753rd. Night raids against Guadalcanal started on the 29st and went on almost daily. Their peculiar engine sound was nicknamed by the Marines "Washing Machine Charlie." Accuracy fell down, but at least the cold favored tlift and lowerd consumptions, reduced losses and deprived the Marines of their sleep. Still these raids turned ineffective. From October 11, they returned to daylight raids until a new airfield was established on Buin, Bougainville, enabling to launch two raids per day. On October 11, the weather interfered. 18 out of 45 found their target. One loss from 751 Kokutai. On October 13, 1rst Lieutenant Shigeji Makino of 753 Kokutai, led 25 G4Ms over Henderson Field and "Fighter One" strip. Both airfields were razed, one B-17 destroyed, many parked aircraft damaged plus 5,000 gallons of avgas burned for one Betty (forced landing in Rekata Bay). Then 14 Bettys from 751 Kokutai also bombed Henderson Field, no loss. On October 13–14 night, Henderson Field was shelled by the battleships Kongō and Haruna for over an hour, leaving heavily cratered airfields and 14 Wildcats, 4 Dauntless destroyed, many more damaged.
36 the arrived on midday on October 14 (Kisarazu, Misawa, and the 753rd Kokutai), targeting again Henderson Field and "Fighter One" without opposition. Later that day anotrher raid of 12 G4Ms from the 751st Kokutai were met with fighter opposition. Three were shot down, a 4th ditched in Rekata Bay. On October 15, 23 bombed the airfield, bu were damaged by AA, one crashed during an emergency landing at Rabaul. On October 17, 18 G4Ms targeted positions at the Lunga River to the ground assault, lost one, crashing in Rekata Bay. The next day 15 Bettys did the same west of the river, lost three. On the 20th, nine from 753 kokutai raised the same objective without losses and the following day, nine from Kisarazu also. On the 23th, 16 Bettys attacked, lost one. Soon the grinding battle for Guadalcanal exhausted reserves, so from October 24, intensity declines. Meanwhile the ground battle went on with a 3rd assault on Henderson Field so the next morning on the 24th, bombers took off to target the left bank of the Lunga River, 16 Betties, loosing 2.
Papua New Guinea
On October 27, Chitose Kokutai returned to Rabaul from R&R. The 753rd Kokutai then returned to the East Indies. Meanwhile took place the battle of the Santa Cruz Islands a Japanese tactical victory but at enormous cost for veteran pilots of the IJN. Next, Mihoro Kokutai became the 701st, the 4th became the 702nd, the Chitose became the 703rd, the Misawa became the 705th, Kisarazu became the 707th; 1st Kokutai became the 752nd; Genzan became the 755th. The 751st Kokutai concentrated on New Guinea with small night raids on Port Moresby. On October 29, they launched a last raid but the ground situation was bad. In November was another night raid on Port Moresby, carried out by just three G4Ms from the 751st Kkt. Several night raids were also conducted during the battle for Guadalcanal, the last days of October. On November 5, Lt.Cdr. Gen-ichi Mihara led 27 G4Ms on a raid on Henderson Field and AA shot down one "Betty" each from the 705th and 703rd Kokutai.5 days later, ten G4Ms from the 707th Kokutai supported the desperate defense around Buna, northern coast, Papua New Guinea. 25 G4Ms made another Guadalcanal raid on November 11, lost 4 aircraft from 703/705 Kokuta, 3 shot down, one missing. On November 12, under command of Lt.Cdr. Tomo-o Nakamura, 19 G4Ms (7 705, 9 703, 3 707 kokutai) with torpedoes, attacked a convoy at the mouth of the Lunga River under Rear Admiral Turner. They were greeted by F4Fs from VMF-121 and VMF-112, Army P-39s from 67 Sqn., and AA fire from ships, so 705th Kokutai lost 3 on site a 3 later crash landing (inc. Group Commander Nakamura) on Buin, one Vunakanau. Just one returned from 703rd Kokutai. Thos who crashed landed at Guadalcanal were rescued and eventually returned to Rabaul. The 707th lost all. Not a single torpedo hit anything, albeit USS San Francisco was hit by the G4M that turned kamikaze after being hit by AA, on her superstructure.
After such losses, the Southeast Sector bomber forced was halved and activity plummitted after November 1942. After allied landings on Buna on November 16, the Japanese command concentrated what was left on New Guinea. Kokutai 751 only could make a few harassing night raids. The 703rd Kokutai was disbanded later on March 15, 1943, with the rare crews suviving turned instructors. The 707th Kokutai was disbanded on December 1, surviving personnel absorbed by the 705th Kkt. On December 1, the 701st Kokutai arrived in Rabaul, with 36 obsolete Type 96 "Nell" bombers and flew exclusively at night, sometimes escorted by the last G4M6 Betty heavy fighters from the 751st Kkt. By late December, New Guinea was about to fall. And by December 31st the high command decided to whithdraw in turn from Guadalcanal.
The Battle of Rennell Island
For Naval Bomber Command units of the Southeast Sector, 1943 was marked by a complete shoft to nighttime operations. By January, three kokutai, 705 and 751 with G4Ms and the 701 with older G3Ms Nell bombers were constantly operating, only harassing nighttime strikes on New Guinea and Guadalcanal. Occasionally they had a few daytime missions. On January 17, there was such raid on Milne Bay, 23 G4Ms from 705 Kokutai led by Lt.Cdr. Mihara, destroyed two B-17s, two P-39s, one B-24, one RAAF Hudson on an airfield, with no loss. On January 29, they were vectored in with torpedoes by IJN reconnaissance aircraft on an allied fleet near Rennell Island, south of Guadalcanal. However the command was relucant about daylight torpedo attack and counted on the experience of veterans of the 701st and 705th Kokutai of making such torpedo attack at night.This was done on January 29-30 by Lt.Cdr. Tomo-o Nakamura and sixteen Betty from the 705th Kokutai, having crews all skilled in night torpedo attack tactics. Plys 15 "Nell" from the 701st Kokutai led by their Sqn. commander Lt.Cdr. Joji Higai. The first arrived in target, to the starboard side of Task Force 18, their silhouettes clearly visible against the sunset, his own aircraft hidden in the darkness. At 19:19, ignoring AA fire they made a torpedo run, on Rear Admiral Robert Griffen's force caught by surprise, but again, success was low: USS Louisville was hit and Chief Petty Officer Bunzaburo Imamura which Betty caught fire from AA, and crashed into the stern of USS Chicago. Later one recce seaplane illuminated the target with flares so that the secnd Kokutai could attack at 7:40 p.m. (Nells from 701st) and managed to hit Chicago's starboard with two torpedoes. Torpedoes also struck Louisville and Wichita, but were duds. The 701st lost two aircraft, one of these from Sqn. commander Lt.Cdr. Joji Higai.
At dawn on January 30, another reconnaissance aircraft spotted Chicago under tow at 4 knots. The 751st G4Ms flew from Kavieng to Buka Island to close the distance, refuelled, were loaded with torpedoed and the commander decided a daylight raid, with eleven taking off from Buka Airfield. In the afternoon of January 30, USS Chicago was spotted north of Rennell Island and at 4:10 PM, rushed to attack. Wildcats from VF-10 rushed to intercept them and two were immediately shot down, the third caught fire, the crew managed to drop a torpedo which hit USS Valletta. The remaining eight attacked through FLAK and when torpedoes were dropped, two more Bettys crashed. Four torpedoes struck Chicago at 4:24 p.m. She sank stern-first in 20 minutes. Six G4Ms disengaged when F4Fs attacked again and lost two more. Four returned as one more crashed landed at Munda, the others reached Shortland. Trained crews for such operations were becoming increasingly rare.
This was the last airborne torpedo attack with any significant success with moderate losses. More important than anything else, a lot of experienced crews perished with little replacements whereas the quality and quantity of Allied forces grew steadily. The 4th Kokutai after returning to Japan refocused its efforts on training new crews for torpedo and bombing attacks at night. After the loss of commander Joji Higai near Rennell Island, Lt.Cdr. Mihara of 705 Kokutai died as well but in a rain squall, colliding with its wingman in mid-air. In February-March 1943, night raids were the norm, with a few daily raids. The 701st Kokutai with its Nell bombers was disbanded on March 15 after heavy losses, aircrews absorbed into the 705th Kokutai.
New Raids on Australia
In another front, operations went on under lower intensity. With enough Zeros in ecort, there were still effective daylight raids without heavy losses. The 23rd Koku Sentai attacked northwestern Australia on March 15, with 19 G4Ms from 753 Kokutai targeting oil depots in Darwin, escorted by 26 Zero fighters from 202 Kokutai. They were however attacked by Spitfires from No. 54 Sqn. RAF and No. 457 Sqn. RAAF. Zeros provided a good cover, eight Bettys were however damaged. One Zero was lost, traded for four Spitfires. On May 2, eighteen Bettys targeted the airfield nearby, even before interceptors arrived. 26 Zero fighters shot down 14 Spitfires without any loss.A week later, seven Bettys from 753 Kokutai, from Babo Airfield, Western New Guinea, attacked Millingimbi airfield, Arnhem Land, 450 km east of Darwin. In the second raid on May 28, they faced Spitfires of 457 Sqn. and this tome, the 7 Zeros escorting them could not avoid losses, two Bettys shot down, a third crash-landing. On June 28, 9 Bettys and 27 Zeros returned to Darwin, lost one G4M crash-landing at Lautham West in Timor, another with a engine fire survived. On June 30, 23 G4Ms from 753 Kkt. raided Fenton airfield with excellent results despite Spitfires attacks. Zeros from 202 Kkt. fended off attacks as well. Four B-24s and one CW-22 were burned on the ground, radar disabled, airfield facilities badly damaged for no losses.
On July 6, 22 G4Ms returned to Fenton, escorted by 26 Zeros, but the dogfight with Spitfires lasted 40 minutes with one Betty shot down, another heavily damaged, crash-landing on Timor. However the airfield's runway was cratered and the fuel depot destoryed with one B-24 destroyed and three damaged. Another Betty was shot down while back, 14 Bettys returned with damage. A personal commendation was given from the command to Chief Petty Officer Torao Maruoka, senior navigator of the 3rd Chutai, in the lead aircraft's crew for outstanding bravery, taking control and managing to land the riddled bomber, with the pilot and copilot dead or badly wounded. On July 6, the last daylight raid on Darwin took place, followed by night raids for the next four months. The final raid from 753 Kokutai was in the night of November 11–12, with one shot down, the one of commander Michio Horii, and deputy Takeharu Fujiwara. The raids on Darwin were abandoned.
East Indies and India
In November 1943, the depleted 705th Kokutai arrived in Padang, southern Sumatra, for R&R and last missions over New Guinea and the Solomons. It started by ocean patrol duties with the 753rd Kkt, later recalled to the Central Pacific from November 1943 to January 1944. In December 1943, 705th Kokutai made its longer range bombing operation against India propoer, with 9 G4Ms to Toungoo Airfield, Burma. By December 5, it met 27 Zeros from 331st Kokutai over Magwe, and they raided Calcutta. But the sortie was pure propaganda to boost the Navy image compared to the Army's air force. They all returned unharmed. By February 1944, the 705 Kokutai flew to Peleliu, Palau to counter American pressure there and only 732 Kokutai remained in the Southwest sector training new crews. It was formed in Toyohashi, Japan, on October 1, 1943. By December it moved to Aiyer Tawar, Malaya. They flew anti-submarine patrols. By April 1944, it was transferred to Digos, Philippines, in anticipation to the expected invasion.The CiC Combined Fleet, Admiral Isoroku Yamamoto, personally arrived in Rabaul on April 3, 1943, to assess the situation on the ground. He ordered the assembly of all available aircraft in the area at Rabaul and Kavieng, to launch a series of major attacks on Allied air forces and shipping. It involved a massive concentration of naval air strikes, under "Operation I-Go", personally commanded by Yamamoto. Most sorties were carried out by fighters and single-engine bombers, and naval attack bomber formations made two sorties. The first on April 12, 1944, with 44 Bettys led by Lt.Cdr. Masaichi Suzuki. 17 from 751st Kokutai, 27 from 705th, escorted by 131 Zeros.

Personal P-38 of ace Richard Bong. P38 Lightning became the greatest "killers" of G4Ms by 1944. Bong himsef shot down 11 in short order.
They attacked Port Moresby airfields from 8,000 meters. The result, one Beaufighter and three B-25s destroyed, c15 more damaged, runways destroyed, fuel depot burned. But P-38 Lightnings inflicted heavy losses: 6 from 751st (7th crash landed) one later crash landed from 705th Kokutai, 11 damaged. On April 14, Lt.Cdr. Shichiso Miyauchi (vet attacker of HMS Prince of Wales) arrived at Rabaul to head the 705th Kokutai. He took off with 26 G4Ms alongside 17 from 751st to strike Milne Bay Airfield. En route, six from 751st Kkt. were lost, 2 by mid-air collisions. P-38s and P-40s over the target, shot three more, a fourth crashed at Gastamata. The 751st Kkt. lost one. By then no less than 11 "Betty" kills were credited to ace Lt. Richard Bong, 9th Fighter Sqn., 49th Group.
Yamamoto is shot down
Misled by the crews' exaggerated reports of a successful attack, Yamamoto decided that Operation I-Go had achieved its objective and declared the operation complete on April 16. To be fair, some damage to the Allies was inflicted, but it was far from expected and certainly had no significant impact on the situation in the region. On April 18, Admiral Yamamoto and his staff boarded two G4Ms bombers from the 705th kokutai at Lakunai Airfield (East Field) in Rabaul and departed for an inspection tour of the frontline bases. The aircraft were destined for Ballale, a tiny Shortlands base on the southern tip of Bougainville, but were never destined to arrive.As is known, the commander's aircraft was ambushed by a group of P-38s from Guadalcanal as a result of American intelligence and a broken Japanese code. Yamamoto died in aircraft #323, commanded by veteran pilot Joto Hiko Heiso (Chief Petty Officer Takashi Kotani). Another aircraft, #326, commanded by Itto Hiko Heiso (Chief Petty Officer) Hiroaki Tanimura and piloted by Nito Hiko Heiso (Petty Officer 1st Class) Hiroshi Hayashu, managed to land near the shore. Chosho (Vice Admiral) Matome Ugaki, Yamamoto's chief of staff, and two others, including pilot Hayashu, were the only survivors. Thus perished one of the Imperial Navy's most capable commanders. As fate would have it, he perished aboard the very aircraft whose creation he had so lobbied for 10 years earlier.
Last South pacific Operations
For the 705th Kokutai, this was not the last loss of the day. April 18. That night, during a raid on Guadalcanal, "Betty" of Chief Petty Officer Sadao Furuya was lost right over the target. He was hit by the cannons of a P-70 night fighter from the 6th Night Fighter Sqn.. Captain Earl S. Bennett recorded the victory, marking the first victory of a USAF night fighter. The cover of night was no longer a refuge for IJNAF bombers. In May 1943, the 25th Koku Sentai returned to the Southeast Region, comprising the 702nd Kokutai (formerly the 4th Ku) and the 251st Kokutai (formerly the Tainan Ku). The 702nd Kokutai, with 47 G4Ms fighters, deployed to Vunakanau (West Field), Rabaul, on May 14 and departed that same night for its first mission. A mission in which six bombers attacked targets on Guadalcanal. On May 14, the 705th Kokutai also returned to Rabaul, having been on rest on Tinian Island since April 27.With the return of these units to Rabaul, the battle-battered 751st Kokutai, in turn, prepared to depart for a well-deserved rest on Tinian. Before that, however, the kokutai was scheduled to fly another mission. On May 14, Lt.Cdr. Nishioka, in the 18th "Betty," under escort of 33 Reisens from the 251st Kokutai, departed for a daylight raid on targets in Oro Bay, at the southern tip of Buna, New Guinea. En route, the Japanese force was intercepted by a large group of P-38 and P-40 fighters from the 49th Fighter Group, which shot down six of the bombers. Shōsa's aircraft was one of the last to be destroyed. Nishioka. Japanese submarines later rescued the crews of the two downed aircraft, but the commander was missing. The 751st Kokutai departed for Tinian as scheduled three days later, but without its commander.
After months of heavy fighting and bitter losses, by mid-1943, the Rikko corps faced a chronic shortage of personnel. This affliction was not limited to naval bomber crews, but was common in both naval and army aviation. And the problem only worsened, despite the formation on April 1, 1943, of a new Rikko operational unit specifically designed for crew training—the "Toyohashi" Kokutai. The new unit flew to Tinian in April, joining the 751st Kokutai, and began its training program. Meanwhile, due to the severe shortage, the 751st Kokutai was forced to reduce its aircraft crew complement from seven to five, abandoning its second. The pilot and nose gunner, whose duties were divided between the navigator and bombardier. This reorganization of Rikko crews soon became standard across all bombardment units of the Imperial Navy.
Most of June 1943 passed relatively quietly. Rikko crews in the southwest Pacific conducted routine patrol flights, interrupted by occasional night missions. But even then, bitter losses were frequent, mostly from gunners of enemy patrol bombers conducting similar missions. The poorly protected and underarmed "Bettys" almost always fell victim to such encounters. On the last day of the month, the Allies took another step in their offensive against Japanese positions, landing simultaneously at Rendova, in the Central Solomon Islands, and Nassau Bay, New Guinea. The Japanese increasingly relied on air transport in the area, not relying on the highly vulnerable Tokyo Express. The actions of the "maritime attack" units were concentrated against Rendova.
To counter Allied actions on Rendova, Rikkō units were ordered to retaliate at the first opportunity by any means necessary. Once again, the aircrews of the naval air force were tasked with launching a suicidal daylight torpedo attack on enemy ships, with 17 G4Ms from the 702nd Kokutai and nine from the 705th, led by Hikotaicho of the 702nd Kokutai, shosha (lieutenant commander) Genzo Nakamura. Valuable time was lost searching for the enemy ships, which were eventually found in Blanche Channel, between Rendova and New Georgia Islands. Unfortunately for the attackers, they found, in addition to the enemy fleet, a swarm of Wildcat fighters and the latest Corsairs.
Only three aircraft from the 702nd Kokutai were able to return to base, including the Nakamura. The fourth Betty crashed on landing, but its crew was rescued. Thirteen others did not return. The 705th Kokutai lost four crew members, and another crashed on landing. In total, 19 aircraft and 17 crews were lost out of the 26 aircraft that took off. About ten Bettys managed to break through the fighter screen and the barrage of anti-aircraft artillery and drop torpedoes. But only one torpedo hit the transport USS McCawley, the flagship of their old friend, Admiral Kelly Turner.
To replace these losses, on July 1, the first Chutai of 751 Kokutai, with 12 aircraft, led by Lieutenant Masao Motozu, was ordered to interrupt recruit training and transfer from Tinian to Rabaul. Two Chutai of 752 Kokutai, comprising 21 "Bettys," led by Lieutenant Goro Nonaka, were also transferred to Vunakanau on July 9 from northern Japan. Earlier, in late 1942, 752 Kokutai had returned to Kisarazu, Japan, from the Central Pacific, swapping with 755 Kokutai (formerly "Genzan"). In the first months of 1943, 752 Kokutai finally replaced its old Type 96 Rikkos with G4Ms. On May 11, 1943, the unit departed for Paramushir, in the Kuril Islands, to support troops defending the Aleutian Islands. However, the polar climate, frequent fog, and appalling weather in the area made air operations extremely difficult.
Nevertheless, on May 22, 19 torpedo-armed G4Ms, led by Lieutenant Taii Nonaka, attacked the destroyer Phelps and light cruiser Charleston near Attu Island, which was delivering reinforcements to the garrison in the Aleutians. The bomber returned to base, losing only one bomber to fog. Despite the optimistic reports from the crews, not a single hit was achieved. The following day, Nonaka Chapter 17 "Betty" returned to Attu again, attempting to bomb American positions, but dense cloud cover prevented accurate bombing. Instead, the Japanese were attacked by a group of P-38 Lightnings. During the 30-minute battle, two bombers were shot down, and a third crashed on landing. The Americans paid for these victories with two Lightnings hit by the Betty's tail guns. The actions of Japanese air bases in the far north had no impact on the outcome of the Battle of the Aleutians, whose garrison ceased to exist by the end of May 1943.
Far to the south, in the sweltering heat of the Central Solomon Islands, daylight missions by Japanese naval aircraft continued into July, during Japanese attempts to prevent Allied landings on New Georgia. On June 7, 1943, during a daylight raid on a group of American transports in Rovianna Lagoon on New Georgia with six aircraft, the 705th Kokutai lost two "Bettys" and one crew in aerial combat. Four days later, another crew failed to return during a mission in Enogai Bay, north of Munda. Losses during the operation on July 15, 1943 were particularly heavy, when the 751st Kokutai lost six aircraft shot down in a 40-minute battle with a group of F4Us, F4Fs, and P-40 fighters over Rovianna Atoll. One of the lost crews was the group leader, taii (Senior Lieutenant) Motozu. Five days later, the 1st Chutai (751 Ku), with only three surviving G4Ms, returned to Tinian, reuniting with the remaining kokutai Sqn.s.
The bomber losses on July 15 put an end to daytime missions for Rikkō's forces, but the aircraft continued to harass the Americans in the Solomon Islands at night. On the night of August 14-15, during a joint operation between 705 and 752 Kokutai, one Betty fell victim to a P-38 night fighter near Guadalcanal. The following night, nine Bettys from 702 Kokutai carrying bombs and seven from 752 Kokutai carrying torpedoes attacked an American transport convoy near Gatukai Island. The only Japanese loss on this mission was one aircraft from 752 Kokutai, destroyed during an unsuccessful landing. In early September, the 752nd Kokutai returned to Japan, although most of its crews were absorbed into the 702nd Kokutai and fought in combat from Rabaul until mid-October. On September 5, the 705th Kokutai withdrew from the combat area to Tinian for rest and replenishment. The 751st Kokutai, stationed there at the time, was sent back to Rabaul in the first week of September. The 705th Kokutai never returned to New Guinea.
Following the Allied landings at Lae, New Guinea, Rikko units launched a new series of daylight raids. On September 4, 1943, the 702nd Kokutai, with 12 aircraft, attempted to attack Allied ships in the area, losing three aircraft and their crews. The group leader made an emergency landing at Cape Gloucester on the southwestern tip of New Britain. The following day, eight "Bettys" from 751 Kokutai bombed an Allied convoy east of Lae without loss. A similar raid was carried out by 17 aircraft from 751 Kokutai on September 6, 1943, with the assistance of dive bombers and fighters. As a result, two Rikkos were lost and two damaged. On September 22, an enemy landing near the port of Finschhafen, 50 miles from Lae, threatened to cut off New Guinea from New Britain – the Dampier and Vityaz Straits were now under Allied control. To counter this threat, IJN headquarters in Rabaul decided there was no choice but to send Rikkos on a daylight torpedo attack, even though everyone knew this would be downright suicidal for most of the crews. Of the eight bombers selected from 751 Kokutai, only aircraft #324, piloted by Chief Petty Officer Jitsuyoshi Kuramasu, was able to return from the mission. Not a single torpedo hit was achieved. Allied successes in the south forced the Japanese to abandon their bases on Buin, in southern Bougainville, at the end of October. Beginning on October 12, 1943, Japanese installations at Rabaul became permanent targets for attack by the US 5th Air Force, which was joined by Navy carrier-based aircraft the following month.
Taisho (Admiral) Mineichi Koga, Yamamoto's successor as commander of the Combined Fleet, launched Operation Ro-Go, which was essentially a repeat of his predecessor's Operation I-Go. Again, he hoped to restore balance in the theater by temporarily deploying carrier Sqn.s to Rabaul and Kavieng. But on the day of their arrival (November 1), American forces landed at Torokina Point, Bougainville, and Operation Ro-Go devolved into a simple tactical operation, consisting of a series of raids on the Torokina beachhead, in which the Japanese suffered heavy losses while inflicting only minor damage.
G4Ms fighters from 702 and 751 Kokutai were to conduct a series of night torpedo attacks against American warships around Bougainville, beginning on November 8. That night, one of the crews succeeded in hitting the light cruiser USS Birmingham with a torpedo, but this success cost seven Bettys, who perished along with their crews. Five aircraft from 702 Kokutai, which took off to attack the Americans on the night of November 11-12, achieved no results, but the following night, Lieutenant Hidezumi Maruyama's aircraft (No. 321) from 702 Kokutai hit the light cruiser USS Denver with a torpedo. Maruyama's bomber sustained 380 holes in its wings and fuselage, but despite this, it managed to return to base and was subsequently written off as beyond repair. On the night of November 16-17, Chief Petty Officer Gintaro Koboyashi of 702 Kokutai hit the old destroyer McKean, which had been converted into a transport, with a torpedo, sinking it. Koboyashi's starboard "Betty" engine caught fire from an anti-aircraft shell, but the pilot managed to extinguish the flames with a sharp maneuver and return to base on one engine.
But, alas, the individual feats of arms and the successes of a few lucky sailors were not enough to halt the Allied advance. On December 1, 702 Kokutai was disbanded, and most of the surviving crew members either returned to Japan or joined 751 Kokutai, which at that time was the only Rikko unit remaining in Rabaul. The 751st Kokutai was selected as the first Rikko unit to receive the new, more powerful G4M variant, the "Model 22 Type 1 Rikko," equipped with a cannon turret on top. In early December, the first 751st Kokutai crews, including Chief Petty Officer Jitsuyoshi Kuramasu, were sent to Japan to receive the first three G4M2 aircraft. However, they soon discovered that the new bomber model was still plagued by problems, despite having entered production in July. By late 1943, the new bomber was still undergoing testing, and plans to re-equip the 751st Kokutai with the new aircraft were shelved, with the aircrew returning to Rabaul with their clearly obsolete G4M1 aircraft.
The 751st Kokutai continued to fight in the face of overwhelming Allied superiority, which was gradually tightening the encirclement around Rabaul. Finally, due to the devastating US Navy carrier raids against Truk, Caroline Islands, on February 17-18, 1944, the Japanese were forced to withdraw all air units from Rabaul. By February 20, 1944, 751 Kokutai had withdrawn its remaining 15 G4Ms to Truk. After the return of 752 Kokutai to Japan in December 1942, the Imperial Navy's bombing operations in the Central Pacific remained solely in the hands of 755 Kokutai (formerly "Genzan"). This unit was the last to surrender its old G3Ms Nell aircraft, beginning to re-equip with G4Ms in the summer of 1943, when the US Navy launched an offensive in this sector, dense with thousands of islands, on September 1.
A US Navy strike group, centered around the new generation of Essex-class carriers, armed with the new Grumman F6F Hellcat fighters, struck Marcus Island. On September 19, enemy carriers struck the Gilbert Islands. The next strike was on Wake Island on October 7. Almost all Japanese aircraft on the island, including 23 Rikkō aircraft, were destroyed or seriously damaged. The American carriers, having dealt a crushing blow, withdrew just as suddenly, leaving the Japanese unable to retaliate. A lull settled over the Central Pacific. But it was the calm before the storm – the Americans had only just begun to deploy massive forces for the offensive against the Empire.
Having completed the rearmament of the new G4Ms aircraft during October, 755 Kokutai concentrated its remaining forces on Kwajalein Atoll. On November 21, the enemy broke ashore at Makin and Tarawa Atolls in the Gilbert Islands. In the last days of the month, the Japanese launched a series of night torpedo attacks against the US fleet with forces from 755 Kokutai and 752 Kkt. On the night of November 21–22, the attacking Betty torpedoed the light aircraft carrier Independence, their only success. All organized resistance by Japanese forces on Tarawa and Makin ended on November 25, 1943.
The next target for the American carriers were the Marshall Islands – Roi and Wotje – which were attacked on December 5. That night, nine aircraft from 752 Kokutai, under the command of Lieutenant Commander Nonaka, and eight G4Ms from 753 Kokutai attempted to attack the American carrier strike group near Roi Island. Although the Japanese lost two Bettys from 753 Kokutai during the attack, they managed to hit the newly commissioned USS Lexington with a torpedo, causing significant damage. On December 7, 1943, 755 Kokutai left the combat area and was withdrawn to Tinian for rest and replenishment, and its place was taken by 753 Kokutai, which had arrived on Roi Island. On the night of January 29-30, 1944, the American fleet concentrated its strikes on Japanese bases in the Marshall Islands. In addition to the eight G4Ms destroyed on the ground, 752 Kokutai lost another six in the air, half of which were claimed by F6F pilot Lt. Alex Vraciu.
The enemy landed on the island. The swarm broke out on February 2, and during the brief fighting, the headquarters of the 24th Koku Sentai, along with units of the 752nd and 753rd Kokutai stationed there, was destroyed. Among those killed on the island was Shosa (Lieutenant Commander) Mieshi Nabeta, a veteran of Malaya and Guadalcanal, who had been assigned as a staff officer to the headquarters of the 24th Koku Sentai.
On the Defensive
On February 18, the Americans landed on Eniwetok Atoll, but by that time the Japanese were practically unable to offer any air resistance, having suffered excessive losses in aircraft during US carrier-based air raids on Truk. Three days later, what remained of the 752nd Kokutai was sent back to Japan for replenishment and rest in Toyohashi. Truk Atoll in the Caroline Islands, the primary stronghold of the Imperial Combined Fleet in the Central Pacific, was one of the most important targets for the advancing Allied fleet. On February 17-18, Truk was subjected to the most vicious and devastating attack by US Navy carrier-based aircraft.Fortunately for the Japanese, the main forces of the Combined Fleet had withdrawn west from Truk a week before the attack. Nevertheless, US Navy aircraft sank over 40 ships moored in the lagoon and destroyed over 300 aircraft. During the carnage unleashed by US air power, the Japanese were only able to mount one counterattack on the night of February 17-18, when Betty bombers from 755 Ku-17s launched from Tinian torpedoed the aircraft carrier USS Intrepid, putting her out of action for several months. The impact of the Truk raids was felt very quickly. IJN air units at Rabaul, now unable to be replenished and having suffered terrible losses, were withdrawn from New Guinea. Active Japanese air activity in the southeastern zone was ended. The air losses at Truk also forced the IJN high command to deploy elements of the 1st Air Fleet to the Mariana Islands before their training was complete.
These units were sent as second-line units of the 1st Air Fleet, forming a sort of mobile reserve for use in the decisive Battle of the Mariana Islands in the summer of 1944. The first unit of this type in the 1st Air Fleet was the 761st Kokutai, also known as the "Ryu" Butai or "Dragon" unit. This unit was founded on July 1, 1943, when the 761st Kokutai began training in Kanoya and was given priority for equipping with the new G4M2 Model 22 bombers. This was another attempt to adopt the new "Betty" modification after the failure of the 751st Kokutai at Rabaul. Immediately following the American raid on Truk, the 761st Kokutai was immediately dispatched to the Central Pacific in an attempt to replace the massive losses in aircraft. On February 22, the 761st Kokutai, equipped with 24 new Type 1 Rikko Model 22 bombers, arrived at Tinian. That same evening, patrolling aircraft discovered an American carrier strike group, and the following morning, the entire 761st Kokutai force attempted to attack the enemy carriers. All 24 Kokutai 761 "Bettys" were shot down by fighters on approach, and not a single hit was scored on the American ships. That same morning, February 23, 1944, US Navy carrier-based aircraft dealt a crushing blow to Japanese targets in the Mariana Islands, concentrating on Saipan and Tinian. The 1st Air Fleet's base aircraft were then almost completely destroyed.
Japan was retreating across the Pacific, its island bases often isolated as the Allies consolidated their air and naval supremacy. IJNAF units now faced a shortage of qualified mechanics. Pilots could fly from one base to another, but experienced ground crews were often abandoned to their fate on the islands. On March 4, 1944, to ensure greater mobility for its air operations, the IJN command undertook another reform of its naval air base units, the kokutai. Individual Sqn.s (hikotai) were separated from the kokutai and established as independent units known as tokusetsu hikotai (special independent Sqn.s), with their own designations. The kokutai essentially became ground support and service units. In theory, this should have allowed the hikotai to operate more freely, operating from different bases as needed, depending on the operation. The new system was not implemented immediately across all naval air base units, but was implemented in stages as needed. Under the new system, on March 4, 1944, the 755th and 751st Kokutai were divided into these independent tokusetsu hikotai. Half of the Attack (Kogeki) formation, Hikotai 701 (K701), formally belonged to the 755th Kokutai, and Hikotai 704 (K704) belonged to the 751st Kkt.
The 705th Kokutai was also reformed at this time, its aircraft and aircrew being converted into Kogeki Hikotai 706 (K706), operationally subordinate to the 755th Kkt. Thus, the 755th Kokutai now consisted of two hikotai, K701 and K706, while the 751st Kokutai consisted of only one K704. Each hikotai had the standard complement of 36 aircraft, plus 12 in reserve, but the actual complement was often significantly smaller due to the severe aircraft shortage. Throughout March, Rikko's units, battered by American carrier raids, attempted to rebuild their numbers by building up their forces. On the night of March 9, 1944, K706 aircraft carried out a successful long-range raid against the American base on Eniwetok Atoll without losses, but such actions proved exceptional.
Within a month, Rikko units were withdrawn to Peleliu Island in the Palau Islands, and by the end of March, elements of the 761st and 751st Kokutai were largely concentrated there, while the 755th Kokutai was based in the Marianas and Truk. These forces were supplemented by Yokosuka Kokutai, which had deployed to Tinian by March 28 and was equipped with 18 of the newest Type 1 Model 22 fighters. Yokosuka Kokutai had previously served as an operational test unit for the IJNAF. In this capacity, it remained on the front lines only until April 14, after which it returned to Japan. Deck-based aircraft from American carriers attacked Palau on the night of March 30-31. The day before, on the night of March 29, 1944, A large "Betty" force consisting of the 761st, 751st, 755th, and Yokosuka Kokutai attempted to attack the enemy carrier strike group far from their bases on the islands of Peleliu, Tinian, and Guam. But the Japanese fleet once again achieved no results, and the scale of their own losses in ships and aircraft was second only to those at Truk a month and a half earlier.
On April 1, 1944, three more new independent hikotai were formed. The 752nd Kokutai became hikotai K703; the 753rd Kokutai became hikotai K705; and the "Toyohashi" Kokutai, which only became a combat unit on February 20 and was redesignated 701st Kokutai, now became hikotai K702. Later, on May 5, the 732nd Kokutai was also detached as a separate Sqn., K707. On April 22, American forces landed at Hollandia, and the focus of IJNAF air operations shifted back to New Guinea. That same day, Kokutai 732 deployed to Sorong, on the western tip of New Guinea, where it was joined 24 hours later by Kokutai 761 and Kokutai 755. Intensive American air activity on Sorong made operations from that base extremely problematic, and Kokutai 761 and Kokutai 755 returned to their bases in the Mariana Islands by May 1.
The American landing on Biak Island on May 27 provoked a Japanese response, which enacted Operation Kon, an effort to repel the Allied forces landing on the beach. That evening, 20 G4M bombers from 732 and 753 Kokutai bombers approached Wasile, in Halmaheras, from Digos Airfield (Davao, Airfield No. 3) on Mindanao. On the night of May 28, a force of 13 aircraft torpedoed a transport convoy east of Biak. The results were modest, and five aircraft were lost. On May 31, seven Rikkos again torpedoed Allied transports near Biak, losing one "Betty" in the attack.
Several more night torpedo attacks were conducted from Sorong in early June, but the Japanese forces were quickly depleted, and subsequently, naval bomber operations were limited to small harassing raids by two or three aircraft. Such raids could still cause serious damage, particularly against the American airfield at Wakde, halfway between Hollandia and Biak, where the American Fifth Air Fleet was concentrated, its aircraft tightly filling the small airfield. On the night of June 5, two G4Ms from 753 Kokutai, led by Shoi (Lieutenant) Isao Sunayama, managed to destroy six American aircraft and damage 80 others at Wakde. During a second raid on the night of the 7th-8th, three aircraft from the same unit inflicted even greater American losses.
On June 11-12, the Americans began preliminary operations for the Battle of the Mariana Islands, and the IJNAF's attention shifted again to the central Pacific. On June 12, the islands were subjected to massive air strikes by US carrier-based aircraft, and the following day, Saipan was shelled by American battleships and cruisers. It was clear that the enemy was preparing a large-scale invasion of the Mariana Islands, the very heart of Japan's defense system in the central Pacific.
Battle of the Marianas
Biak and western New Guinea were finally abandoned, and the Combined Fleet began preparations for Operation A-Go, the long-awaited showdown with the US Pacific Fleet. Preparations for this decisive battle with the Americans had been underway well before the summer of 1944 and involved close coordination between carrier-based aircraft, Chōshō (Vice Admiral) Jisaburo Ozawa, and the naval aviation of the First Air Fleet. But by this time, the enemy had proven its overwhelming superiority in the quality and quantity of combat equipment and personnel. The Battle of the Mariana Islands has been well documented, and there is no point in recounting its course here. Therefore, only those facts concerning the participation of Rikko units can be described. Operation A-Go failed from the outset, as the Japanese failed to consolidate their carrier-based and naval aviation. The Americans had already destroyed the core of the naval and army air forces on Saipan and Tinian before Jisaburo Ozawa's fleet arrived. Thus, the Combined Fleet, engaging American forces on June 19-20, was left without support from the islands' naval air forces. The battle between Japanese and American carrier-based aircraft, unofficially dubbed the "Great Mariana Turkey Hunt" by the Allies, ended in complete defeat for the Japanese.By the summer of 1944, it was already clear that the G4Ms was hopelessly outdated. At that time, front-line units began receiving the Betty's successor – the high-speed naval dive bomber "Ginga" P1Y1 "Francis" by the Allies. The remaining large numbers of G4M naval attack aircraft of various modifications were relegated entirely to night operations and patrol duties. G4Ms aircraft from the 761st, 751st, 755th, and 753rd Kokutai based on Tinian, Guam, and Peleliu participated in the Battle of the Marianas in only small numbers. These units were later reinforced by a Rikkō detachment assembled from the Yokosuka Kokutai and the 752nd Kokutai, known as the "Hachiman" group (named after the Shinto god of war), which was based on Iwo Jima. Despite the high training of their crews, they were unable to achieve any significant effect; the enemy defenses were already so formidable that most of the crews and aircraft were destroyed long before they could attack.
Following the horrific losses of equipment and personnel in the Battle of the Mariana Islands, the IJNAF undertook a radical reorganization of its surviving air units on July 10, 1944. Among the Rikko units, the 732nd, 751st, 753rd, and 755th Kōkūtai, as well as the 701st, 705th, 706th, and 707th independent Hikotai, were disbanded. The remaining units equipped with Type 1 Rikko bombers were K702, assigned to the 701st Kū, K703, assigned to the 752nd Kū, K704, assigned to the 761st Kū, and the newly formed K708, from the 762nd Kōkūtai. After the fiasco in the Mariana Islands, many in the Imperial Japanese Navy began to feel the war was lost. It was clear that conventional air attack tactics against the American fleet were associated with enormous losses and minimal results. A countermeasure was urgently needed. Following the defeat at the Mariana Islands, "Betty" units of K704 conducted a series of operations against the US fleet from their base on Mindanao in September and early October 1944. K702, from the 752nd Kokutai, arrived at Clark Field on Luzon in September, and K704 also appeared in the Philippines in late October. However, after the American landings on Leyte, K704, having suffered enormous losses, returned to Japan in November 1944.
Meanwhile, in Japan, a tactical formation known as "T-Butai," roughly translated as "Typhoon Force," was formed from K708 and K703 aircraft of the 762nd Kokutai. Its primary mission was to attack US carrier strike groups under the cover of poor weather conditions at low altitude. Ultimately, the T-Butai's tactics boiled down to attack at any cost, practically equivalent to the ramming tactics of the Tokkotai units. The two hikotai, K708 and K703, along with other units, practically exhausted their offensive potential in a series of desperate attacks on the US fleet near Taiwan between October 12 and 14, 1944, expending more than half of their available aircraft.
During the replenishment period, K703 carried out strikes against American bases in the captured Mariana Islands, home to B-29 airfields, which launched their first raid on Japan on November 2. Two weeks later, K703, K708, and K702, having received reinforcements, transferred to Clark Field, Philippines, joining the 763rd Kokutai, which was formed on October 10, 1944. These three hikotai undertook a series of missions in Leyte Gulf, and by the end of November, the badly battered K703 and K708 returned to Japan. K702 remained in the Philippines until the end of the campaign and was virtually destroyed. Its remnants were withdrawn to Taiwan in January 1945.
Upon returning to Japan from the Philippines, K704, along with K703 and K708, took part in a series of night raids on B-29 bases in the Mariana Islands on November 28 and December 7. Following the American landings on Iwo Jima on February 19, 1945, K704 participated in several night raids from Kisarazu. On March 5, 1945, it was assigned to 706 Kokutai, the last "marine attack" unit formed during the war. The Rikko units' final raid on American positions on Iwo Jima took place on the night of March 25-26, 1945, after which all attention shifted to the Okinawa area.
In August 1944, it became clear to the more sober-minded members of the Japanese Navy that unconventional tactics were the only way to avoid Japan's defeat in the face of the growing Allied power. This served as the justification for the use of suicide pilots. One of these officers was Mitsuo Ota, a transport pilot from the 405th Kokutai, who proposed using a rocket-powered aircraft for kamikaze pilots. With the help of staff from the Aeronautical Research Institute at Tokyo University, Ota developed an aircraft design based on his proposal and presented the drawings to the 1st Naval Aircraft Technical Arsenal in Yokosuka. Ota's proposal was favorably received by the Navy, which supported the project. Detailed development of the aircraft was led by Masao Yamano, Tadanao Mitsugi, and Rokuro Hattori.
The aircraft, designated MXY7, was designed for launch from a carrier (primarily for coastal defense). After launch, the MXY7 glided toward its target and then accelerated using three solid rocket boosters, which could be used simultaneously or sequentially. This tiny aircraft was constructed of wood and readily available metals, allowing for the use of unskilled labor. Since the aircraft was to be used only once, and by a poorly trained pilot, instrumentation was minimal, and high maneuverability was required for accurate target engagement.
The development and production of the prototype airframes took several weeks, and by September 1944, ten MXY7s were ready. The aircraft was designated "Naval Special Assault Aircraft 'Okha' (Cherry Blossom) Model 11." The first aircraft carried a 1,200 kg (2,600 lb) warhead in the nose. The Type 1 Rikko Model 24 Tei (G4M2E) bomber with a specially modified bomb bay was to be used as a launch vehicle. Three Type 4 Mark 1 Model 20 booster rockets provided 800 kg (1,600 lb) of thrust for 8-10 seconds. Unpowered flights began in Sagami in October 1944, and the first rocket burn was used in Kashima the following month. The tests were successful, and unmanned trials at Kashimo in January 1945 allowed for the following flight characteristics to be determined: speed at 3,000 meters in a dive reached 450 km/h, and with the boosters engaged, 650 km/h.
Without waiting for final testing, the Navy ordered serial production of the aircraft, and 852 Okha Model 11s were produced from September 1944 to March 1945. Of these, 155 were delivered by the 1st Arsenal in Yokosuka, and the remainder by the 11th Arsenal in Kasumigaura. The wings and tail units were produced at Nippon Hikoki and Fuji Hikoki in Kanegawa. Deliveries of the first Okha began in September 1944, and the recruitment and training of volunteers to pilot the new weapon began at the same time. Thus, even before the birth of the Tokkotai, the "Shimpu" Special Attack Corps, there were already volunteer pilots in the Philippines training to carry out one-sided suicide missions.
On October 1, 1944, the first operational unit to use Ohka flying bombs was established at the 721st Kokutai. The commander of the 721st Kokutai was Taisa (Captain 2nd Rank) Motoharu Okamura, a veteran fighter pilot and ardent proponent of taiatari (ramming) tactics. Shosa (Lieutenant Commander) Goro Nonaka, former commander of the 752nd Kokutai and a veteran of countless night torpedo attacks in the Central Pacific, became the hikotaicho of the new unit, and on November 15, 1944, the 1st Hikotai of the 721st Kokutai became K711 under the command of Goro Nonaka. On December 20, K708, under the command of Lieutenant Commander Jiro Adachi, was transferred from the 762nd Kokutai as the 2nd Hikotai of the 721st Kkt. In keeping with the specific nature of their Ohka carriers, the unit received the name "Jinrai" (Divine Thunder).
The head of the Aircraft Technical Arsenal, Chōshō (Vice Admiral) Misao Wada, made it clear that if the Rikko/Ohka combination was used in a local air superiority situation, the chances of success were virtually nonexistent. The Ohka 11 missile weighed 2,140 kg, which was practically the maximum weight for the Type 1 Rikko Model 24 Tei carrier. The carrier would struggle to reach an altitude of 5,000 meters, burning fuel at an alarming rate. There was a significant risk that the carrier would be shot down long before reaching the Ohka's effective range, which was only 20 nautical miles. Having moved to shore bases on Kyushu Island in February 1945, 721 Kokutai was merely biding its time. High hopes were pinned on the new weapon, but the unit was beset by adversity from the very beginning. On March 18, K708 was ready to launch Jinrai's first mission. However, before the Rikko/Ohka combination could take off, the base was attacked by US carrier-based aircraft. Almost all the materiel was destroyed on the ground, and the mission was cancelled.
On March 21, K711 Jinrai, led by Shosa (Lieutenant Commander) Nonaka, managed to launch 18 aircraft, 15 of which were Bettys carrying Ohkas. The Imperial Navy believed that the three days of previous attacks by Kyushu-based aircraft had severely weakened the American strike group TF 58, and that the Ohka-equipped bomber group would be able to approach the American carriers unhindered, but this was profoundly mistaken. Although 30 Reisens were assigned to escort the bombers, they were unable to repel the American interceptors. Within 20 minutes, all 18 Bettys were shot down by F6F Hellcats from VF-17 and VBF-17 from the carrier USS Hornet, and not a single Ohka managed to separate from the carrier. These losses led to K711 being disbanded on May 5, and K708 assumed the operational hikotai role. This unit subsequently conducted a number of smaller Jinrai missions, primarily at night, and continued to exist until the end of the war.
On April 1, 1945, the Americans began landing on the last bastion of Japanese defense – the island of Okinawa. That night, K708 attempted its first mission, "Jinrai," with six Bettys carrying Ohka bombers. Only one bomber returned from the sortie; two were missing, two were shot down, and one was lost on the return flight during an emergency landing in Taiwan. It is difficult to judge the effectiveness of this sortie. It is believed that one of the Ohka bombers hit the battleship West Virginia (BB-48) that day, but postwar analysis refutes this. It is known that during this raid, the battleship was hit by two suicide pilots, and the total losses were four killed and seven wounded.
That same day, hits by Shimpo aircraft were recorded on the transports Alpine, Achernar, and Tyrrell, but Ohka's involvement in these damages is also unlikely; at least according to eyewitness accounts, the attacks were carried out by conventional aircraft. Specifically, a twin-engine Betty bomber of unknown origin crashed into the Tyrrell, destroying its bridge, radio antenna, and landing craft. The ship fortunately suffered no crew losses. Since specially trained Tokkotai units equipped with G4M bombers were not deployed that day, it was most likely simply an act of desperate self-sacrifice by one of the combat crews.
The Battle of Okinawa was marked by the massive use of special attack aircraft—Tokkotai—known as Operation Kikusui (Floating Chrysanthemum). Contrary to popular belief, no special attack units were created during this period based on units equipped with G4Ms bombers. All ramming attacks carried out by Betty pilots were initiated from below, and strictly speaking, they cannot be classified as shimpu or kamikaze. The primary mission of Betty units off Okinawa, such as those of the 721st Kokutai, consisted of routine nighttime torpedo and bombing attacks from bases on Kyushu and Taiwan.
K704s from the 706th Kokutai, based on the southern coast of Kyushu, performed similar missions, while the 801st Kokutai, which included heavy flying boats and a large number of G4M bombers as part of the Teisatsu (patrol) Hikotai 703 (T703), was primarily engaged in reconnaissance, patrol, and anti-submarine operations. T703 was formed on March 15, 1945, from the former Tokusetsu Hikotai K703. Later, T707 and T709, also equipped with the Betty, joined the same 801 Kkt. Stationed in Taiwan, K702, from 765 Kokutai, was reassigned to the Tokkotai's "Special Attack" missions in late April 1945, and was likely the first such unit equipped with G4M bombers during the Battle of Okinawa. K701, whose equipment and personnel had previously belonged to the 13th Kokutai training unit, joined 765 Kokutai and was hastily transferred to Taiwan from Malaya and the East Indies. K701 also underwent training for shimpu ramming attacks and began combat operations in May.
K708 resumed its "Jinrai" missions on April 12. Eight Rikkos from MXY7 Ohkas took off early in the morning as part of a large force of Special Attack aircraft of various types. The carriers managed to launch six Ohkas. This time, the attack was successful. The Ohka's victim was the destroyer DD-733 Mannert L. Abele. In the afternoon of 12 April 1945, the Mannert L. Abele was repeatedly subjected to massive suicide attacks, but managed to avoid them for the time being. The destroyer's anti-aircraft gunners managed to shoot down at least four kamikazes. At approximately 2:43 PM, a small aircraft struck the destroyer's starboard side at an angle of approximately 30 degrees, penetrated the side of the ship, and exploded in the engine room. This is how eyewitnesses described the Ohka's first success. The Mannert L. Abele immediately lost power, and the ship's power supply was completely disrupted. Because the force of the explosion was directed downward, the destroyer's keel was broken off behind the second funnel. The fire control system was completely disabled.
At approximately 2:46 PM, the Mannert L. Abele struck the second Ohka. The strike also struck the starboard side, just above the waterline. Almost immediately, the ship broke in half and sank within 10 minutes. Seventy-three crew members perished along with the ship. The other destroyer, the Jeffers (DD-621), which was assisting the sinking, was also hit by a flying bomb, but the destroyer's antiaircraft gunners managed to shoot down the Ohka just 40-50 meters from the ship.
The third ship attacked by the Ohka on April 12 was another destroyer, the USS Stanly (DD-478). A swarm of American fighters and Japanese aircraft circled above the ship, attempting to break through to the fleet ships. The aircraft were locked in close combat, and the destroyer's antiaircraft gunners were unable to fire for fear of hitting their own. Suddenly, an Ohka flying bomb emerged from the maelstrom of aircraft and began a high-speed dive toward the destroyer. According to eyewitnesses, the aircraft was traveling at over 500 knots at the time, and the destroyer's antiaircraft gunners simply had no time to react. The Ohka struck the ship's port side at a steep angle, approximately 1.5 meters above the waterline, and pierced the ship completely. This saved the ship; the Ohka's warhead exploded in the water. A few minutes after the first attack, another Ohka narrowly missed, passing over a sailor's head and knocking the fire hook from his hand. It then fell into the water and broke apart.
During this attack, five Rikko carriers were lost, and a sixth crash-landed on Taiwan. During a daylight raid on April 14, 1945, by seven Ohka-based Bettys, all carriers were shot down well before reaching their target. On April 16, 1945, an attempt by six Rikkos to attack the US fleet with flying bombs also ended in the destruction of the entire group. In May, K708 switched to nighttime attempts to break through to its target. On May 4, seven Ohka-based Bettys succeeded in attacking the American ships. One Ohka hit the destroyer-minesweeper USS Shea (MMD-30). Then, at 8:54 a.m. Observers on the destroyer spotted a lone Betty bomber at a range of approximately 6 miles.
The ship's anti-aircraft gunners immediately opened fire and shot down the enemy, but the bomber managed to launch an Ohka flying bomb. It instantly dove toward the ship and struck the starboard side near the bridge, passing through the sonar room and the chart room, and exploded on the port side just above the water's surface. A fire broke out on the ship, communication was lost, the controls for 5-inch gun mounts No. 1 and 2 were disabled, as was the sonar, and the port 20mm anti-aircraft gun was destroyed. Twenty-six sailors and one officer were killed. Ninety-one were injured to varying degrees.
Another Ohka attacked the corvette Gayety (AM-239), but the Japanese pilot missed and crashed into the water a few meters from the ship. Of the seven carriers, only one returned to base. On May 11, 1945, four more "Bettys" from the "Ohka" attempted to attack the American fleet. This time, the radar picket destroyer "Hugh W. Hadley" (DD-774) fell victim. At 9:20 a.m., it was attacked by 10 Japanese aircraft simultaneously. Anti-aircraft gunners destroyed all 10. However, two suicide bombers managed to hit the destroyer. While the damage control party was busy extinguishing the fire, the "Ohka" dived on the ship, hitting the stern. The explosion was very powerful, followed by a massive fire, and most of the crew abandoned ship. 52 crew members were killed and about 100 were injured. However, the ship was kept afloat, although it was never fully repaired.
On May 25, 11 "Bettys" from the "Ohka" attempted to attack the US fleet again, but were forced to return due to bad weather. On the night of June 21-22, six Rikkos from Ohka departed for Okinawa but achieved no success. Four of the carriers failed to return and scored no hits on the American ships. At dawn on June 22, the remnants of Chōshō (Colonel General) Ushijima's 32nd Army on Okinawa ceased resistance. However, routine Rikkos attacks and patrol flights in the Okinawa area continued until the end of the war. One of the last G4M bomber sorties, albeit with only two aircraft from the 801st Kokutai, took place on the night of August 12, 1945, when they attempted to attack supply ships in the Okinawa area.
By June 1945, all major Japanese cities had been reduced to rubble by armadas of B-29s operating from bases in the Mariana Islands and later Okinawa. The Japanese made desperate attempts to attack these bases. Until the loss of Iwo Jima, long-range bombers from both the Army and Navy periodically carried out night raids on B-29 airfields. But by the spring of 1945, this had become impossible. On May 24, 1945, Japanese Army special forces carried out a sabotage operation against a newly commissioned B-29 airfield on Okinawa. Ten Type 97 (Ki-21 "Sally") heavy bombers, specially converted into transports, landed a detachment of commando-paratroopers who managed to destroy several American bombers on their parking lots. The results were encouraging, and the Navy decided to undertake a similar operation, but on a much larger scale. The IJNAF developed an operation to attack B-29 airfields at bases in the Mariana Islands.
On June 24, 1945, two operational plans, codenamed "Tsurugi" (Sword) and "Retsu" (Fury), were developed for this purpose. Project "Retsu" envisioned an assault on a B-29 base using thirty specially modified Ginga PlY1 bombers, half of which were armed with 17 20mm cannons—two in the nose, and the remaining 15 mounted in the bomb bay at an angle forward and downward. Project "Tsurugi" consisted of twenty modified G4M "Betty" bombers, adapted to carry paratroopers with weapons and motorcycles. The "Tsurugi" transports were to follow immediately behind the "Retsu" attack aircraft and, after attacking the airfield, land and disembark the troops. The surviving Gingas, having expended their ammunition, were also supposed to land, and their crews would join the landing force. The paratroopers were expected to destroy as many B-29s as possible on the airfield before dying honorably.
Many of the G4M Tsurugis were modified, with most of their armament removed, including the dorsal gun turret, resulting in a more streamlined fuselage. Both projects were operationally subordinate to the 706th Kokutai headquarters, with the Ginga attack aircraft assigned to Hikotai K405, and the Bettys to Hikotai K704. Tsurugi crews and paratroopers were trained at Misawa Air Base and several other bases in northern Honshu. The training was rigorous. Commando training took place using full-scale wooden B-29 mockups and captured B-29 crew members, who were interrogated for details of the bomber base locations and security. The mission participants wore US Air Force ground control uniforms.
The operation was planned for late July, but a carrier-based air strike on targets in northern Honshu, including Misawa Air Base, on July 14-15 disrupted the preparations. Many of the prepared aircraft were destroyed on the ground, and the operation was postponed until the following month. Meanwhile, the scale of the operation was expanded, additional G4Ms bombers were scraped together from the Empire's reserves, and additional volunteer paratroopers were found. The new plans also included hijacking a B-29 to Japan, which was to be carried out by G4M crews. One of the Superfortresses crashed near Nagoya during a forced landing, providing a near-complete picture of the B-29's flight capabilities, and the Japanese were supremely confident they could pilot the American heavy bomber once it was airborne.
Finally, 60 G4Ms, converted into transports, were prepared to deliver 300 naval commandos from the 101st Independent Naval Landing Battalion, along with 300 Army paratroopers from the 1st Regiment, to the Marianas. The groups were to be divided equally into three sections of 20 aircraft each. The naval commandos would land on Guam, while the Army paratroopers would attack targets on Saipan. The combined Army and Navy force would strike Tinian. After completing the task of sabotaging the airfields, the surviving paratroopers and aircraft crews would have to continue fighting as partisans. The operation was planned to take place during the full moon between August 19 and 23. However, Allied intelligence caught wind of the planned Operation Tsurugi, and on August 9, a massive US and British carrier-based air strike was launched against the northern airfields of Honshu. As a result, twenty-nine Bettys and twenty Gingas were destroyed. The operation was postponed, and Japan surrendered on August 15.
Last combat Days
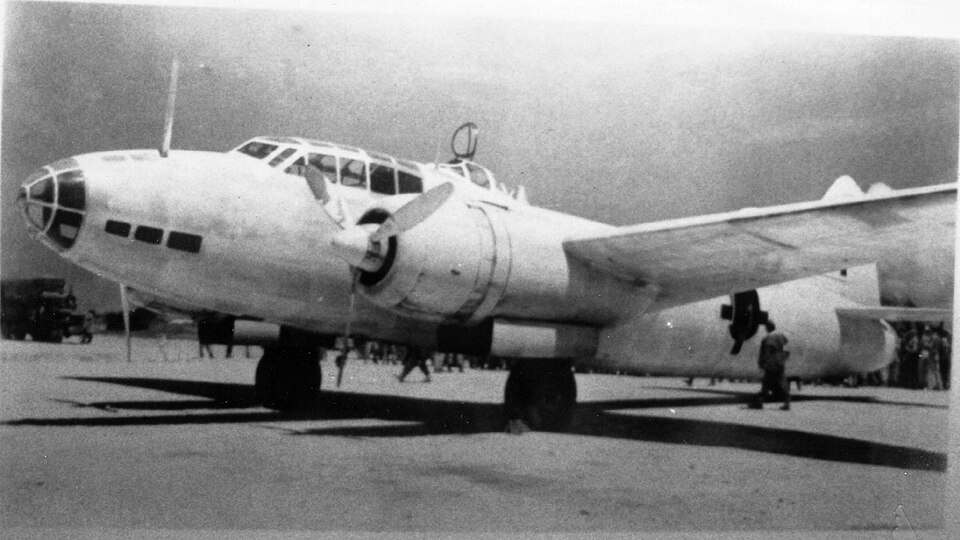
On August 19, veteran naval bomber pilot Taii (First Lieutenant) Den Sudo of the Yokosuka Kokutai took off from Kisarazu Air Base in command of two Bettys. His mission was to deliver the Japanese delegation to the surrender negotiations. One of the aircraft Sudo piloted was a veteran G6M1-L transport, and the other was an old friend, the Type 1 Rikko Model 11 (G4M1). On orders from General Douglas MacArthur's headquarters, both aircraft were painted entirely white. Dark green crosses were painted on the upper and lower wings, fuselage, and vertical tail surfaces in place of the hinomaru insignia. The aircraft were to deliver a 16-person delegation, led by Chōshō (Colonel General) Torashiro Kawabe, to the tiny island of Le Chima near Okinawa. There, General Kawabe and his delegation were to board a USAF C-54 transport plane and fly to Manila to receive detailed instructions from the Allied command regarding surrender.
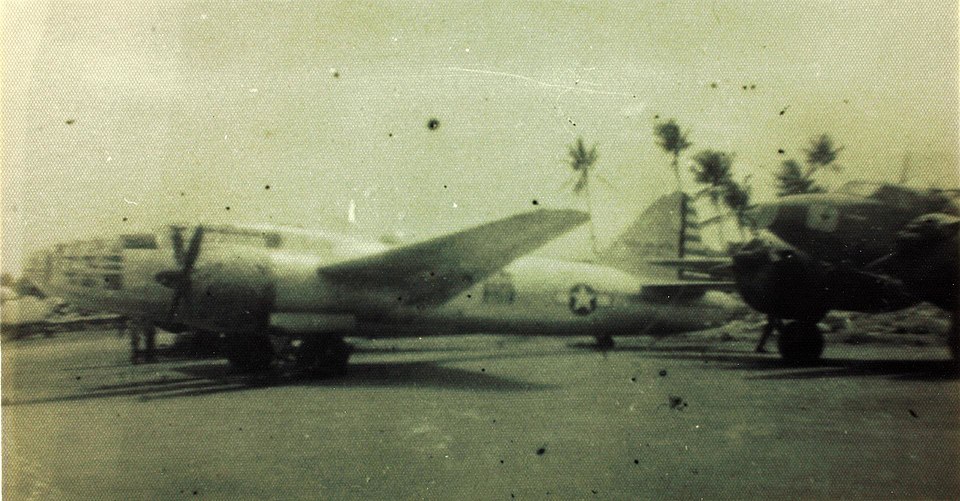
The Japanese aircraft crews waited for the delegates overnight at Le Chima airfield, and after the delegates returned from Manila the following day, Sudo piloted his plane carrying General Kawabe and ten of his companions on the return journey. An unexpected fuel leak during the flight forced it to make an emergency landing near the mouth of the Tenryu River. Fortunately, no one was injured. The second aircraft remained at Le Chima for another day for minor repairs, but it soon returned, safely reaching Kisarazu Air Base with the remaining members of the delegation. Thus ended the last official mission of the G4M "Type 1 Rikko" "marine attack aircraft."

One of the most famous livery was for the model 11s that carried the delegation to Ie Shima island on Aug.19, 1945 for the preliminaty surrender talks. This was a converted transport model, with a livery following allied guidelines. Note on the photo below, the original upper camouflage still shows through.
According to the final instructions from the American command, the Imperial Navy was to disband its Special Attack units first, with particular attention given to the "Jinrai" (Divine Thunder) unit of the 721st Kokutai. Given the unit's specific mission—carrying Okha bombs—and the strong patriotic sentiment within the unit, the IJNAF command sought to implement the victors' will as quickly as possible, fearing a repeat of the uprising that had occurred at Atsugi Air Base in the first days after the surrender. On August 23, 1945, the G4M bombers took off for the last time from Komatsu Air Base in Ishikawa Prefecture, the final resting place of the 721 Kkt. Once again, the base was filled with the sound of Kasei engines as the Rikkos taxied for takeoff. They scattered to airfields across Japan, carrying their surviving sons home to their families.
Gallery
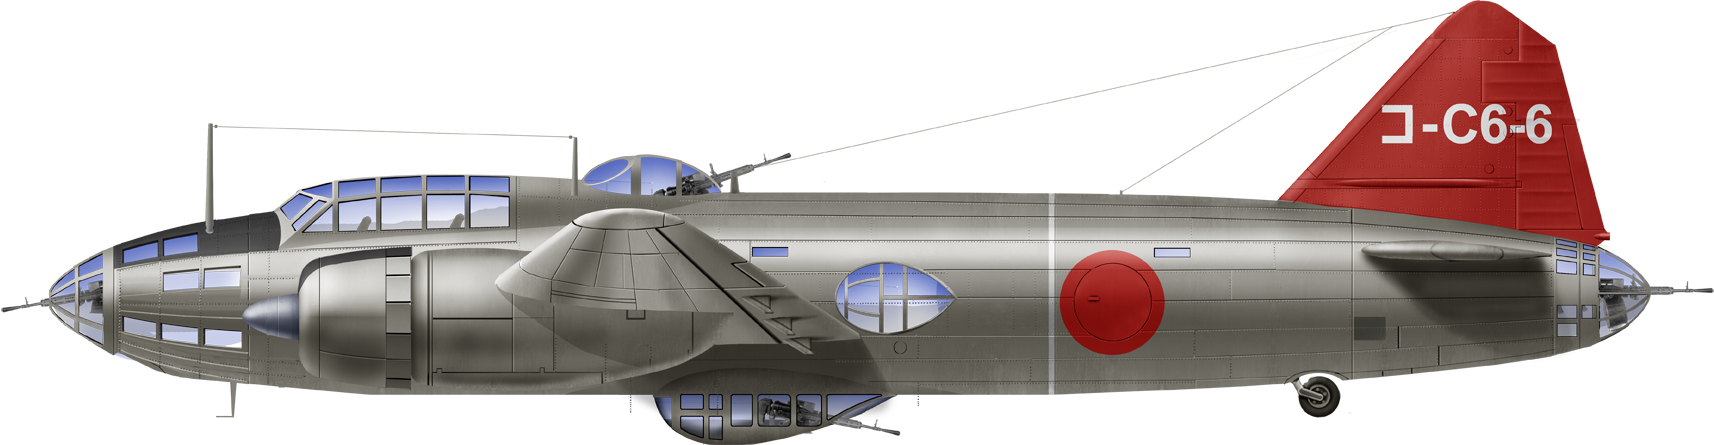
G6M1, Naval Air Tech Arsenal Late 1940
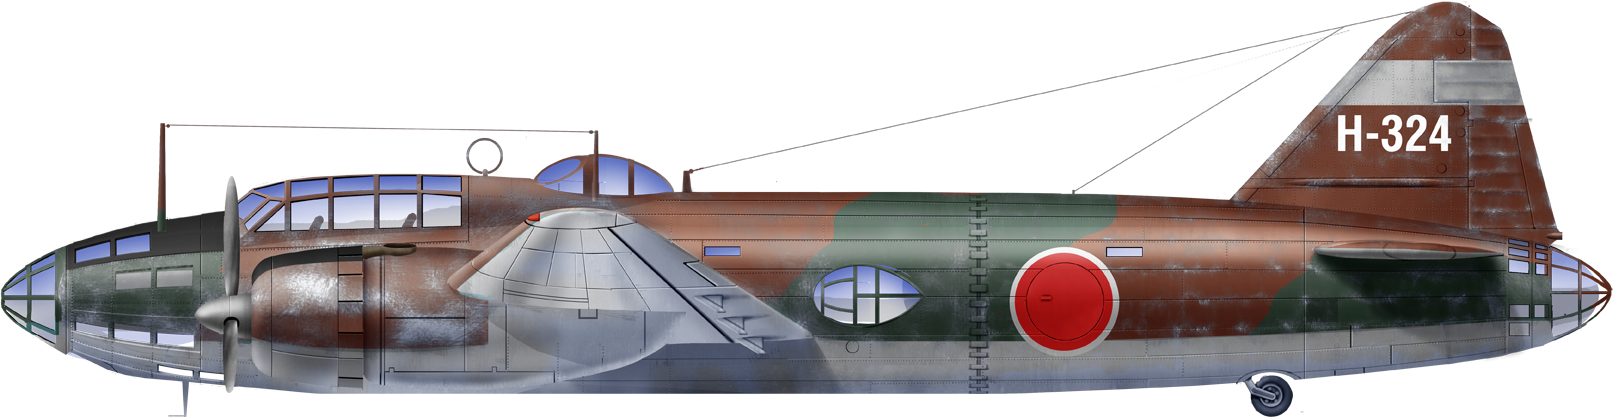
G4M1 Kanoya Kokutai, Formosa Dec. 1941
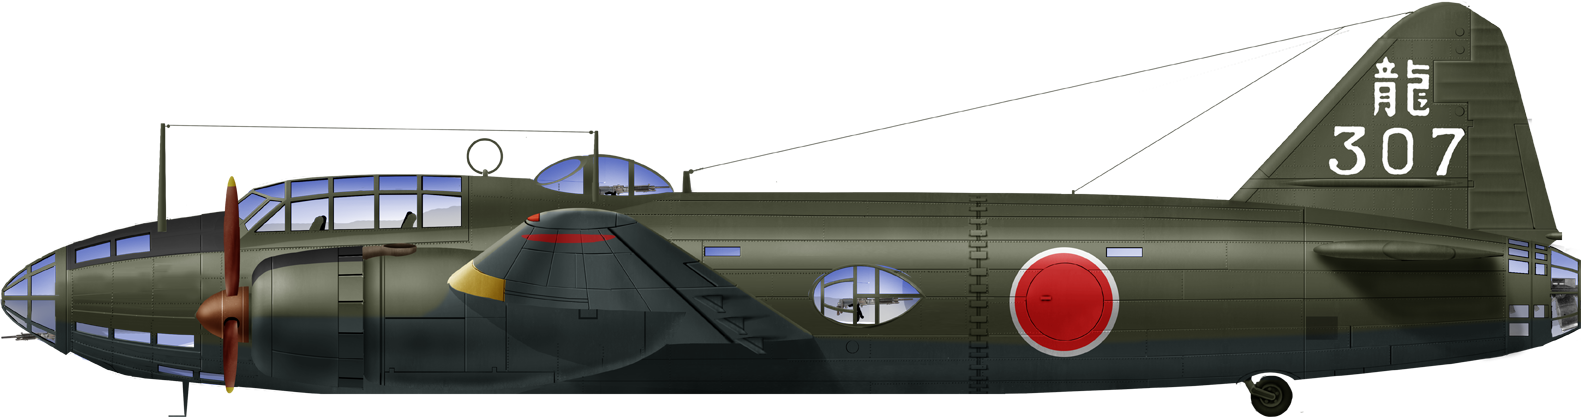
G4M1 761 Kokutai Kanoya 1943
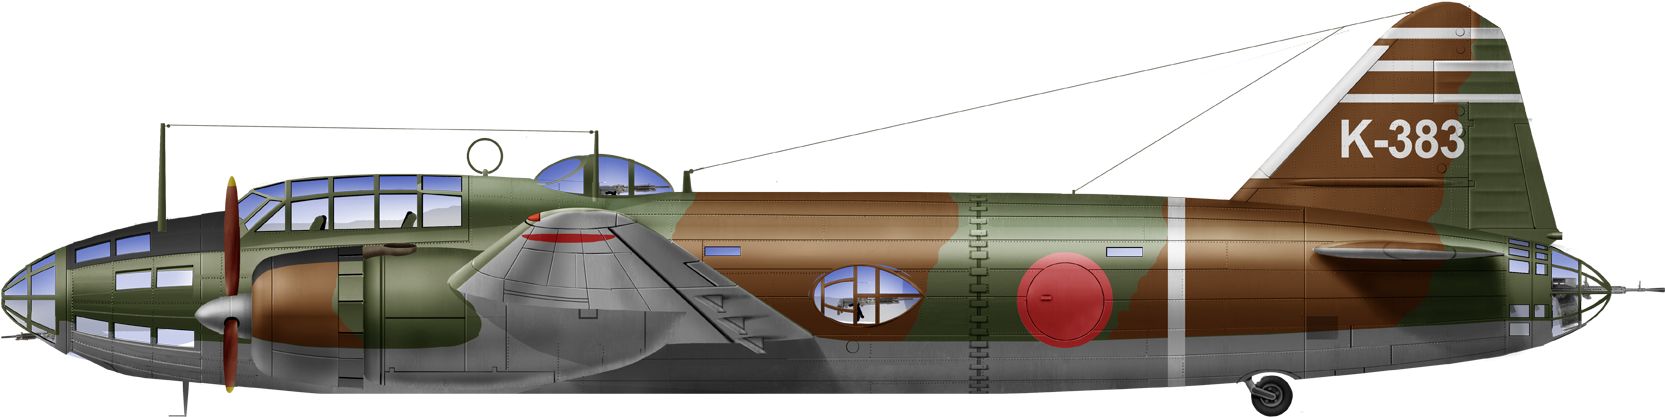
G4M1 #383
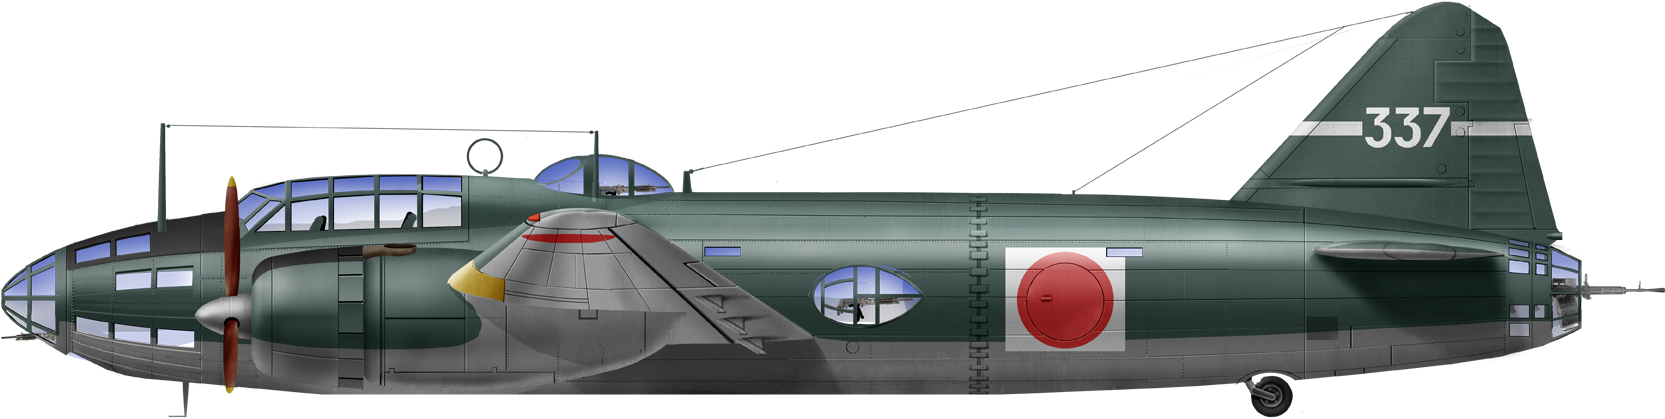
G4M1 #337
G4M1 Takao Kokutai (later 753th) Rabaul October 1943
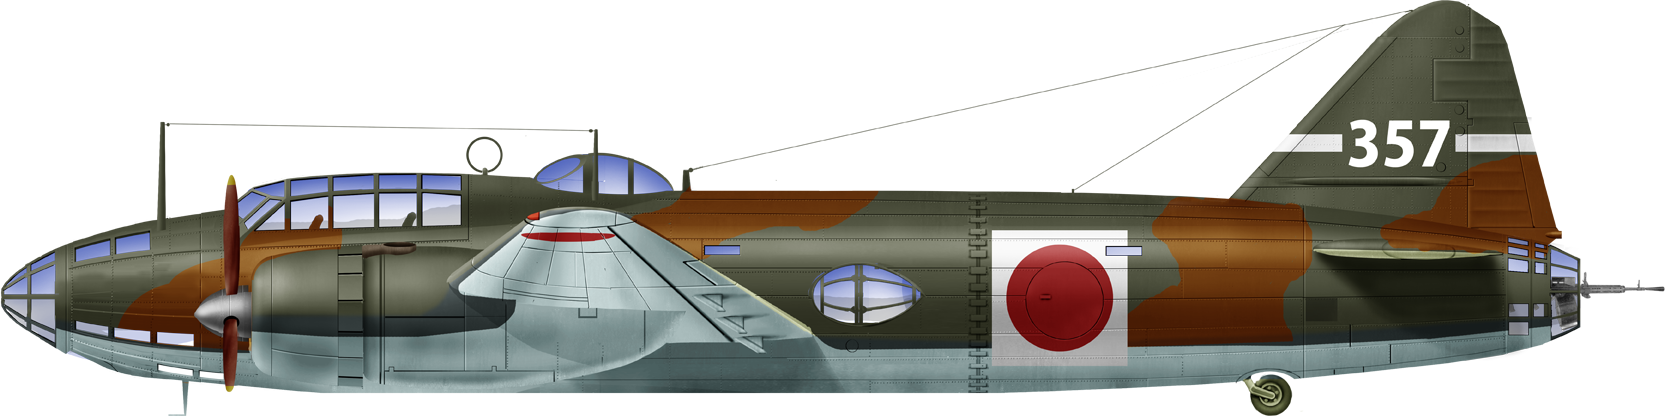
G4M1 705 KoKutai, Rabaul 1943
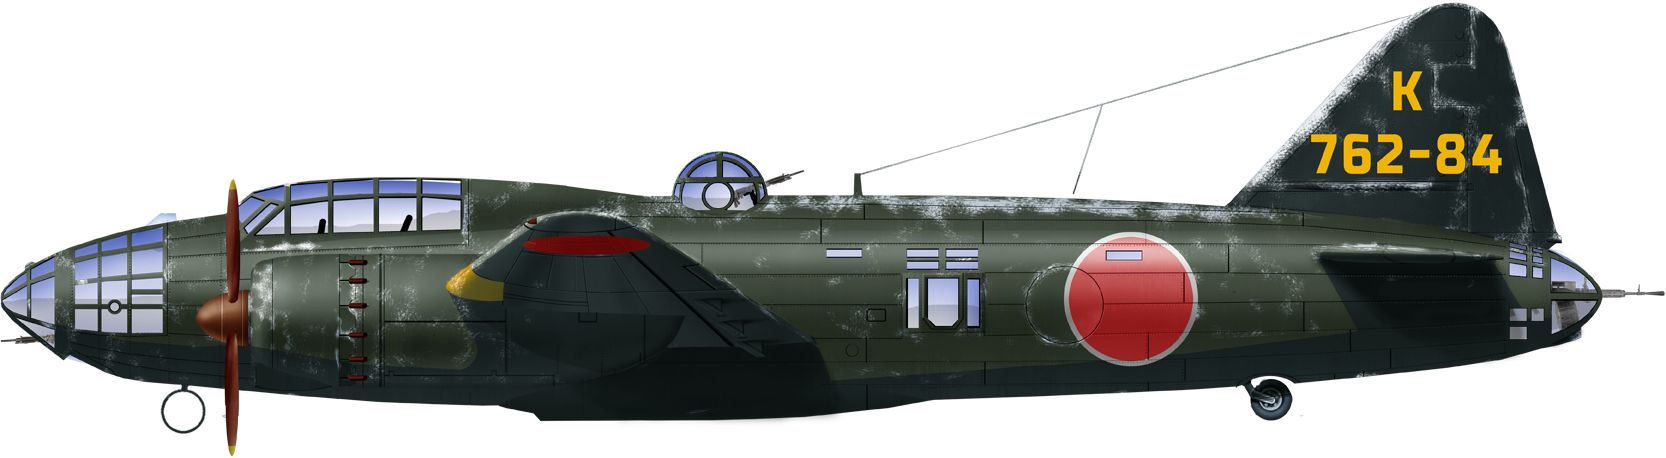
G4M2 in night bombing colors, Kokutai 762 Hikotai Kogeki 1944
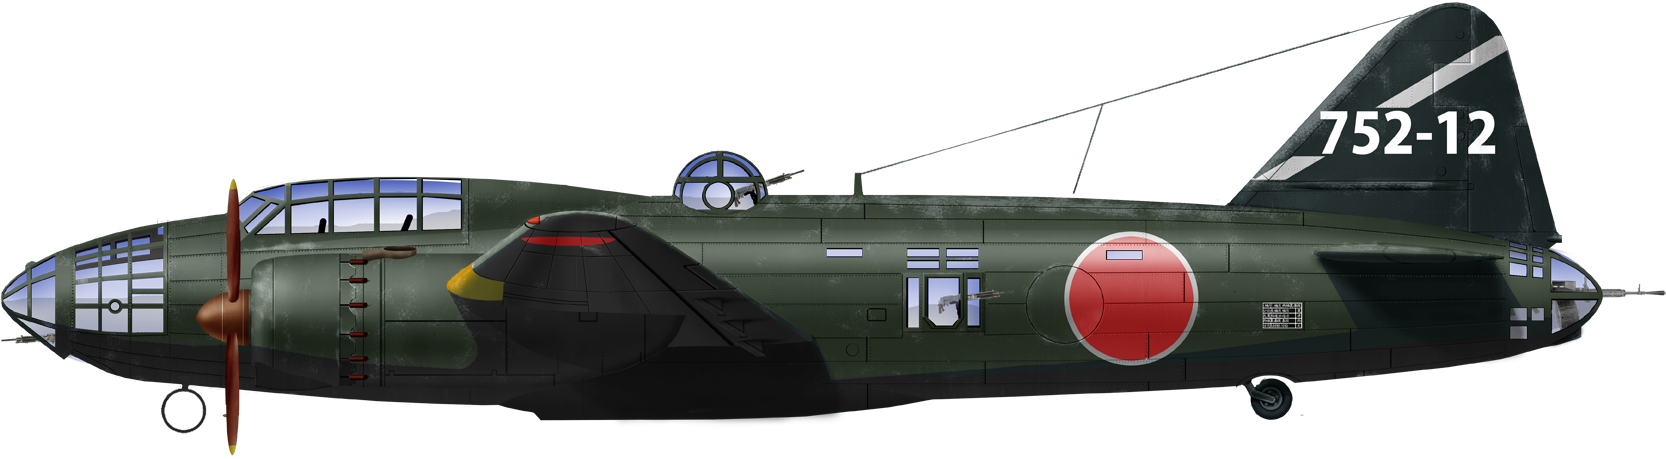
G4M2A 703-752th Kokutai Kogeki Hikotai
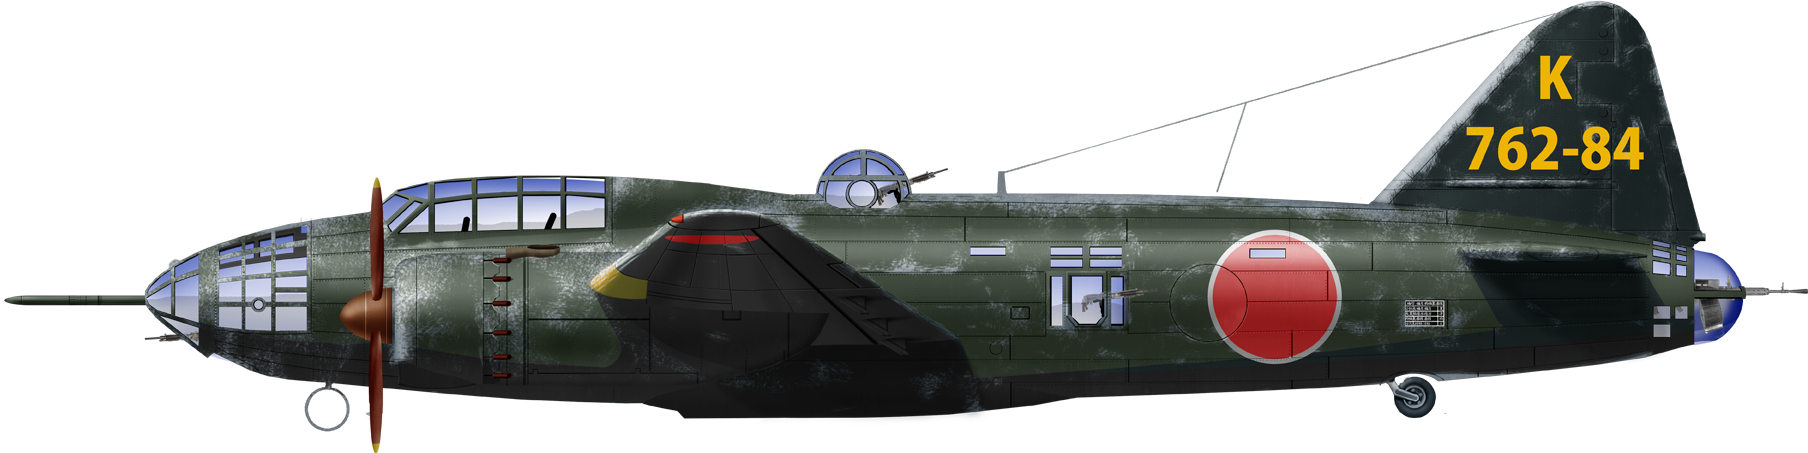
G4M2A of 708-762 Kokutai.
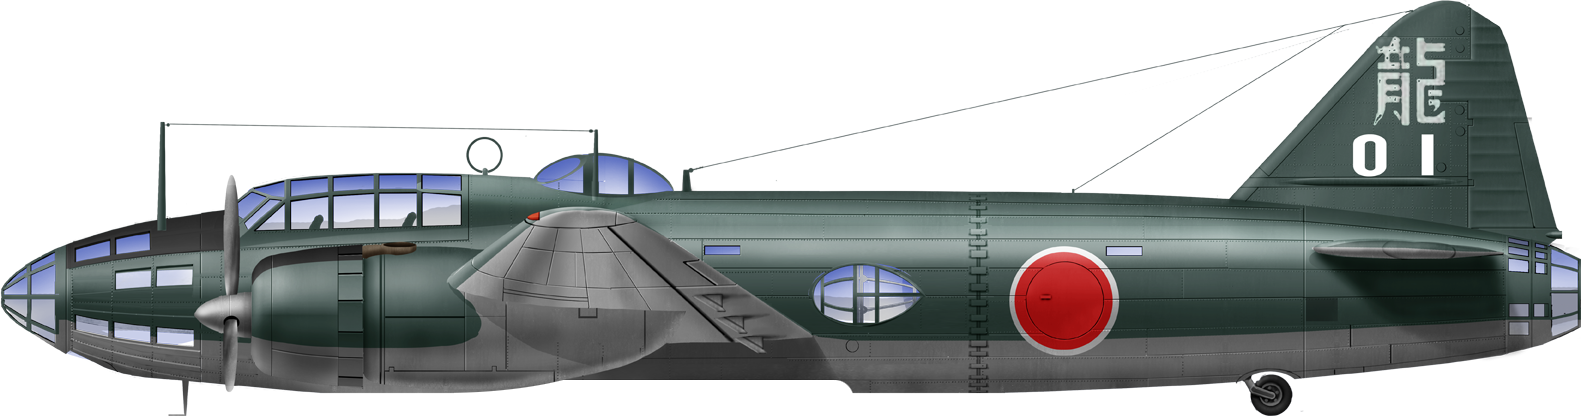
G4M1 m11 761 KoKutai Kanoya Jap. 1943
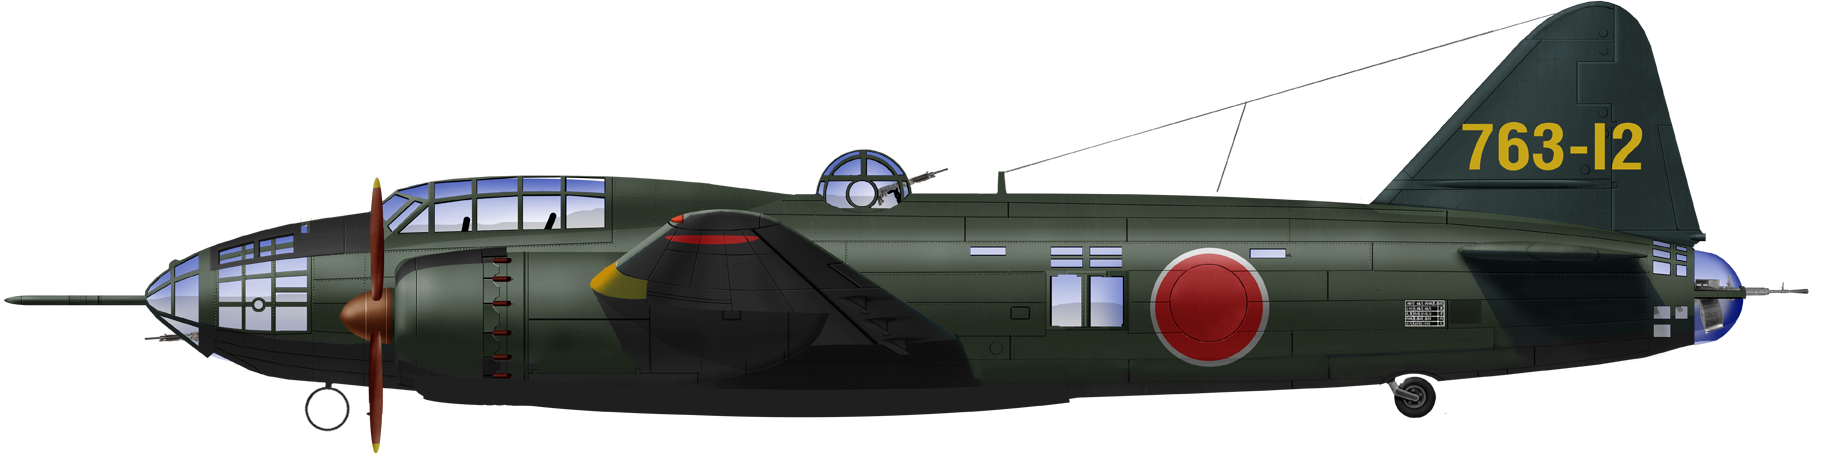
G4M2Ab mod.24 Otus Hikotai 702, Kokutai 763, Philippines 1944
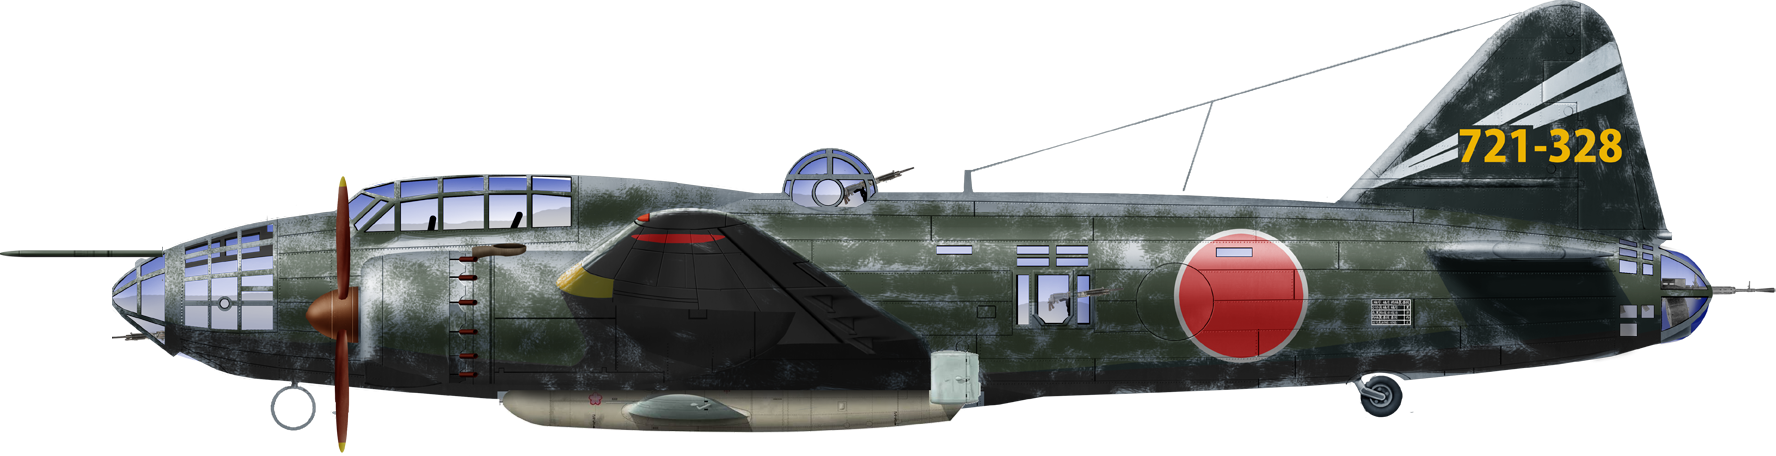
G4M2E of 771-721 Kokutai carrying a Yokosuka MXY "Baka" kamikaze jet bomb
G4M1-L2 Transport Plane Tainan Hikotai 1944
G4M2Ac M24 Hei Atsugi 1945 Kokutai 1081 transport
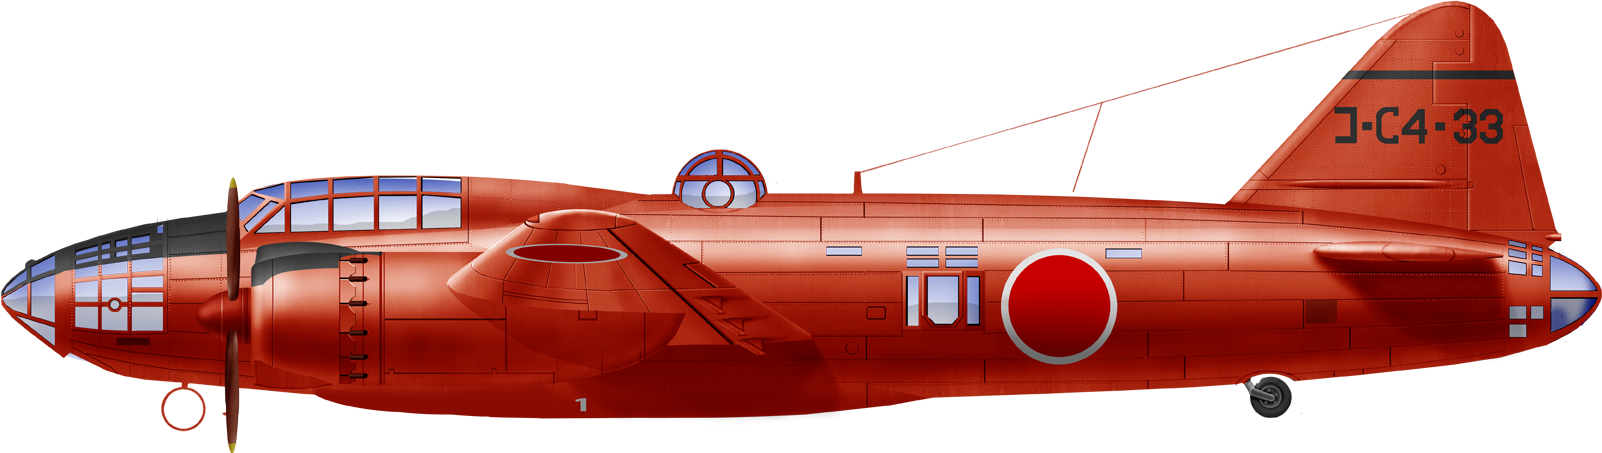
G4M2A Kiku Gijitsu Sho (Air Tech. Arsenal), 33th dev. Aircraft G4 series Japan 1945
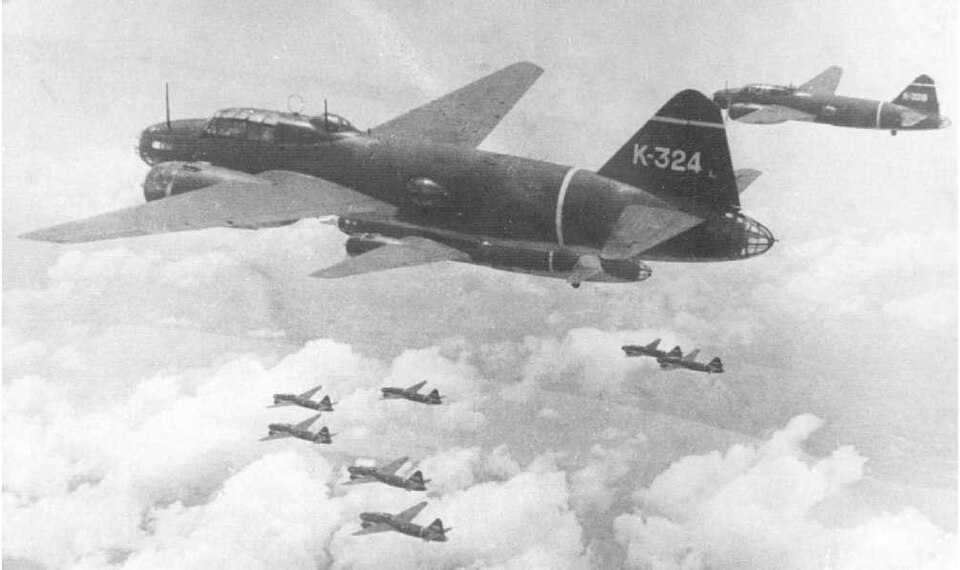


Read more
Books
Bunrin Do - Famous Airplanes Of The World 59 - Mitsubishi G4M Betty (translated as much as we could)Japanese Aircraft of the Pacific War page 378-387
Japanese Aircraft of World War II : 1937-1945 ,Thomas Newdick, Edition 2 2017, page 25-28
(Wydawnictwo Militaria No.67) Mitsubishi G4M “Betty” | PDF
(Aircraft Profile 210) - Mitsubishi G4M Betty PDF | PDF
MARU MECHANICS Yokosuka P1Y & Mitsubishi G4M Betty | PDF
Bunrindo - Famous Airplanes of The World 59 - Mitsubishi G4M 'Hamaki ’ Army Type 1 Attack Bomber
Links
On plane-encyclopedia.comwarmachinesdrawn.blogspot.com 1
warmachinesdrawn.blogspot.com 2
warmachinesdrawn.blogspot.com 3
japanese-warship.com
si.edu/
/airvectors.net/
aviation-history.com
airpages.ru
combinedfleet.com
ktymtskz.my.coocan.jp
Bunrindo: Famous Airplanes of The World 59 - Mitsubishi G4M 'Hamaki’ PDF
valka.cz
valka.cz
valka.cz
valka.cz
valka.cz
MARU MECHANICS Yokosuka P1Y & Mitsubishi G4M Betty | PDF
Aircraft Profile 210 - Mitsubishi G4M Betty PDF | PDF
Wydawnictwo Militaria No.67) Mitsubishi G4M “Betty” | PDF
apaneseaircraftofwwii.blogspot.com
en.wikipedia.org
Video
3D and model kits
All kits on Scalematesartstation.com
- Lohner E (1913)
- Macchi M3 (1916)
- Macchi M5 (1917)
- Macchi M7 (1918)
- Ansaldo ISVA (1918)
- Short S.38 (1912)
- Sopwith Baby (1916)
- Short 184 (1916)
- Fairey Campania (1917)
- Sopwith Cuckoo (1917)
- Felixstowe F.2 (1917)
- Gotha WD.2 (1914)
- Friedrichshafen FF 33 (1916)
- Albatros W4 (1916)
- Albatros W8 (1918)
- Hanriot HD.2
- Grigorovich M5 (1915)
- Grigorovich M9 (1916)
- IJN Farman MF.7
- IJN Yokosho Type Mo
- Yokosho Rogou Kougata (1917)
- Yokosuka Igo-Ko (1920)
- Curtiss N9 (1916)
- Curtiss H4 (1916)
- Curtiss H12 (1917)
- Curtiss H16 (1918)
- Aeromarine 39
- Vought VE-7
- Douglas DT (1921)
- Boeing FB.5 (1923)
- Boeing F4B (1928)
- Vought O2U/O3U Corsair (1928)
- Blackburn Blackburn (1922)
- Supermarine Seagull (1922)
- Fairey Flycatcher (1923)
- Blackburn Ripon (1926)
- Fairey IIIF (1927)
- Fairey Seal (1930)
- LGL-32 C.1 (1927)
- Fokker T.II (1921)
- Caspar U1 (1921)
- Dornier Do J Wal (1922)
- Rohrbach R-III (1924)
- Mitsubishi 1MF (1923)
- Mitsubishi B1M (1923)
- Yokosuka E1Y (1923)
- Nakajima A1N (1927)
- Nakajima E2N (1927)
- Mitsubishi B2M (1927)
- Nakajima A4N (1929)
- CANT 18
WW1
✠ K.u.K. Seefliegerkorps:
 Italian Naval Aviation
 RNAS
RNAS
 Marineflieger
 French Naval Aviation
 Russian Naval Aviation
 IJN Air Service
 USA
USA
Interwar
 Interwar US
 Interwar Britain
 Interwar France
 Interwar Netherlands
 Interwar Germany
 Interwar Japan
 Interwar Italy
- Curtiss SOC seagull (1934)
- Grumman FF (1931)
- Curtiss F11C Goshawk (1932)
- Grumman F2F (1933)
- Grumman F3F (1935)
- Northrop BT-1 (1935)
- Grumman J2F Duck (1936)
- Consolidated PBY Catalina (1935)
- Brewster/NAF SBN-1 (1936)
- Curtiss SBC Helldiver (1936)
- Vought SB2U Vindicator (1936)
- Brewster F2A Buffalo (1937)
- Douglas TBD Devastator (1937)
- Vought Kingfisher (1938)
- Curtiss SO3C Seamew (1939)
- K-class Blimps (1939)
- Douglas SBD Dauntless (1939)
- Grumman F4F Wildcat (1940)
- F4U Corsair (NE) (1940)
- Brewster SB2A Buccaneer (1941)
- Grumman TBF/TBM Avenger (1941)
- Consolidated TBY Sea Wolf (1941)
- Grumman F6F Hellcat (1942)
- Curtiss SB2C Helldiver (1942)
- Curtiss SC Seahawk (1944)
- Grumman F7F Tigercat (1944)
- Grumman F8F Bearcat (1944)
- Ryan FR-1 Fireball (1944)
- Douglas AD-1 Skyraider (1945)
- Fleet Air Arm
- Hawker Osprey (1932)
- Fairey Swordfish (1934)
- Blackburn Shark (1934)
- Supermarine Walrus (1936)
- Fairey Seafox (1936)
- Blackburn Skua (1937)
- Short Sunderland (1937)
- Blackburn Roc (1938)
- Fairey Albacore (1940)
- Fairey Fulmar (1940)
- Grumman Martlet (1941)
- Hawker sea Hurricane (1941)
- Brewster Bermuda (1942)
- Fairey Barracuda (1943)
- Fairey Firefly (1943)
- Grumman Tarpon (1943)
- Grumman Gannet (1943)
- Supermarine seafire (1943)
- Blackburn Firebrand (1944)
- Hawker Sea Fury (1944)
- IJN aviation
- Yokosuka E6Y (1930)
- Aichi D1A "Susie" (1934)
- Mitsubishi A5M "Claude" (1935)
- Nakajima A4N (1935)
- Yokosuka B4Y "Jean" (1935)
- Mitsubishi G3M "Nell" (1935)
- Nakajima E8N "Dave" (1935)
- Kawanishi E7K "Alf" (1935)
- Nakajima B5N "Kate" (1937)
- Kawanishi H6K "Mavis" (1938)
- Aichi D3A "Val" (1940)
- Mitsubishi G4M "Betty" (1940)
- Mitsubishi A6M "zeke" (1940)
- Nakajima E14Y "Glen" (1941)
- Nakajima B6N "Jill" (1941)
- Mitsubishi F1M "pete" (1941)
- Aichi E13A Reisu "Jake" (1941)
- Kawanishi E15K Shiun "Norm" (1941)
- Nakajima C6N Saiun "Myrt" (1942)
- Yokosuka D4Y "Judy" (1942)
- Kyushu Q1W Tokai "Lorna" (1944)
 Luftwaffe
- Heinkel 114 (1935)
- Arado 196 (1937)
- Me109 T (1938)
- Blohm & Voss 138 Seedrache (1940)
 Italian Aviation
- Savoia-Marchetti S.55
- IMAM Ro.43/44
- CANT Z.501 Gabbiano
- CANT Z.506 Airone
- CANT Z.508
- CANT Z.511
- CANT Z.515
 French Aeronavale
- GL.300 (1926-39)
- CAMS 37 (1926)
- Levasseur PL.5 (1927)
- Potez 452 (1935)
- Loire 210 (1936)
- Loire 130 (1937)
- LN 401 (1938)
 Soviet Naval Aviation
- Shavrov SH-2 (1928)
- Tupolev TB-1P (1931)
- Beriev MBR-2 (1930)
- Tupolev MR-6 (1933)
- Tupolev MTB-1 (1934)
- Beriev Be-2 (1936)
- Polikarpov I16 naval (1936)
- Tupolev MTB-2 (1937)
- Ilyushine DB-3T/TP (1937)
- Beriev Be-4 (1940)
 Swedish Naval Aviation
- SAAB B17S
-
 Skoda Š-328V
  R-XIII Idro
 Fokker C.XI W (1934)
 Rogožarski PVT-H (1938)
WW2
- De Havilland Sea Vixen
- Hawker Sea Hawk
- Supermarine Scimitar
- Blackburn Buccaneer
- Hawker Sea Harrier
- Douglas A4 Skyhawk
- Grumman F9F Panther
- Vought F8 Crusader
- McDonnell-Douglas F-4 Phantom-II
- North Am. A5 Vigilante
- TU-142
- Yak 38 forger
☢ Cold War
✧ NATO
Fleet Air Arm
 US Navy
☭ Warsaw Pact
Merch
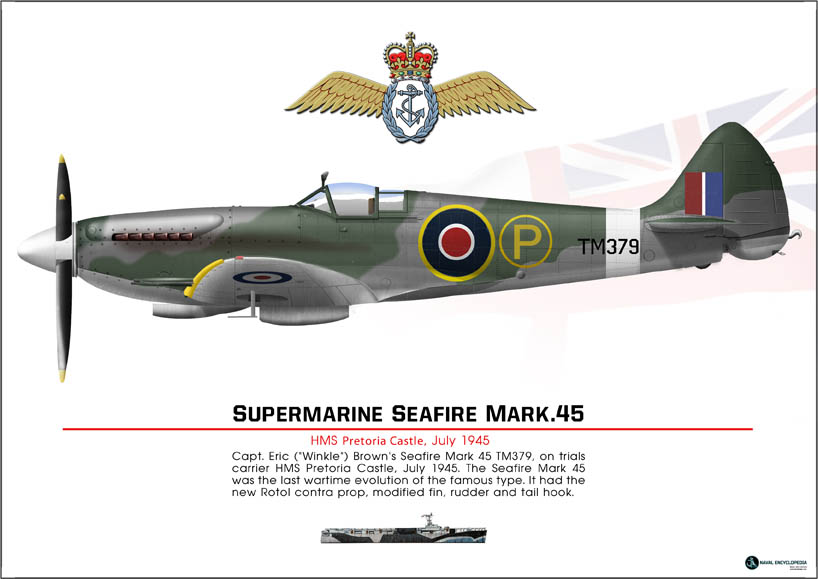
Seafire Mark 45; HMS Pretoria Castle
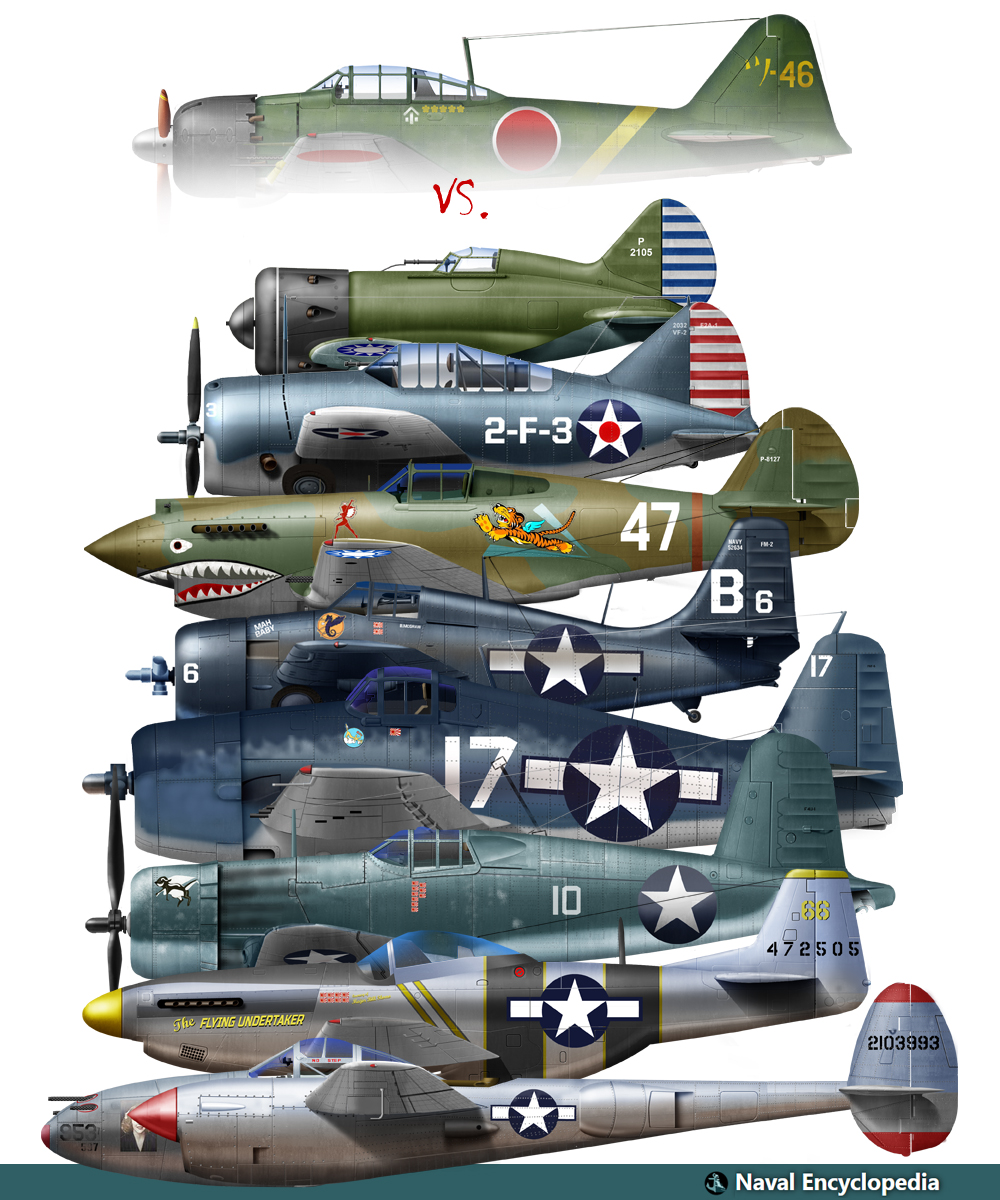
Zeros vs its aversaries
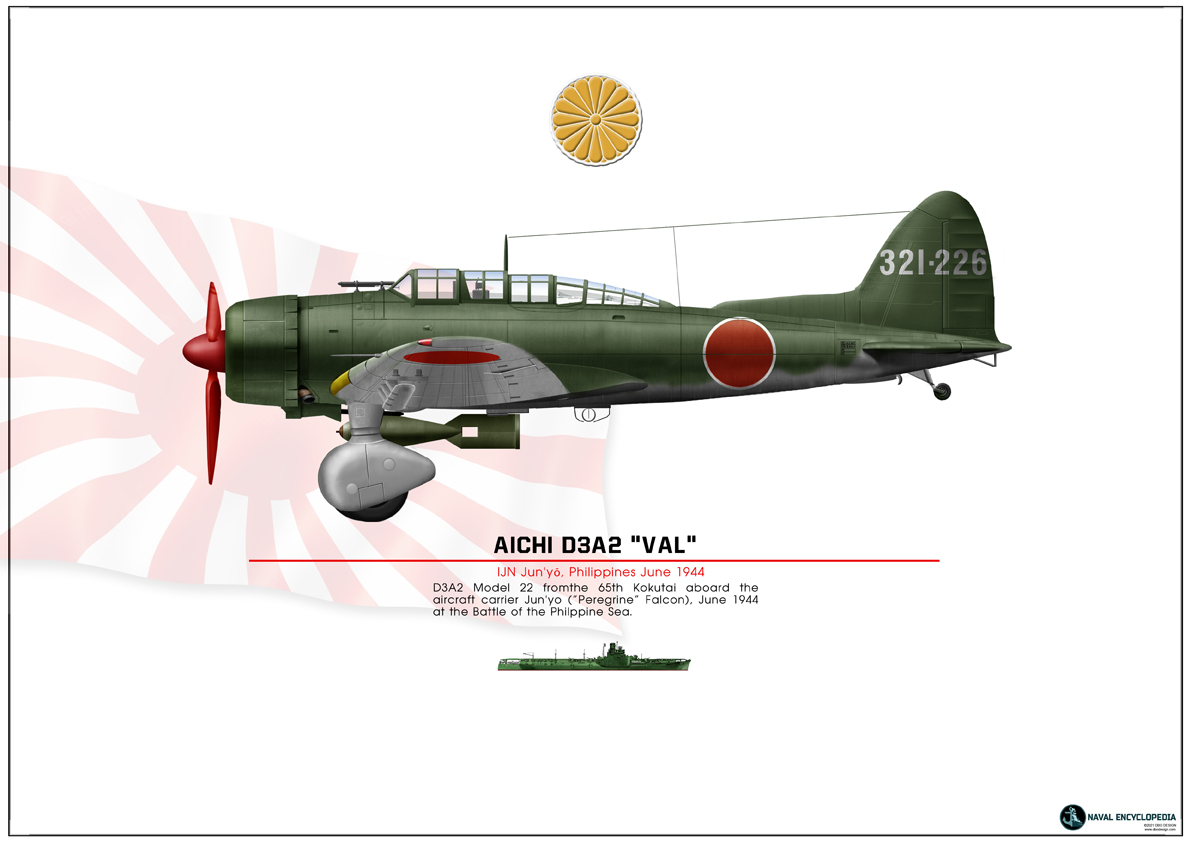
Aichi D3A “Val” Junyo
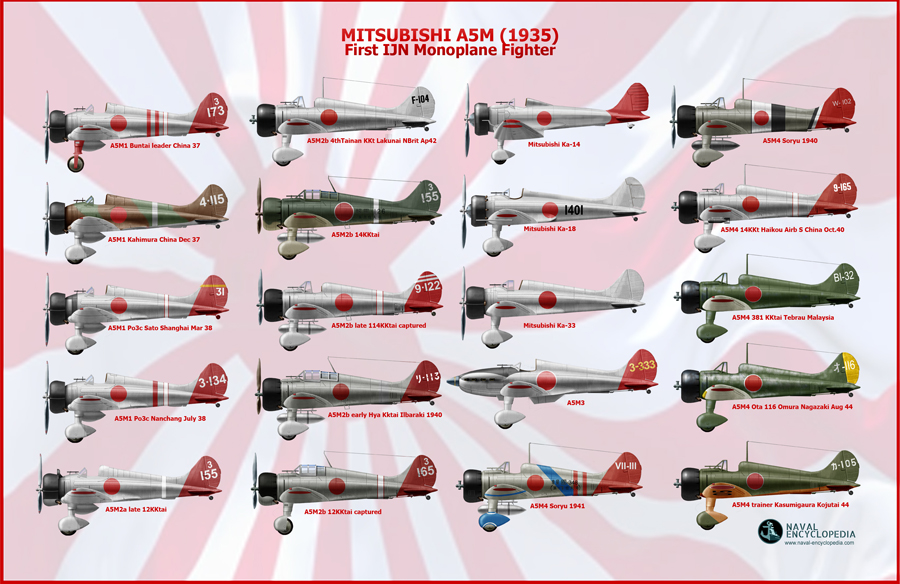
Mitsubishi A5M poster
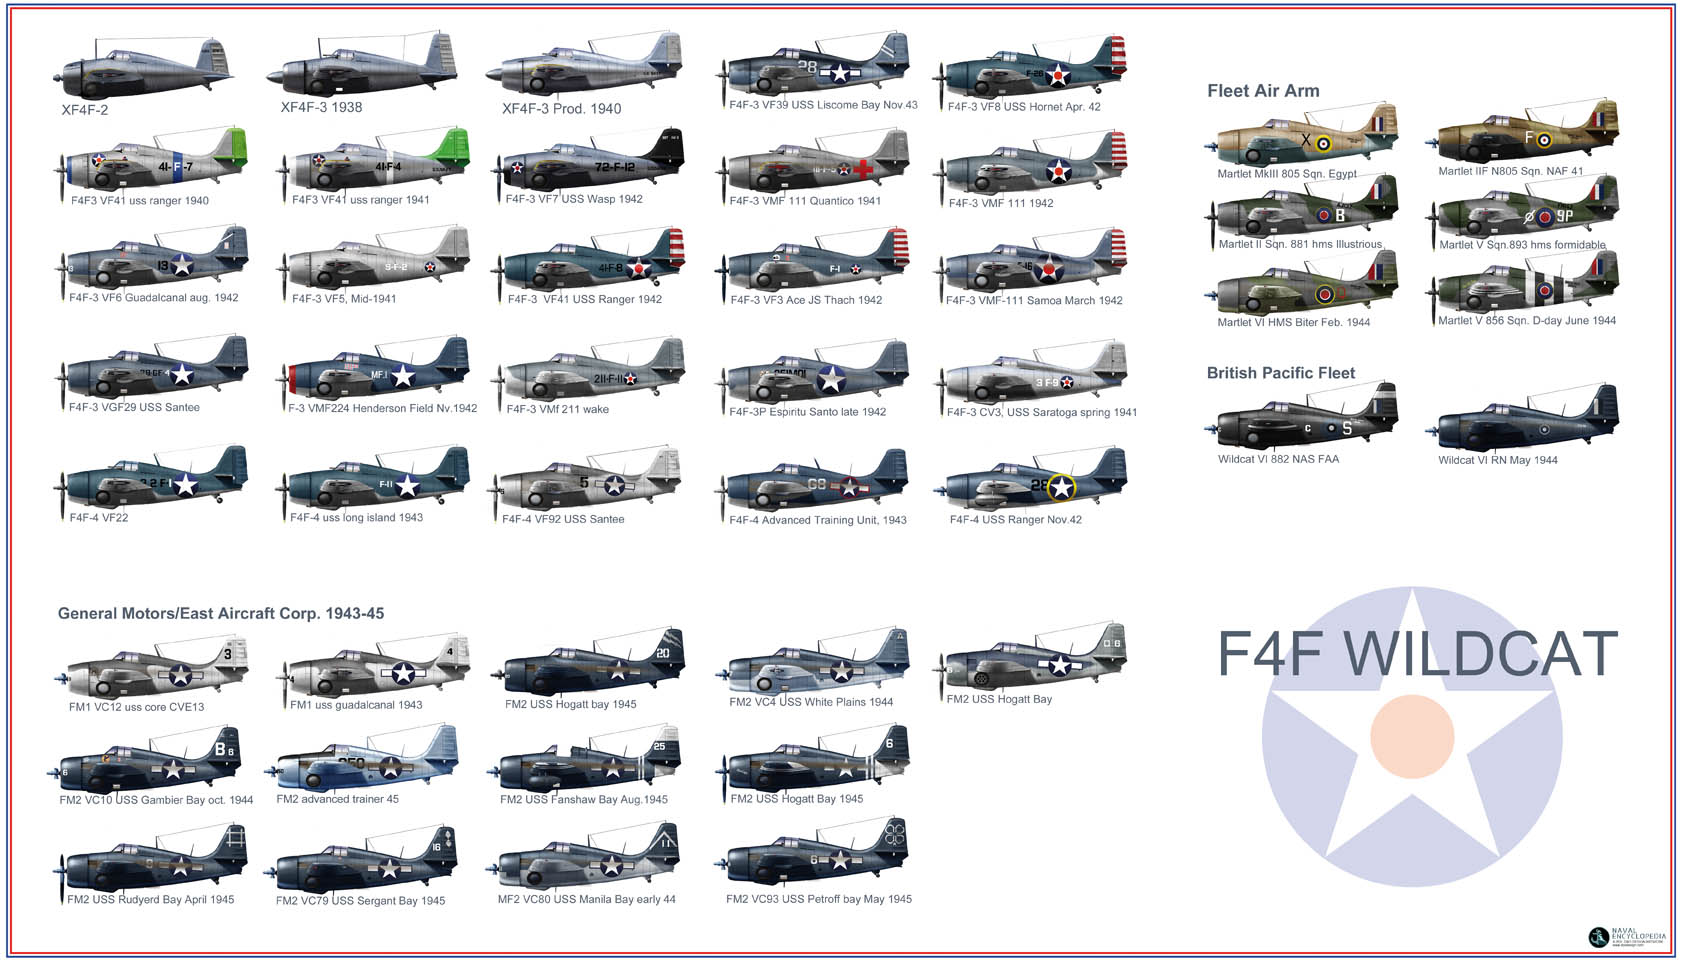
F4F wildcat
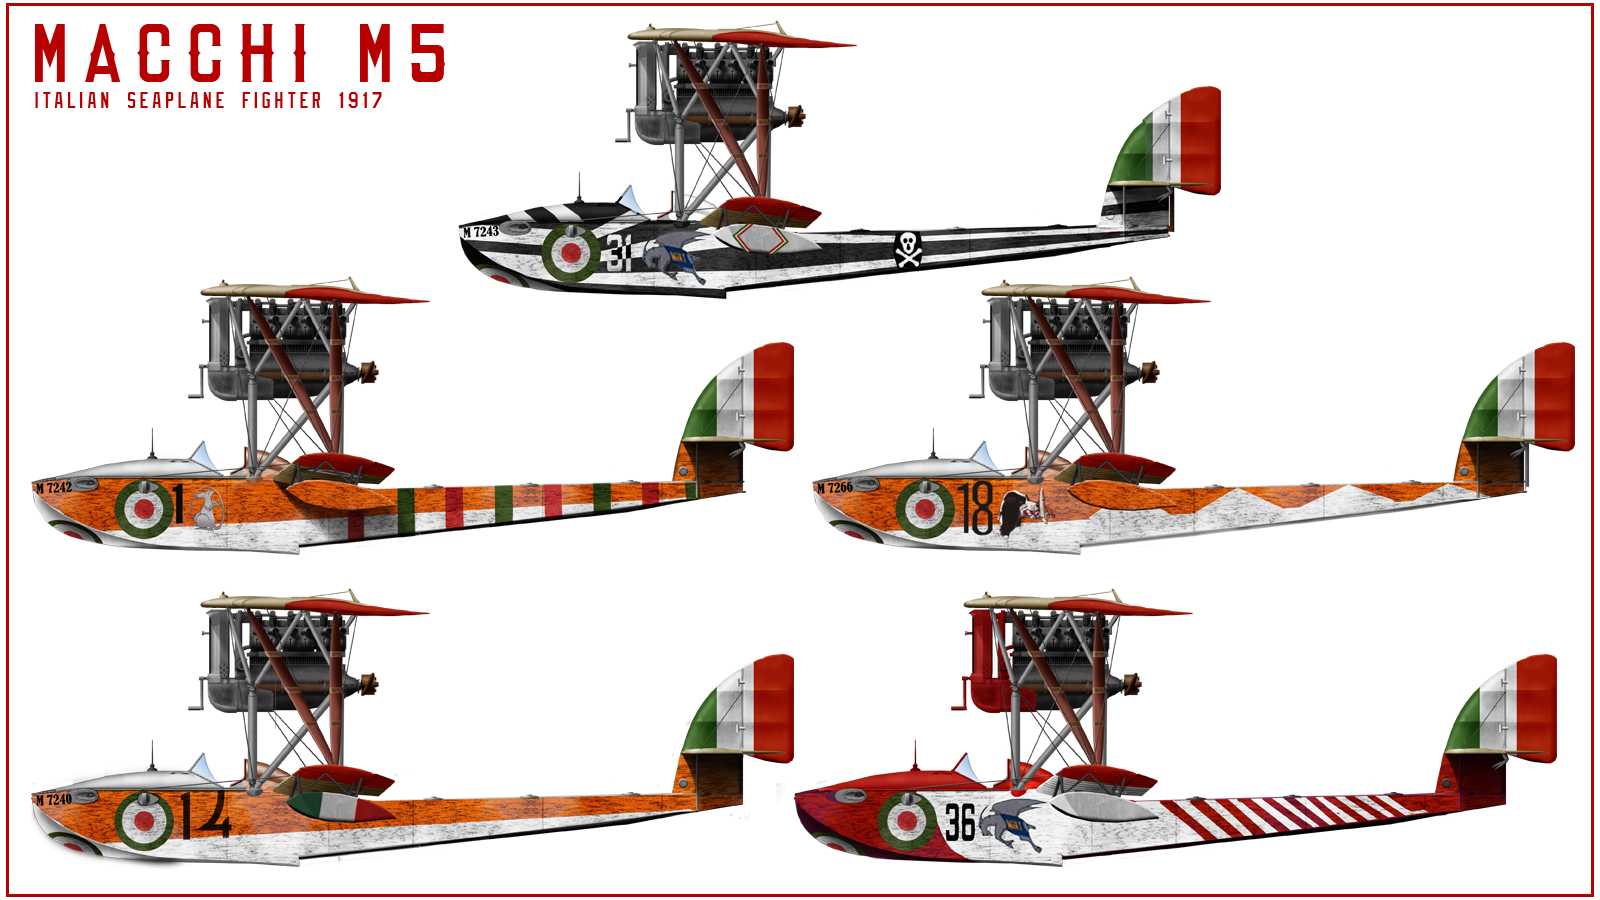
Macchi M5
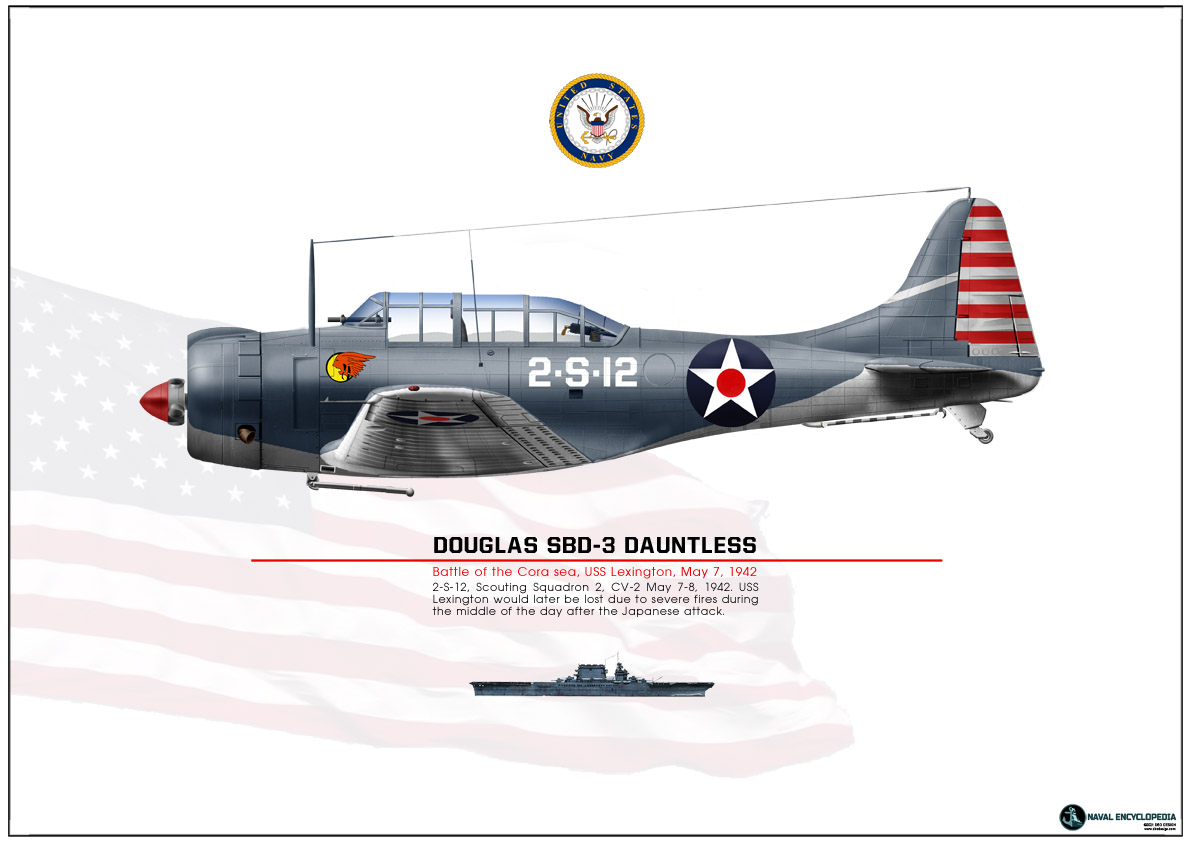
SBD Dauntless Coral Sea
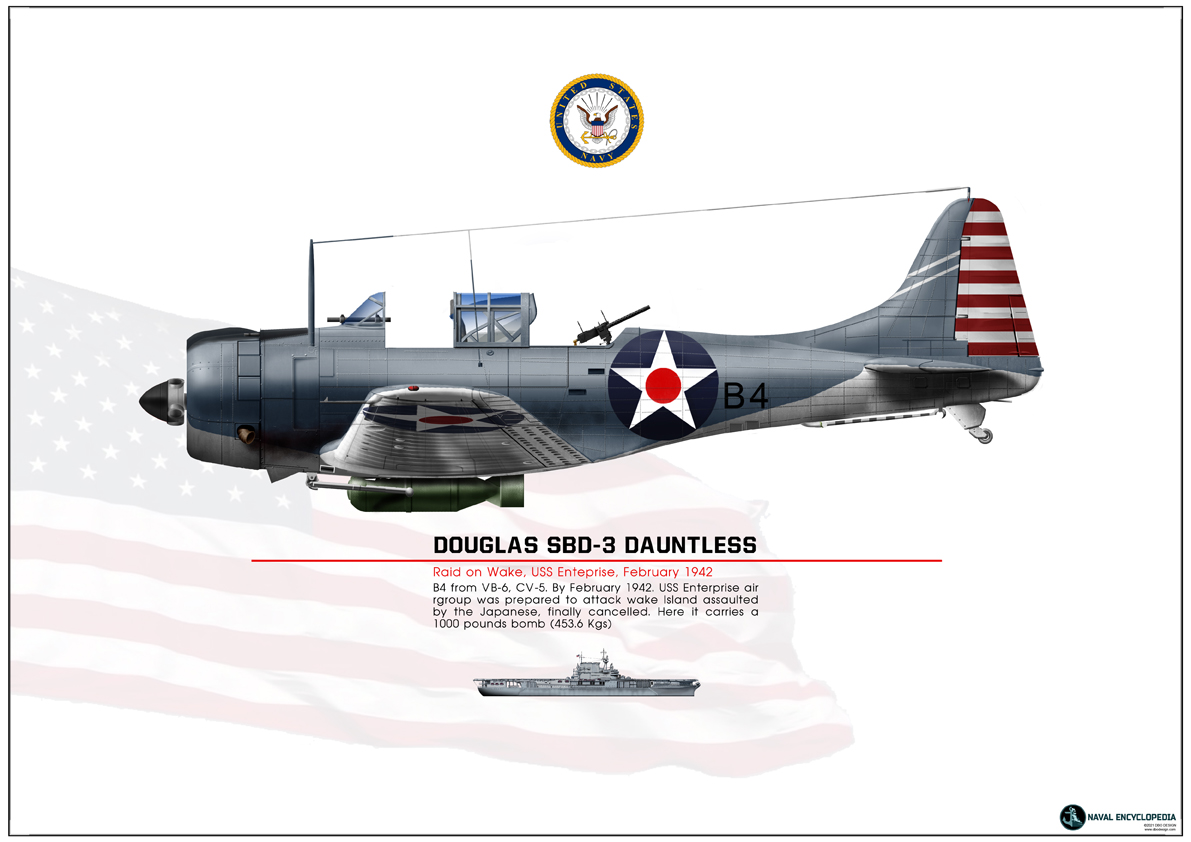
SBD Dauntless USS Enterprise
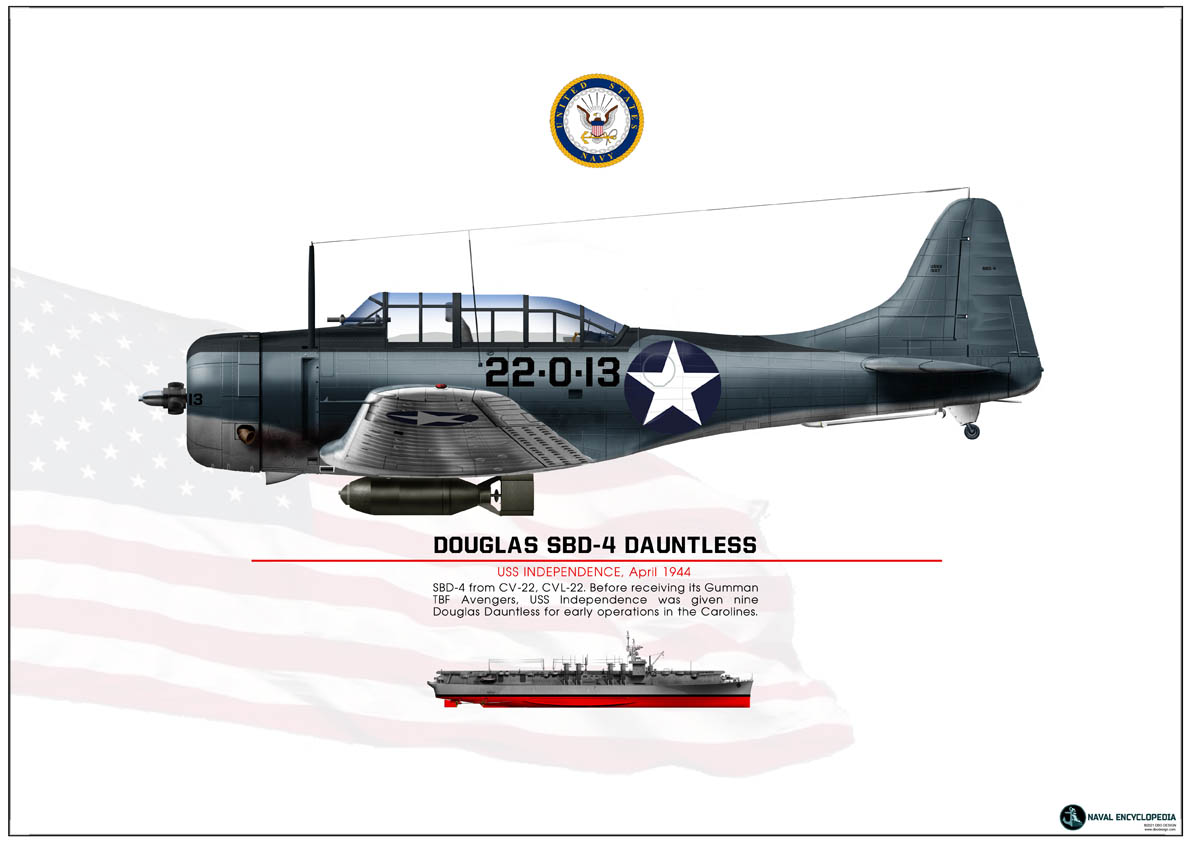
SBD-4 CV22